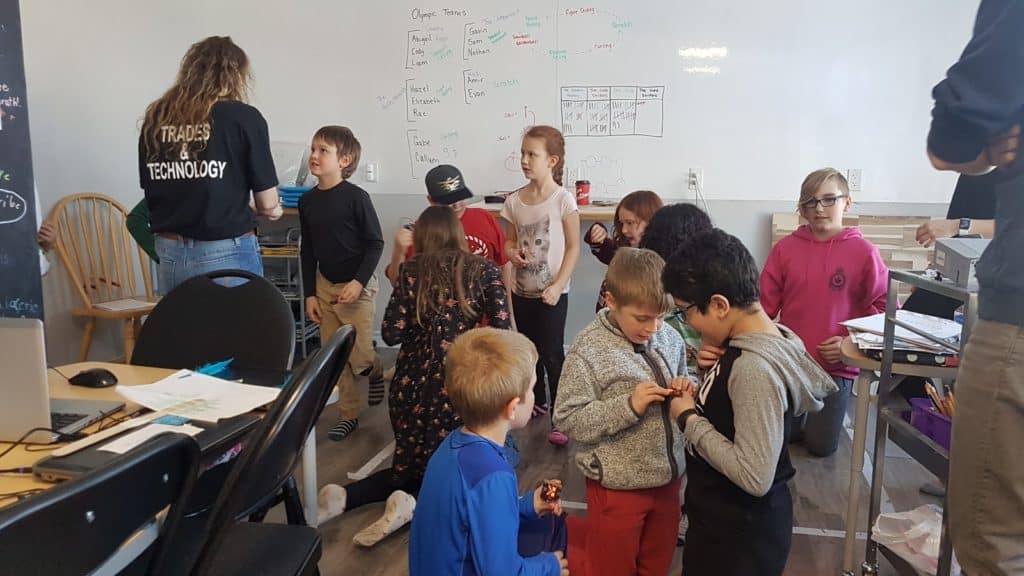
Becky, the lead educator at Pinnguaq’s Lindsay Makerspace, shares with you her top three engaging makerspace activities for learners and how they were implemented at our Makerspace.

The following activities were some of my favourites that I used in the Pinnguaq Lindsay Makerspace this year with elementary students. They sparked creativity and innovation in our students. These activities had the children excited about STEAM and unafraid to try new things. They lend towards collaborative work with other makers in the space. Implementation of these activities in our Makerspace promoted whole group interaction and engagement. While some of these activities can be used as fun icebreakers at the beginning of a Makercamp day or week, others could be used as larger group projects or as introductions to new software.
I chose these activities specifically because they all appeal to new and old members of the makerspace and promote an environment where students are excited to learn and grow together. They introduce beginner concepts in coding, 3D design and robotics while bringing the added exploration, creativity, sharing of ideas, and intrinsic motivation to innovate.
Micro:Bit Rock, Paper, Scissors Battles
This activity takes the classic Rock, Paper, Scissors game of chance and adds some basic programming skills into the mix. The students learned how to use a block-based coding language to create a program that runs on their micro:bit.
This activity is a great way to introduce your students to introductory coding concepts like variables, conditionals and random numbers. It is spectacular for the students to be able to see the applications of their code come to life by breaking down and re-creating the different components of the Rock, Paper, Scissors game in code and then sending it to the Micro:bit to play.
What is a Micro:bit?
Many of you will have heard of or played the game of Rock, Paper, Scissors but are asking yourselves, “What the heck is a Micro:bit?”
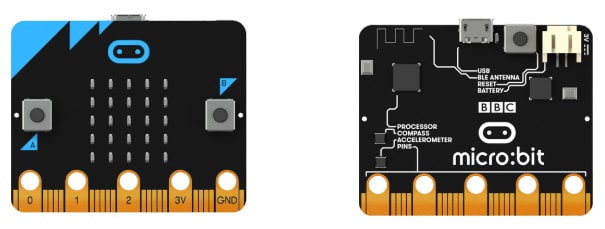
A Micro:bit is essentially a tiny pocket-sized computer designed by BBC. This hardware only works if it is programmed (or told what to do), thus being an amazing resource for teaching computer science, and specifically coding. On the front of the Micro:bit is a square display of 25 LEDs that can be used to flash messages, pictures and to play different games. There are also two buttons (labeled A and B) that can be programmed to control games or to skip or pause songs on a playlist. On the back of the Micro:bit is an accelerometer that can detect motion. This device also has a built-in compass that can be programmed to detect which direction it is moving towards and a low energy Bluetooth connection that can interact with other devices and the internet. There is a reset button, a USB port, and a small battery socket.
Learners can code instructions for a particular task that they would like the Micro:bit to carry out.
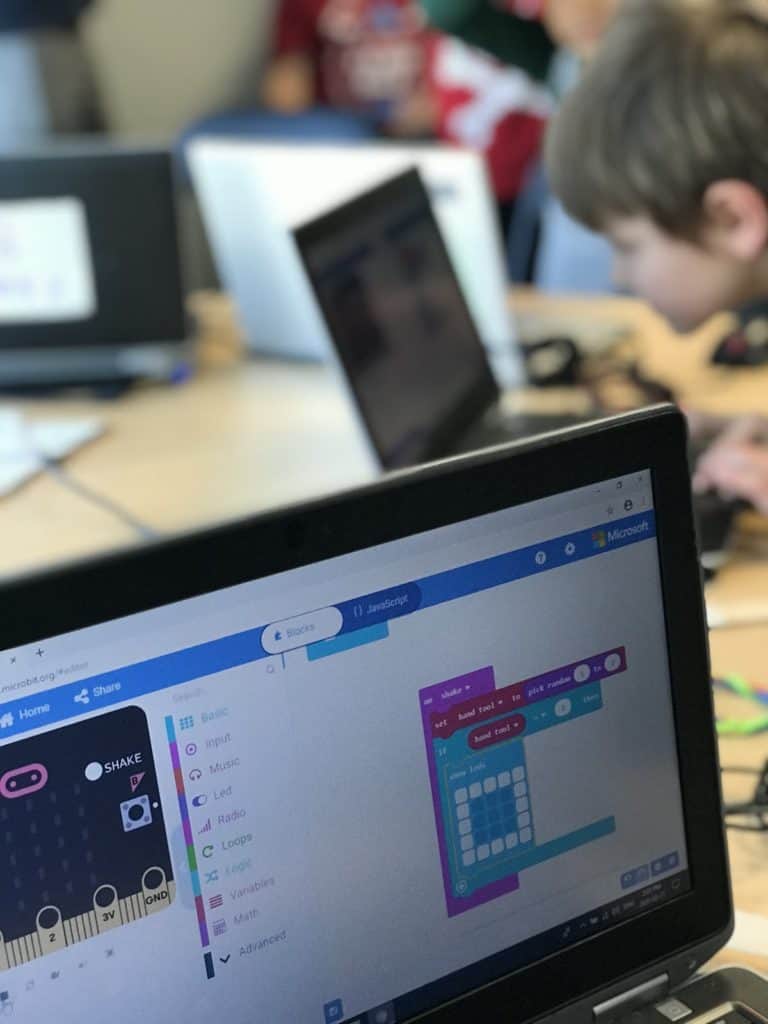
They can use different programming languages to do this; we use makecode in our makerspace, which is a block based programming language that is great for beginners. Once a program is created on the computer, the learner sends it through a USB cable to the Micro:bit.
How Did I Integrate This Activity in the Makerspace?
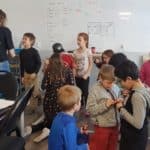
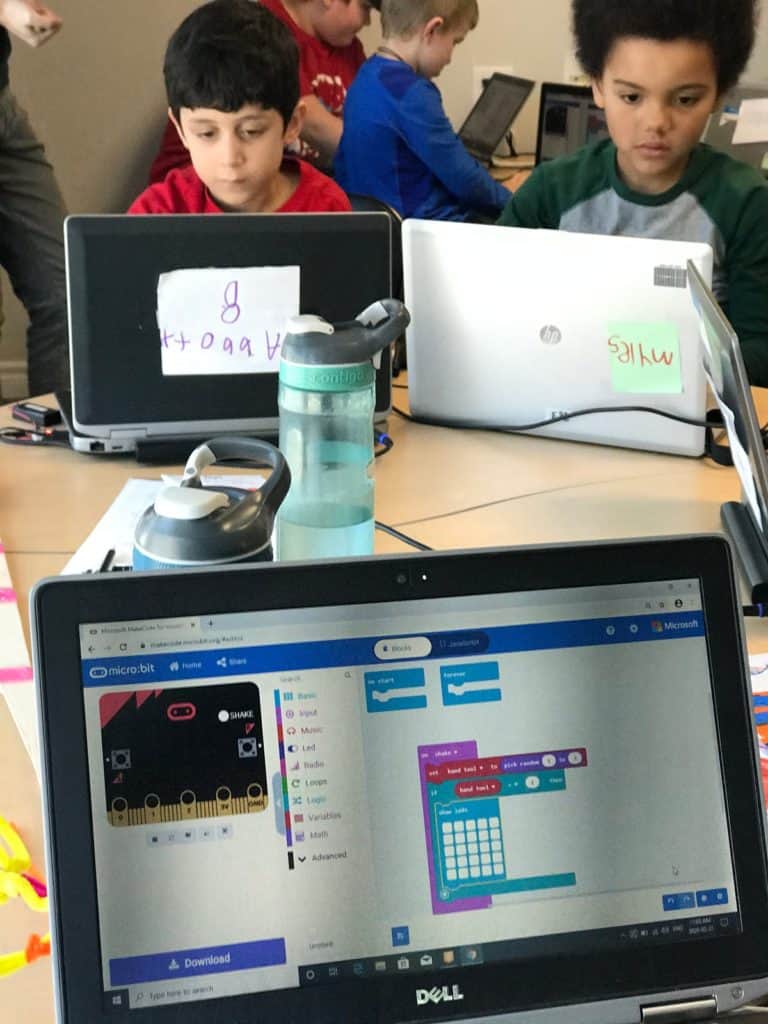
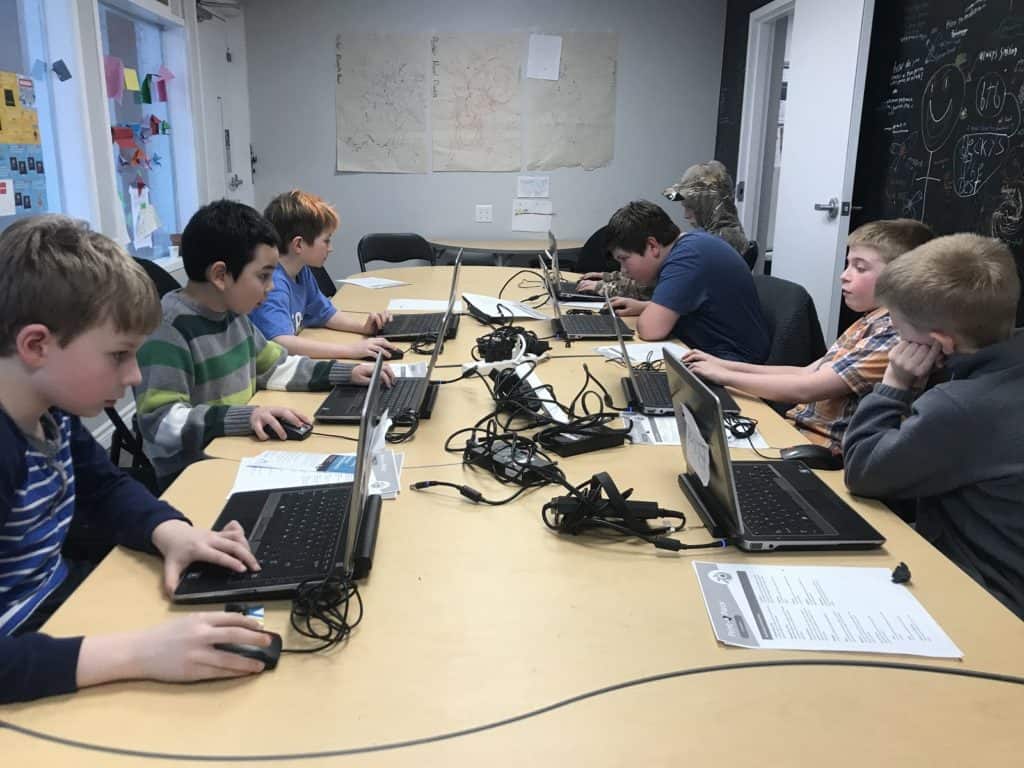
This activity requires a computer, micro:bit, USB cable, and a battery pack. I first had the students play Rock, Paper, Scissors the old fashioned way: three shakes of a closed fist and then showing their hand as a gesture of a rock, paper, or scissors. We then decomposed the game into its separate parts to make sure we knew what we were aiming to code into our program. We then walked through the steps of the activity to add each part of the code together, and as I had a very wide range of skills and abilities in the class, I had some students helping other students as we moved through the steps. I found it worked well to open up makecode and show it on a projector to walk through the steps with the students so that they have a visual guide.
Once we coded the micro:bits, we played rock, paper, scissors battles. The students would stand in a large group and have 10 seconds to find a partner to battle. Depending on whether they lost or won that round, the students would either “loose” a limb or “gain” a limb and thus simulate different levels. Students could then only play against someone on their level for the next round and move around excitedly to find a partner within the 10 second transition countdown. The first loss would result in losing a leg, so those students would have to hop on one leg. If the student then won the game against another Hopper, they would gain their leg back and battle against another student on two legs.
The second loss resulted in losing another leg, and that student would then crawl on their knees. The third loss would lose an arm and the fourth would lose another arm, so the students would be left playing the game by holding the micro:bit under their chin in order to play. Adding this extra level of battling changes this activity from a partner game into a whole group activity where students have the opportunity to interact with different members in a fun and stress free environment. I found that even the shyest in the group was interacting with and just as much as the more outgoing students. This additional implementation strategy encourages positive interactions between all of the different age groups, which is typically reaching a four year range or wider if you’re running a makerspace camp. It is a great icebreaker to the beginning of a camp and gives all of the students the chance to share a fun experience with each other while learning to code.
The students were focused on finding another kid that was hopping on one foot to play against instead of whether they were friends with that student or knew them beforehand.
You’re showing them that they can transform a no-tech, simple chance game that they play, probably all of the time in school into a high tech game that they’ve coded and downloaded themselves into a computer. Once they’ve experienced this, they can then move into transforming other physical games that they play into digital games.
Access This Activity
You can access this activity through the BBC Micro:bit website for a brief outline of the activity and the code for the game, and you can also access it directly on the makecode website with more detailed instructions as well. Here are the links to get you there!
Want More Micro:bit Activities?
- We have a great lesson on our website written by Mac Pavia that shows students how to create a random number generator.
- Pinnguaq is hosting a virtual summer camp using the BBC Micro:bit to explore the connections between technology and the natural world and dive deep into how humans can help support animals and nature.
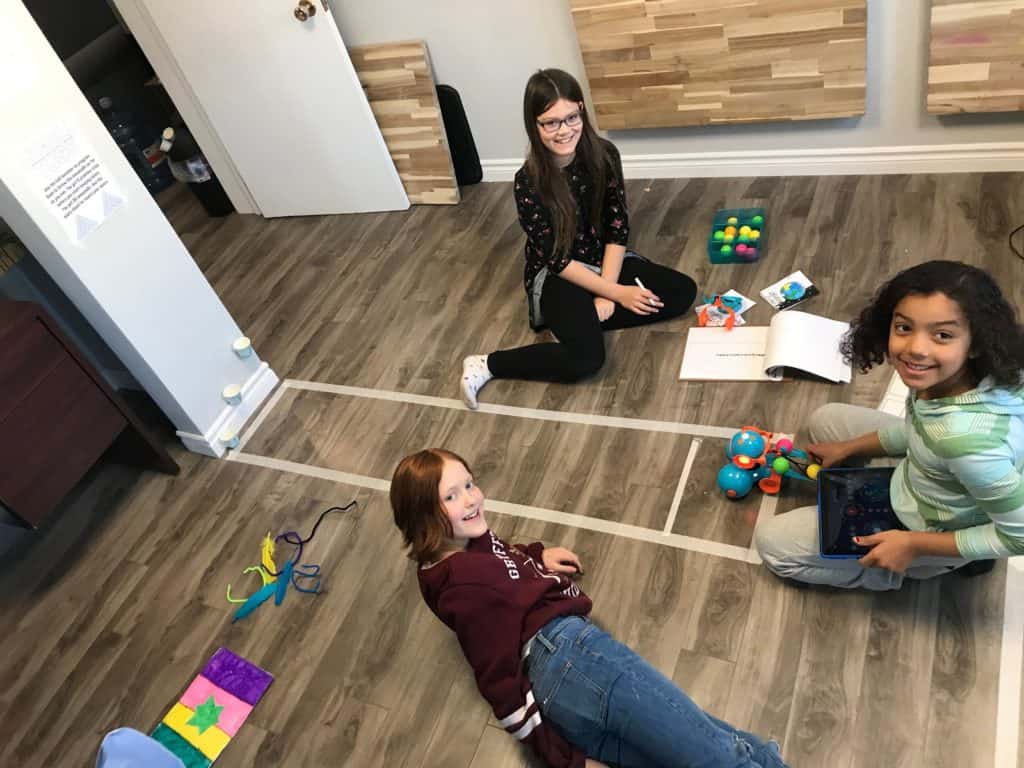
Viewpoint Scavenger Hunt in Blender
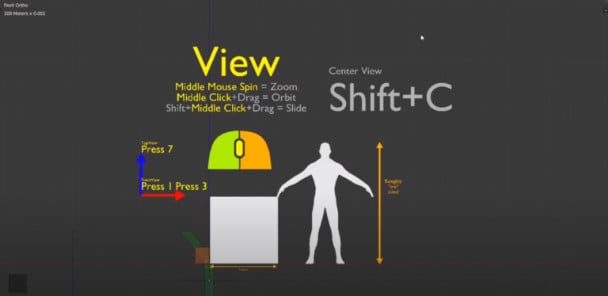
This activity is part of our Blender Print-a-Piece series created by Pinnguaq’s 3D artist Brandon Bunnie. In this activity, students learn about the ways in which they can use a mouse and their keyboard to move around the 3D viewpoint by going through a scavenger hunt! This lesson introduces the concepts of orbiting, panning and zooming in an engaging and interactive game. Bradon has created a 3D classroom working environment in Blender (see image below) that has locked certain features so that students can focus on the key concepts and allow a visual framework for the students to see how and why they would want to orbit, pan, or zoom within Blender.
This classroom also has the instructions built into it so that they are always in view for the students to refer to as they maneuver through the scavenger hunt. The students will enjoy this first experience with Blender without getting overwhelmed with the many tools and menus that make up the software. It allows the students to gain the confidence and comfortability in Blender to be able to create their own 3D model to print by the end of the Print-a-Piece series.
What is Blender?
“What is Blender?” you may be asking, “And why would I use it in my makerspace?”
Blender is a free and open-source 3D modeling software that allows you to do things like modeling, rigging, animation, simulation, rendering, compositing and motion tracking, video editing and 2D animation and much more. Because it has so many different functions, it is a complicated digital workspace that is tough to navigate through as a beginner or first timer in the Blender universe. This is why I highly recommend Brandon’s activity, as it adjusts the space to allow for a more narrow focus and it also adds all of the fun.
How Did I Integrate This Activity in the Makerspace?
This activity requires a laptop, the Viewpoint Scavenger Hunt file, Blender 2.79, and a 3 button mouse. Students were introduced to the different viewpoints first and then shown how to navigate them using their 3 button mouse. I made this into a challenge by asking the students if they could orbit the Blender man into doing a backflip and then to zoom in so that the man’s face covers the entire working screen. Giving them challenges while they explore how to use the mouse to orbit, pan, and zoom kept the students excited and engaged. They then went on a scavenger hunt to find the hidden emojis underneath, behind, on top and on the sides of the 3D objects that Brandon has prebuilt and locked into the 3D Blender classroom.
I had students come up to the board and draw the emoji or write the type of emoji that they found to make the activity more interactive. I also added in a small candy reward for students who finished the scavenger hunt and went on to assist other students through giving hints. This lesson was created to be engaging and exciting, while also teaching vital skills needed to navigate the Blender working environment and it does just that! It is as easy as downloading the materials off of the Pinnguaq online learning space and letting your students go off on the emoji hunt.
Access This Activity:
- Access this lesson and its required resources from the Pinnguaq online learning space.
Want More Blender Activities?
- Our Pinnguaq website has a Blender Print-a-Piece series with 11 courses that are all just as fun and exciting as this activity. The students are walked through the concepts and skills that allow them to be able to design their very own 3D monster masterpiece.
We also have an intermediate course that leads students through the skills of using a plane, the knife tool, and a modifier to design their own 3D creations.
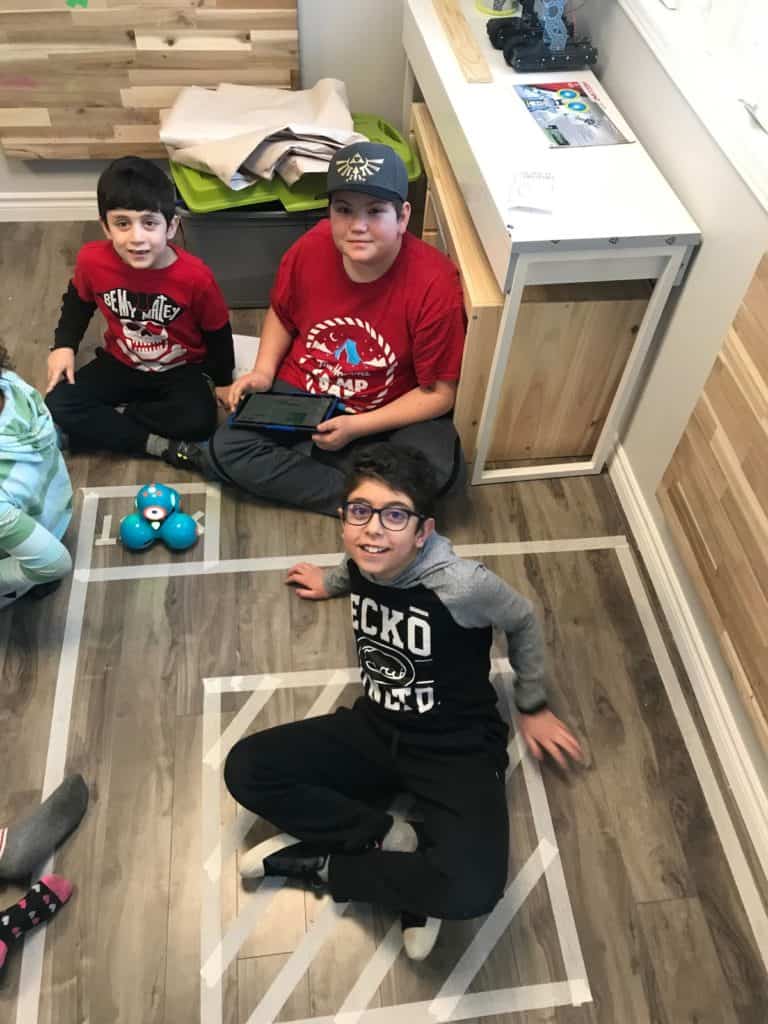
Dash and Dot Winter Olympics
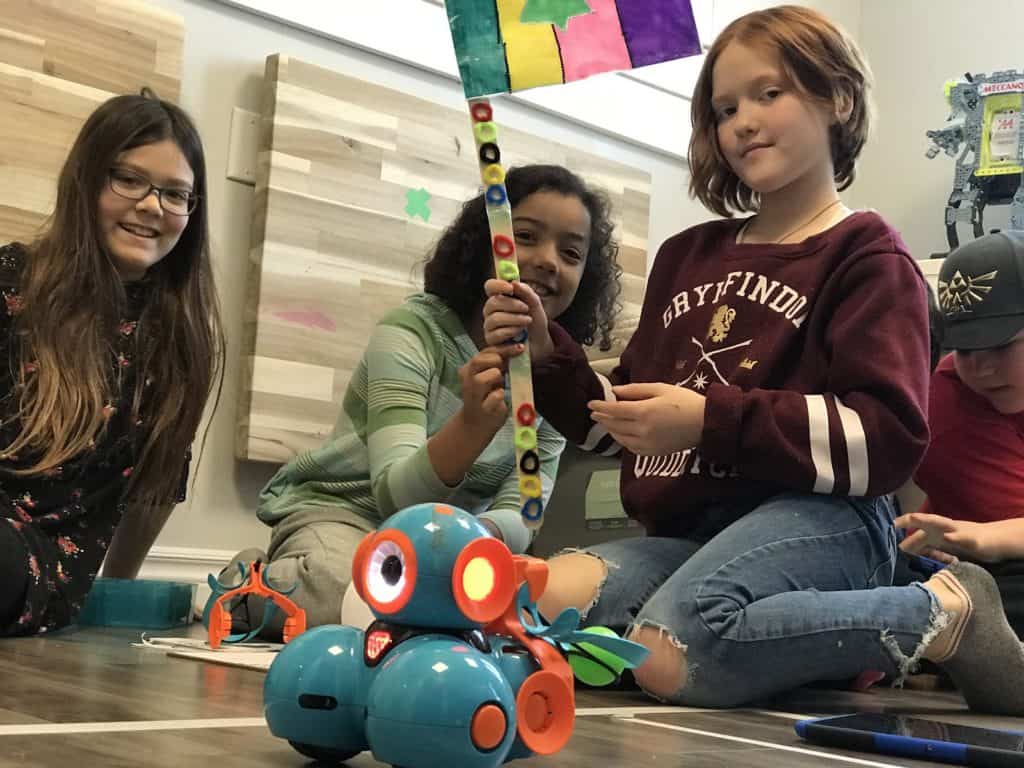
My co-teacher, Kayla, and I put this activity together during one of our PA day camps. The kids absolutely loved it and we have been asked almost every time we bring the Dash and Dots out if they will be playing the Dash and Dot Olympics! This activity is a great way to have the students work in teams together to complete a rotation task. Every student was engaged and excited through the entire activity and many of the groups either spent more time at a certain station or wanted to revisit a station because they enjoyed it so much.
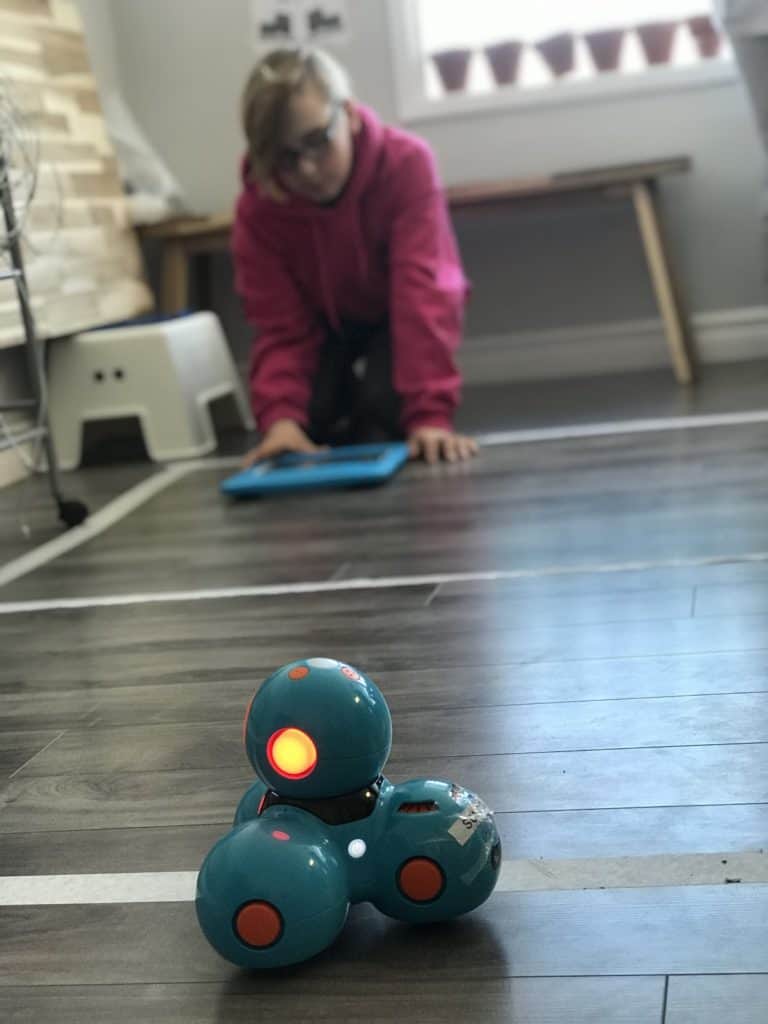
We divided the class into 5 groups of three students and had those students rotate through the different different types of activities that represented a winter sport with a Dash robot. The events were snowball basketball, curling, slalom skiing, figure skating and speed skating. Each event required the students to either code a program to have the Dash robot through the event using the Blockly app or to steer the Dash robot through a certain layout using Wonder or Go app.
What is a Dash Robot?
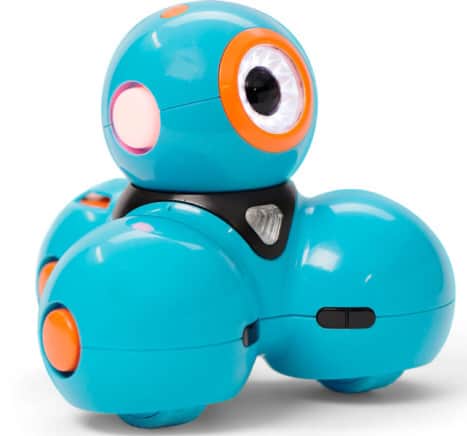
This is a must have material in every makerspace in my opinion. Dash is a robot that can respond to voice, navigating objects, dancing, and singing that allows students to program it to do different things, for example, moving in a specific direction, at a chosen speed, for a certain amount of time.
The students can create a program for the robot on a tablet or iPad using different child friendly apps like Blockly, Go and Wonder. Blockly is recommended for ages 6+ and requires students to use a block based programming language, similar to the Scratch or MakeCode working environment. It allows exploration of more advanced coding concepts like events, variables, conditionals, loops and much more. Go is the best way to explore Dash for the first time, with this app the students can explore how to personalize Dash’s lights, sounds, sensors and movements. I found that Go was a great way for students to interact with and program the robot without needing an understanding of coding. Wonder is a picture based programming language app that allows the students to snap different instructions together like moving forward and spinning in a full circle. This app also has features for the different add ons like the launcher.
How Did I Implement This Activity in the Makerspace?
Kayla and I first explained the challenge to the students and then split them into their groups, we had already made the groups based on how the students interacted in another activity and tried to create each group with a range of different abilities, personalities and ages. We then had the groups get together to design and create a flag to represent the imaginary country that they’re competing for. We walked through the instructions of each event and also created a poster for the instructions at each event station. This allowed for the student to have a strong understanding of each task before actually getting to the station, while also infusing a lot of excitement around the activity. The stations were set up as follows:
Figure skating
We taped a large rectangle onto the floor to represent an ice rink. Students coded Dash to perform a figure skating routine with one touch of a button using Blockly. Their task was to have Dash stay in the “rink” and their routine must last at least 30 seconds but could be no longer than 60 seconds (this was to allow time for each member of the group to design a routine). The groups collected points for each of the following elements:
- 5 points – full 360 degree turn
- 3 points – 180 degree turn
- 2 points – routine sound effects
- 1 point – light changes
What I loved about this station was that we had some students in each group with advanced coding experience in using the Blockly program that were able to help students in their group who were coding for the first time. The students learned from and helped each other, while also collaborating to come up with creative routines. Every routine was different and specially designed by each student and they were very excited to show off their designs.
Curling
We taped a rectangle onto the floor and then created a red, blue, and white bullseye at one end with three different sized circles cut from construction paper. The students had to assemble the push tool onto their robot and code their Dash to push the curling puck onto the bullseye to score the most points. What I liked about this activity is that they had to estimate the number of moves forward that Dash had to take and code those movements into the Blockly app. They gained five points for hitting the rock into the white part of the bullseye, 3 points for the blue, and 1 point for the red.
Snow Dashket-ball
As my co-teacher Kayla cleverly coined was three cups taped to the wall in a diagonal incline and a taped shooting line. The students had to assemble dash’s launcher as a team and then use the launcher on the Wonder app to program Dash to throw the snowballs (small plastic balls that come as a kit with the launcher add on). Each group had five practice shorts per student and then each student in the group would take 10 shots for their team. If the students get a ball in a cup, they earned two points for their team.
Speed skating
Students had to code Dash to complete 4 laps around the ice rink and recorded their time for the event. They worked in groups to figure out how to make Dash move forward, make 90 degree turns and adjust the speed settings to be as fast as possible for this challenge. The groups had the option of using the Blockly, Go, or Wonder app to complete this event.
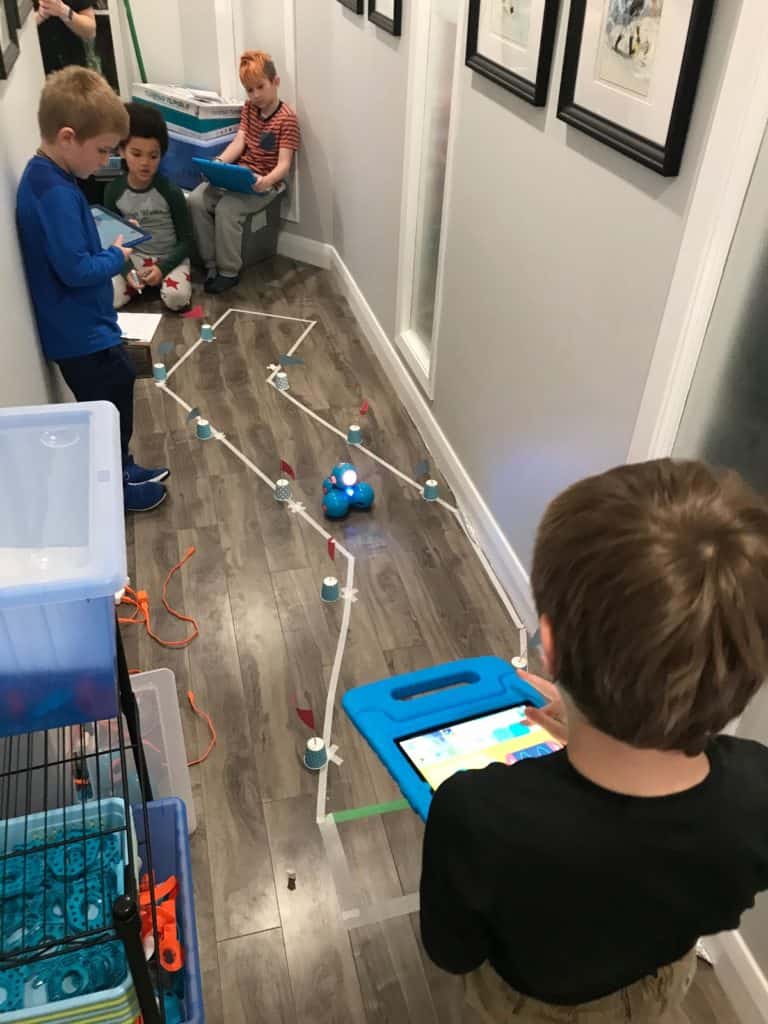
Slalom Skiing
We taped a zigzag course onto the floor and added a flag made from small paper cups, toothpicks and construction paper at different points along the course. The teams coded Dash to move from flag to flag and complete the Slalom course. For every flag touched, students had to add a one second penalty onto their time, and for every flag/cup pushed over students added 5 seconds onto their time. Each team member had to complete the course three times as fast as they could and record their fastest time. This was a favourite for the students as well because they got to compare their race times and try to beat their own scores.
We set up certain supports such as a handout with instructions for each event station. On these, teams were able to track participation, record best times and points earned. We added an extra layer of engagement, but also organization in helping the students transition between the stations by implementing a Dash Winter Olympic passport,where students collected a stamp for each station that they completed. We also drew a map on the board showing what station each group was starting at and which station to go to next. These supports allowed each group to freely move the next station together and gave them a bit of motivation to get a stamp and accomplish the challenge.
Want More Dash and Dot Activities?
- Pinnguaq has a great lesson that challenges students to use Dash and Dot to learn how to visualize a solution to a programming challenge, then program the robot accordingly.
- Try this great Robo Bowling lesson from the Wonder Workshop!
This summer the Wonder Workshop is releasing a virtual Dash and Dot simulator for students to enjoy the same engaging coding and robotics activities from home as an option for those who do not have access to the physical robots.
Pinnguaq’s Digital Skills Teachers Kayla and Becky will be running a virtual coding and robotics camps this summer that will incorporate Wonder Workshop’s Dash’s neighborhood and a lending Library for borrowing our own Dash and Dot’s. Please follow us on social media and check out our website to learn more about our upcoming virtual summer camps!
We want to see the awesome things you’re creating! Take a photo or video and share your work with us by emailing media@pinnguaq.com or tagging @pinnguaq on Facebook, Twitter, or Instagram. Don’t forget to include the hashtag #LearnWithPinnguaq
You might also like
The Iqaluit Makerspace in 2020
 January 3, 2020
There are some exciting things happening at the Pinnguaq Iqaluit Makerspace in 2020! Introducing Michael Foote, the new Makerspace Manager.
Lindsay Makerspace – Beading Workshop 2019
March 3, 2020
Hosted at the Lindsay Makerspace, delivery team members Stef and Courtney taught a beading workshop along with the Makerspace team!
