

Introduction
Welcome to the Hide and Seek Variations for the Mix and Match Challenge Bonus in which we’ll solve the mystery of the hidden hide and seek block! We’ll find the hidden block, and learn how to use it for another way to code hidden sprites. In this tutorial, we’ll explore having different sprites share the same x-postions and y-positions in order to trigger the code to make a hiding sprite appear. This method not only involves a hidden hide and seek block, but also requires careful thought and precision that goes beyond the basics into intermediate coder territory.
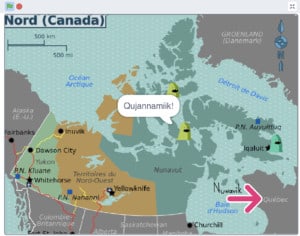
Find the hidden Critters in the All Together Now game
Use the arrow keys to help Critter navigate around Northern Canada and discover where the other Critters are hiding. The friends won’t be visible until Critter finds them. Add code to make Critter’s friends change their effects or have them travel along with Critter.
The background map for this game was obtained from Wikimedia at https://commons.wikimedia.org/wiki/File:Canada_northern_regions.png
Attribution: Shaund / CC BY-SA
Video Tutorial
Thanks so much to Trevor Garrrod for sharing his track, Ready or Not
First, let’s find that hidden block
Another way that you can have a sprite hide and then show is to have the hidden sprite show when the x-positions and y-positions of both sprites are the same. This can be a tricky option as you will see as we go through the steps. For one thing, the code block we need to use is hidden. As well, you will need to be very precise and exact in the way you set up the game or story. It’s a great option if you want to create a challenging game!
Follow these steps to find the code block that you need to use for this option. (It is hidden.)
- Make sure you have more than one sprite in your sprite pane. The code block you need won’t show unless you have more than one sprite. (I have lots of sprites in the All Together Now game.)
- In the blocks palette, go to the light blue Sensing blocks.

- Find the block, “backdrop # of stage”. Make sure you already have more than one sprite in your sprite pane. If you have only one sprite in your sprite pane, you won’t be able to see the options you need to use when you open the drop-down menus.
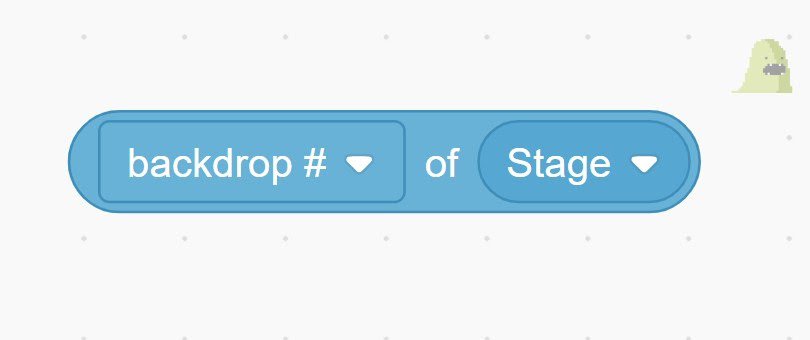
- If you have more than one sprite in your sprite pane. You will see the choices you need in the drop-down menus.
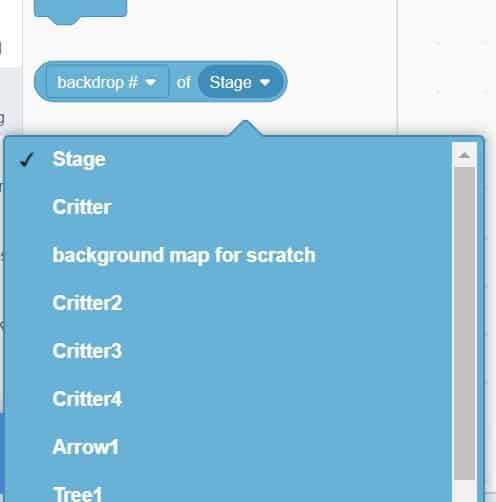
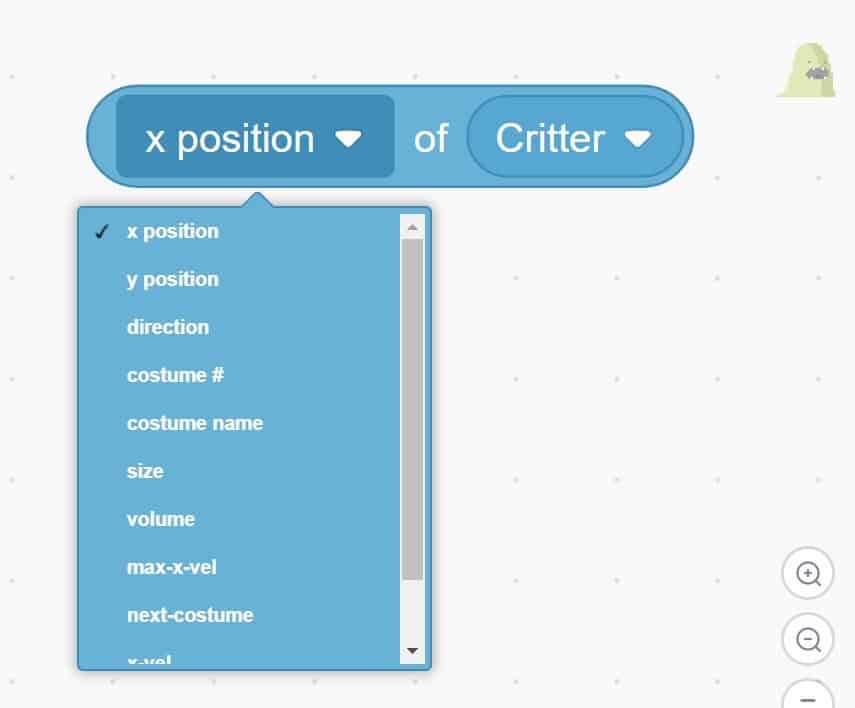
- First open the drop-down menu under “Stage”. When you choose a sprite (I’ll choose Critter), the choices available in the first drop-down menu under “backdrop #” will be different than they first were, and you will see the choices for x-position, and y-position. (Test by selecting Stage in the second menu again and look at the choices in the first drop-down menu. Very different choices are available in that first menu when you have “Stage” selected in the second menu!).
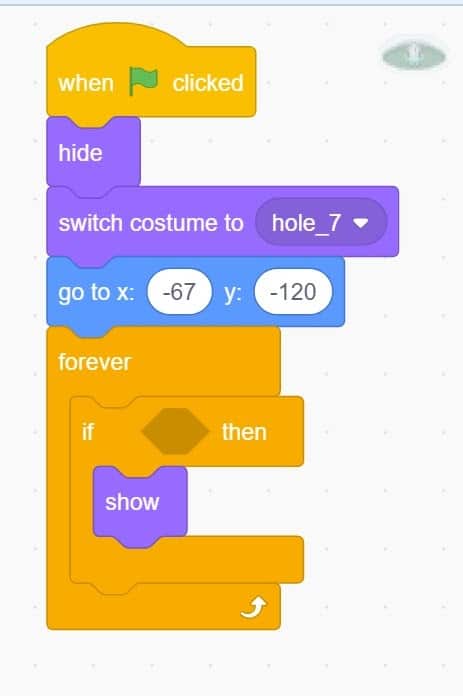
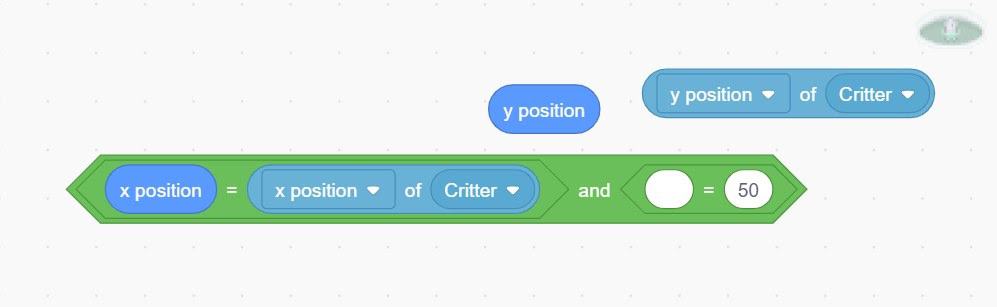
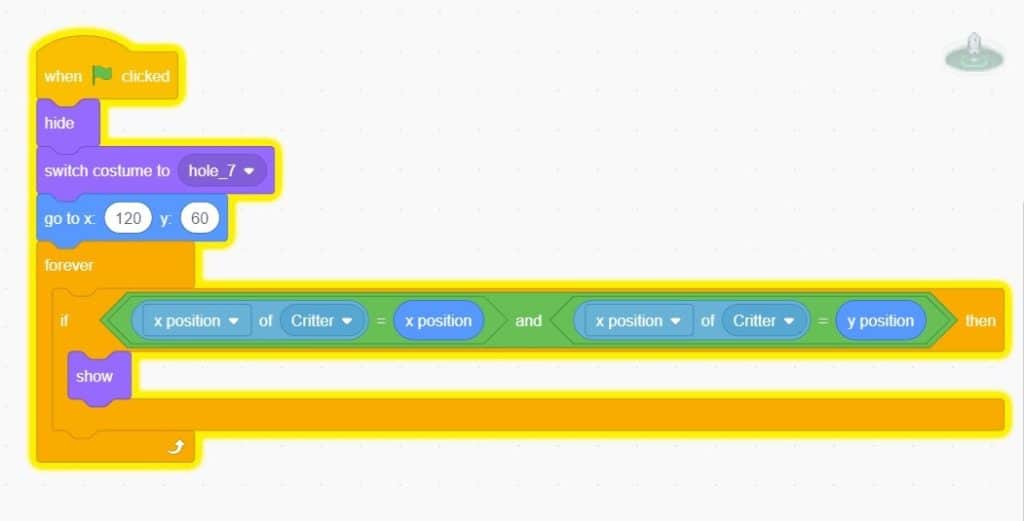
- Now that you have found the hidden block for this hide and seek option, we can put the code together. This picture shows all the pieces of code you will need to use this hide and seek method.
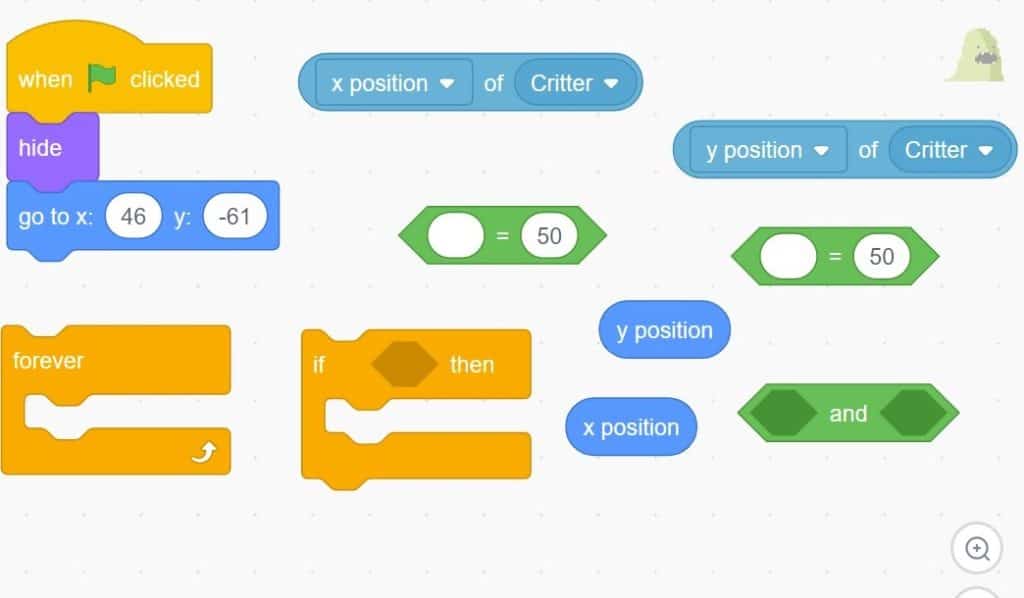
- The orange Control forever block will keep running the code that is wrapped inside it. Put an “if.. then” block inside the forever block so that the computer continues to check to see if…something is happening then, “show”. Add a purple Looks block, “show” inside the if..then conditional statement block, to make the fish show if it has been found by Critter.
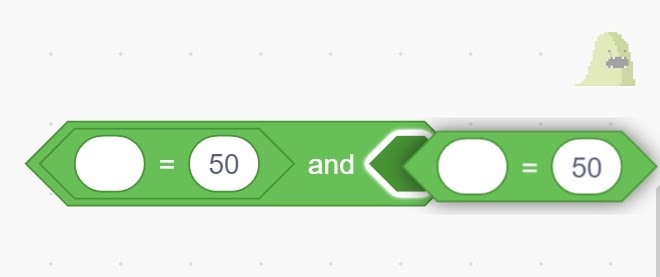
- The two green Operators blocks, “(something) = (something)” will allow us to compare the x-position of the fish in comparison to the x-position of Critter, and the y-position of the fish in relation to the y-position of Critter. The green Operator block with two hexagonal openings, “(something) and (something)” gives us the opportunity to compare both of these positions.
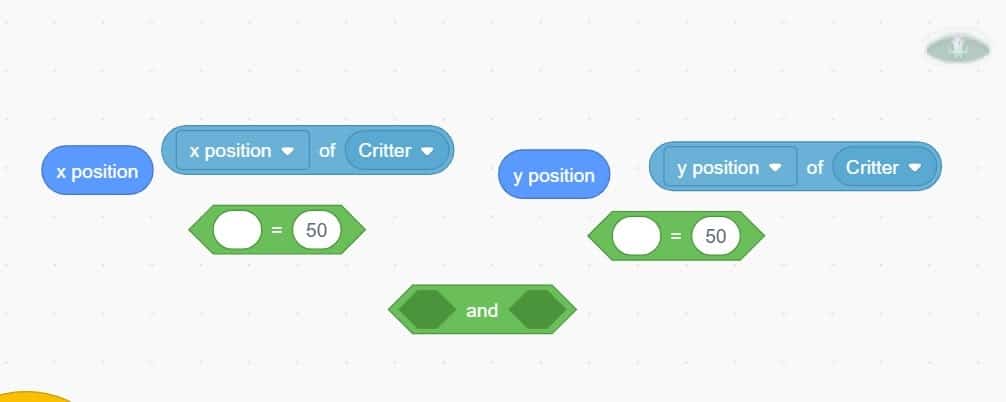
- We can place one green Operator block that compares two things to see if they are equal into one of the openings inside the “(something) and (something)” green Operators block. Place the other “(something) equals (something)” block into the other opening in the “(something) and (something)” block.
- The blue Motions blocks, “x-position” and “y-position” record the current location of the sprite on the xy-grid that is underneath every Scratch game. When you click on the block, it will report the x-position or y-position of the sprite. These blocks report the current position of the sprite along the xy-grid to the computer which allows us to use this report in our code.

Remember, under every game or story in Scratch lies the xy-grid even when you can’t see it.
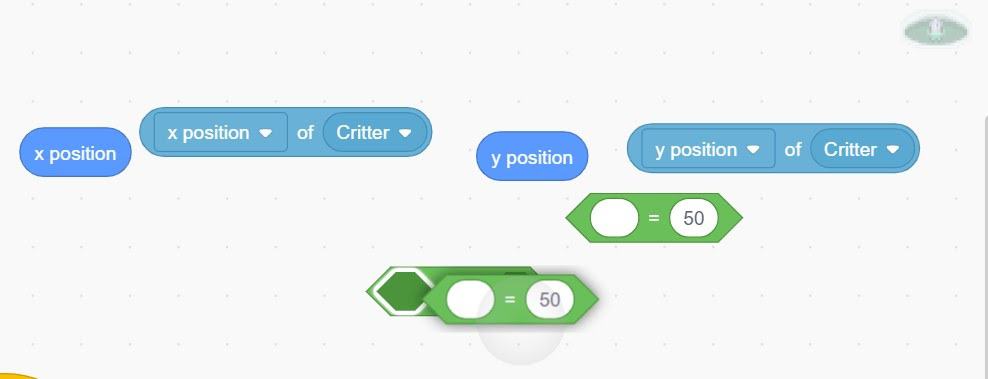
- We can compare the x-position of the fish and the x-position of Critter to see if they are the same and are equal by putting the blue Motions “x-position” block into one side of the “=” sign to record the x-position of the fish and the light blue Sensing block that tells the “x-position of Critter” into the opening on the other side of the “=” sign. Repeat for the y-position blocks.
- Now the condition — if the “x-position of the fish sprite is equal to the x-position of Critter and the y-position of the fish is equal to the y-position of Critter” is ready to be placed into the orange Control conditional statement “if…then” block. And now, you are ready to set this program up so that it will work! (It’s a bit tricky.) Follow along and watch the video below to see how to set up your program so that the seeking sprite will find the hidden sprite.
Hide and Seek Variation Three — X/Y position
Thanks so much to The Mini Vandals featuring Mamadou Koita for sharing their track, Momo Do
- Now comes the tricky part. You need to carefully plan the hiding position of the hiding sprite, the starting position of your seeking sprite, and how far your seeking sprite travels with each movement in order to make this program work.
- Consider these blocks:
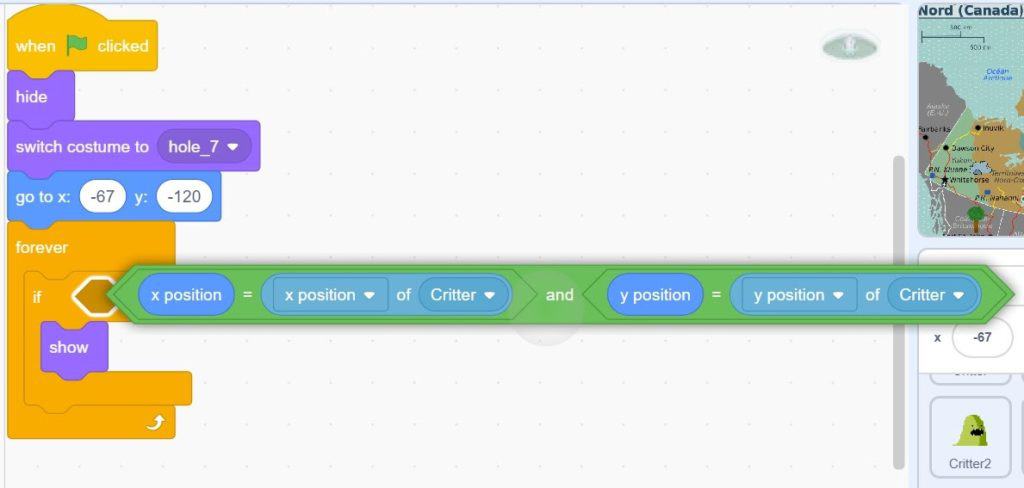
- Hiding position of the fish– “go to x: (-67) and y: (-120)”.
- Starting position of Critter — “go to x: (-197) y: (-130)”.
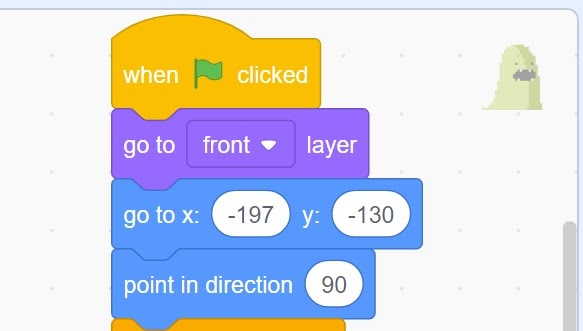
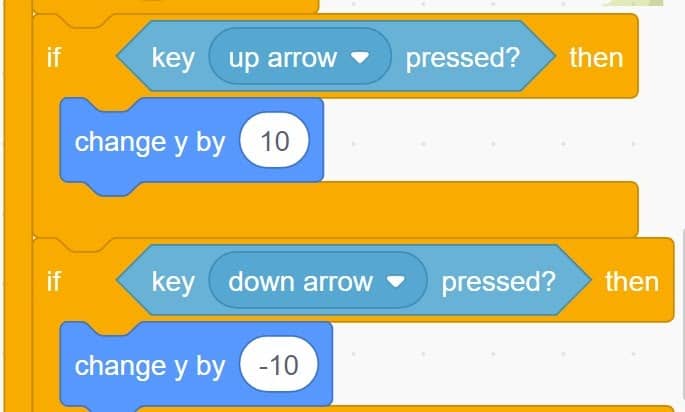
- Distance Critter travels (in pixels) with each “step”, each time one of the arrow keys is pressed — “change y by (10)” and “change y by (-10)”.
- Will this work?
- Test to see!
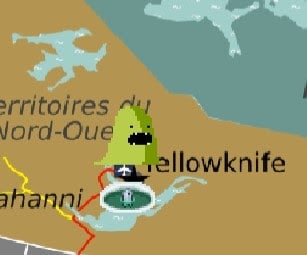
- These number values do work, Critter “found” the fish and the fish is showing because the x-positions and the y-positions of both the Critter sprite and the fish sprite matched and were the same. (In this picture, Critter has taken one more step so that we can see the fish and Critter.)
- What if the number values were changed to other values? Would this always work? What if Critter travelled 20 pixels with each step. Would that work? Remember, that for the fish to show, the x-positions and y-positions of Critter and the fish have to match.
- If Critter starts the game by “go to x: (-197) y: (-130)” and then travels 20 with each step, will Critter be able to match the X-position and the y-position of the fish if the fish is hiding at “go to x: (-67) and y: (-120)”? If Critter starts at x: (-197) and changes his x-position by 20 with each press of the left or right arrow keys (sprites go left and right to travel along the x-axis), will Critter go to “x: (-67)”?
- If Critter starts at x: (-197) and goes to the right with every press of the right arrow key, Critter will now be at positions x: (-177), x: (-157), then x: (-137). Do you think that Critter would be able to get to x: (-67) if moving by 20 steps with each arrow key press?
- Matching the x-positions and y-positions of the seeking sprite and the hiding sprite offers you a very precise method for triggering a hidden sprite to show. You have to be equally precise and careful in the way you set up the number values in the value bubbles inside each of these blocks to make it work. It’s a great method to use if you want to make a challenging game!
Now you are an expert in making sprites hide and show! In the last tutorial, Hide and Seek Variations, you learned how to make a sprite hide behind something, then come to the front layer and show when touched and found. You learned how to make a hiding sprite show by comparing the distance between the seeking sprite and the hiding sprite.
With this tutorial, you have learned how to use the xy-grid that is underneath every Scratch game and story to make sprites that are hidden, appear and show when another sprite shares the same x-position and y-position. Each method has its pros and cons. You can choose the method that best fits your game or story situation. Think of all the different ways you could use these methods to hide and seek sprites in your games and stories. I can’t wait to see what you create! Remix the All Together Now game or create your own and remember to share it with us!
Conclusion
We want to see the awesome things you’re creating! Take a photo or video and share your work with us by emailing media@pinnguaq.com or tagging @pinnguaq on Facebook, Twitter, or Instagram. Don’t forget to include the hashtag #LearnWithPinnguaq! You can also upload your project to the Pinnguaq Studio.
For more fun activities, visit the Learn section on the Pinnguaq website.
You might also like
Fancy numbers in Scratch: Deleting clones and using custom blocks
In this tutorial, you will learn to create an updatable number readout using custom numbers in Scratch, through learning to manage Scratch clones as well as through using Scratch’s custom block (“My Blocks) feature.
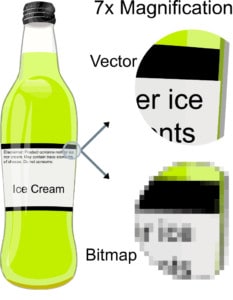
Working with vector graphics art in Scratch
In this tutorial, you will learn about the differences between vector graphics and raster graphics (also called bitmap graphics or pixel graphics) and how they are used in Scratch as well as how to use Inkscape to make vector-based art for use in Scratch.
Scratch Mix and Match Series
Learn how to make your own game with the Scratch Mix and Match Cards. Accept the challenge and make a game or story with the cards for this challenge!
