Section Navigation

In the series: Building A House In Unreal 4 Series
Introduction
Students will take their blocked out house from the second part of the module, “Building a House in Unreal 4”, and polish it with provided assets.
Learning Goals
This period of refinement is an important part of the development pipeline, and demonstrates the work that any type of 3D media goes through on it’s way to release.
Vocabulary
Mesh - Another name for a 3D model. The wireframe of the model which looks like a mesh (net) fabric.
Brush Mode - An Unreal 4 feature that uses 3D frames to create 3D surfaces within itself. It is often used for blocking out projects in the alpha and design stages.
Volumes - A 3D space where something is happening. For example, a kill volume can be placed in water to instantly kill a player if they enter it.
Post Processing - Visual effects added to projects. For example, adding a colour correcting filter to an end product that lowers saturation to make a desert level look washed out and bone dry, giving it a more realistic feel.
VFX - Visual Effects. These can be added to levels, like post processing, to create a more immersive environment.
Vertex - A point where edges meet. For example in a prism, the point on top is a single vertice.
Edge - A hard angle of a shape. In a prism, the square base is bounded by four edges at the bottom.
Face - The flat surface of a shape. In a prism, the square bottom and four triangle sides are faces.
TARGA, .tga file - A file type used for texture files.
Origin Point - The point at which an asset’s manipulator exists. This is set in a modelling program, and can be changed to easily move assets.
Skybox - A large sphere with a special material applied to it that replicates a real sky.
Material - Unique to a texture, where a material has instructions inside of an engine.
Texture - A base image created based on the UV Unwrap of a model. It provides the colour and look of a model.
Guiding Questions
- Now that we’ve created our house, what is the next step?
- How can we refine our house to finalize it and polish it?
- How important is this polishing stage to the development pipeline?
- Why do we follow a development pipeline?
Curriculum Links
This module builds skills in Computer Studies and Visual Arts.
Materials
- Computer
- An Unreal account – Register for Unreal
- Blender – Download Blender
- Asset Package – Download Assets Folder (ZIP)
- House level from previous module
Computer Activity
Group the blocked out house in the outliner by selecting all the pieces, either in the viewport or in the World Outliner menu, right clicking and selecting “Group”. Then click the eye icon to toggle the visibility of the blockout to make it easier to build overtop of it.
Bringing Assets into Unreal
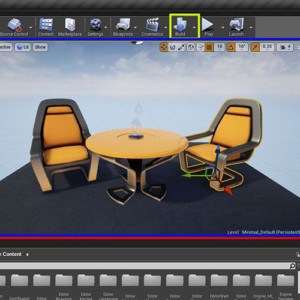
To import the set of modular pieces we will use to polish our house, click “import” in the content browser, and navigate to the folder provided. Select “Modular_Set” and click import. In the pop-up that appears, select “Import All” at the bottom. Close any other pop-ups that appear. The assets will now be listed in the content browser.
Extra Options
There is an opportunity here for students to import models they’ve created in the Blender modules. In Blender:
- Select a model in object mode, snap it to the origin (Center of XYZ axis), press Ctrl + N to open scene options, find 3D Cursor Origin, and set every axis to 0.
- With the model still selected, go File > Export > FBX.
- Name it and click “export”.
Now it can be imported to Unreal Engine 4. It is important to set a model’s origin point, because inside of any game engine, this is where the manipulator will be located.
Textures and Materials in Unreal
Textures are what give a model colour and dimension. In the 3D industry, a texture is an image painted over a flattened picture version of a model. This picture is a carefully laid out version of the model, mapped in such a way that the image painted over it fits the model and is not distorted. This image, or texture, is a single piece of an entire pipeline that, when it comes together, creates a material.
A material is different from a texture in that it takes many texture samples and, using code and math, combines them to create optical illusions and effects that makes a model look more real, stylized, or achieves any sort of artistic ideal. The main texture samples that go into a material are the base texture map, specular map, normal map, and ambient occlusion map. These are called maps because they map out the location for their effects for the program using them. We will only be using the base texture map for this project.
Unreal requires these images to be saved as an 8-bit TARGA. TARGA stands for Truevision Advanced Raster Graphics Adapter. This file format has the ability to work with an alpha channel and, as per the name, is powerful for game engines. These images are large in file size, have amazing render quality, and are a standard in the 3D industry.
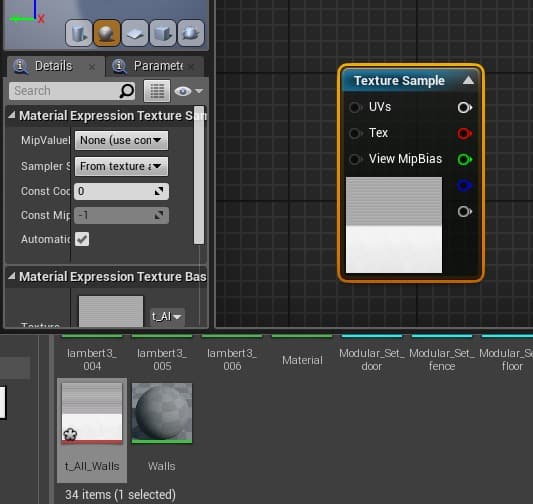
When a texture is imported into Unreal, it must be made into a material before it can be applied to a model. To start this process, import your texture into Unreal by clicking the import button and navigating to the texture. We’ll start with the walls: “t_All_Walls.tga”.
Next create a new material in the content browser by clicking “Add New” and selecting “Material”. In the dialogue that appears, enter “Walls” in the text name field to keep it separate from other materials.
Double click on the new material that appears in the content browser to open the material editor.
Outside of the material editor, in the content browser, select the texture, and then right click anywhere in the blank space within the material editor and type “texturesample”.
Click on TextureSample to place it into the work area.
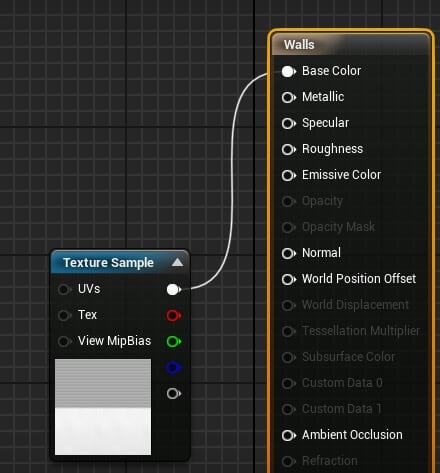
Click the small top node and drag it to the base colour circle in the material options node.
In the top left hand corner of the material editor, click apply.
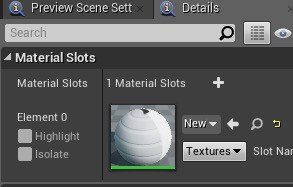
To apply the material to a model:
- in the content browser, double click the asset you wish the material to be applied to;
- in the asset editor, under material slots in the right hand panel, click on the material you made in the content browser; and
- click the arrow back in the asset editor.
This ensures the correct material is added to an asset when it is placed into a level.
Replacing the Blocked Out House
Apply materials to all assets before importing them into the 3D space.
We’re going to use our blocked out house as a model for the assets we’ve just applied materials to. As we’ve selected and grouped all parts of the house together, we can ‘hide’ or ‘show’ it anytime by selecting it and pressing ‘H’.
If you want to see it, click the ‘eye’ icon in the World Outliner. (Open eye = visible; closed eye = hidden.)
As we learned in the first module, assets can be moved using the 3D Manipulator. Create the floor of the house by selecting the floor asset from the content browser and dragging it to the 3D space.
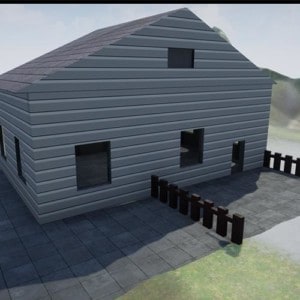
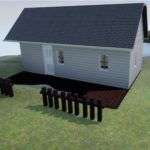
Next, place the wall pieces onto the floor, and assemble the walls by snapping them into place around the floor. Continue with the roof, windows, and doors that have been provided.
For those with a flat roof, the floor asset can be duplicated, and the shingles material added.
Once the house has been assembled, the fbx package called “House_Decor” can be imported using the same process as before. Import the textures, create the materials, and apply them to the new assets.
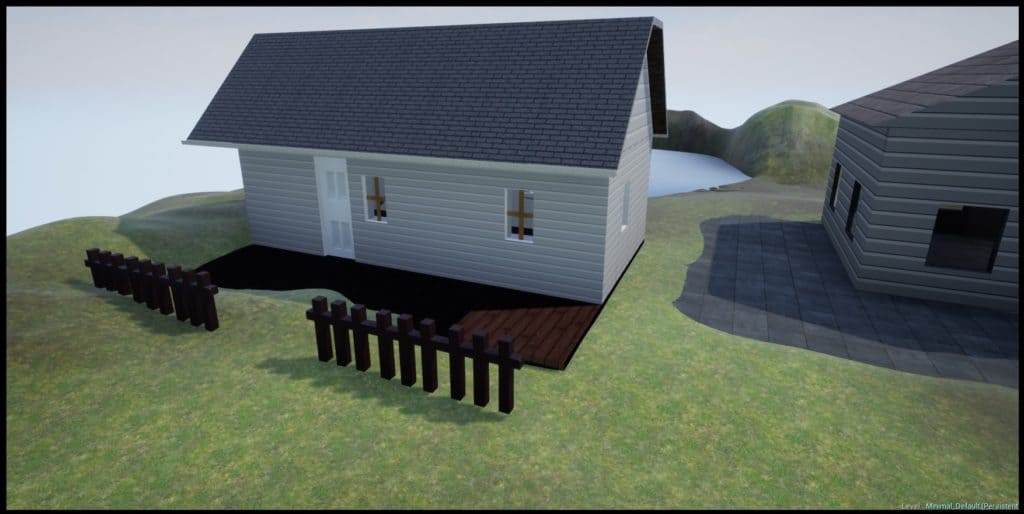
To finish, place some decor around the house, and then show off your house!
Conclusion
Share your work with each other. Discuss what was challenging about polishing a room. This module provides students with the necessary learning to be comfortable navigating the Unreal 4 engine. Students can continue to work with Unreal in creative ways to showcase their artistic works, expand their programming skills, and use a powerful, open source program. Students will have gained perspective into a number of creative fields, which is a great inspiration for those interested in the industry.
Resources
Additional Resources
- Their blog covers a lot of news and opportunities that have to do with the engine, sometimes covering helpful tools and tutorials.
- Their wiki includes a ton of resources for anyone using the engine.
- This is a resource for developers to ask other developers to make it easy for people to get help for their projects.
- These forums cover a ton of topics and hold a treasure trove of possibilities. Like the answers page, you can collaborate with other developers to help solve your problems or generate ideas.