Section Navigation

Introduction
In this module students will learn about random numbers and how they are used in game design. Students will build a game in Scratch using the ‘random operator.’ After this module students will have the skills to create probability experiments. This module aligns with the data management and probability unit of the mathematics curriculum.
Learning Goals
By the end of this module the learner will understand how random numbers are used in probability and game design.
Vocabulary
Probability - The likelihood of an event occurring
Frequency - The rate at which something occurs over a period of time
Outcome - The possible result of an experiment
Guiding Questions
- When you roll a dice what is the probability of getting a one? is it the same as getting a six? Why doesn’t the probability change with the different outcomes?
- How is randomness used in game design? Why do we use it?
Curriculum Links
This module provides opportunities to tie in mathematics expectations from data management and probability units in Grade 4 through 6. After completing this module students will have the skills to create their own virtual probability experiments. The conclusion activity also provides an opportunity to address the Language Arts curriculum through the creation of a random story.
Materials
- Scratch – Download Scratch
- Adobe AIR (required for Scratch to run) – Download Adobe AIR
- Tenzi Dice Game art assets – Download Assets Folder (ZIP)
- Dice
- Paper and pen
Non-Computer Activity
Dice Game
Divide students into groups of six to eight. Each group sits in a circle with a dice. Everyone gets a turn to roll, and if they roll a one they are eliminated. Go around until there is a winner. Ask the students if they think it took skill or talent to win the game. Use this to shift into a discussion about randomness and that there is no skill to rolling dice. How the dice land is random.
Computer Activity
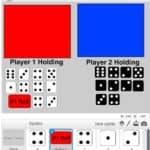
For this module students will be creating a two-player dice game called Tenzi in Scratch. Each player has 10 dice and is trying to get 10-of-a-kind before their opponent. Players set aside dice they want to keep, and continue rolling the rest until all 10 dice match.
Give an example:

Activity
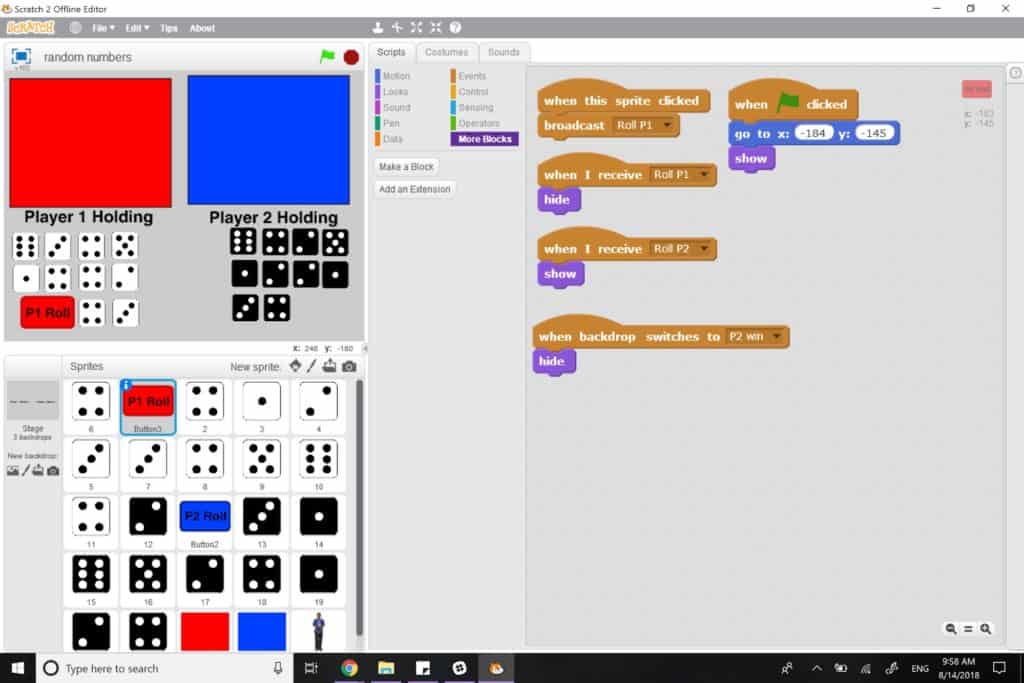
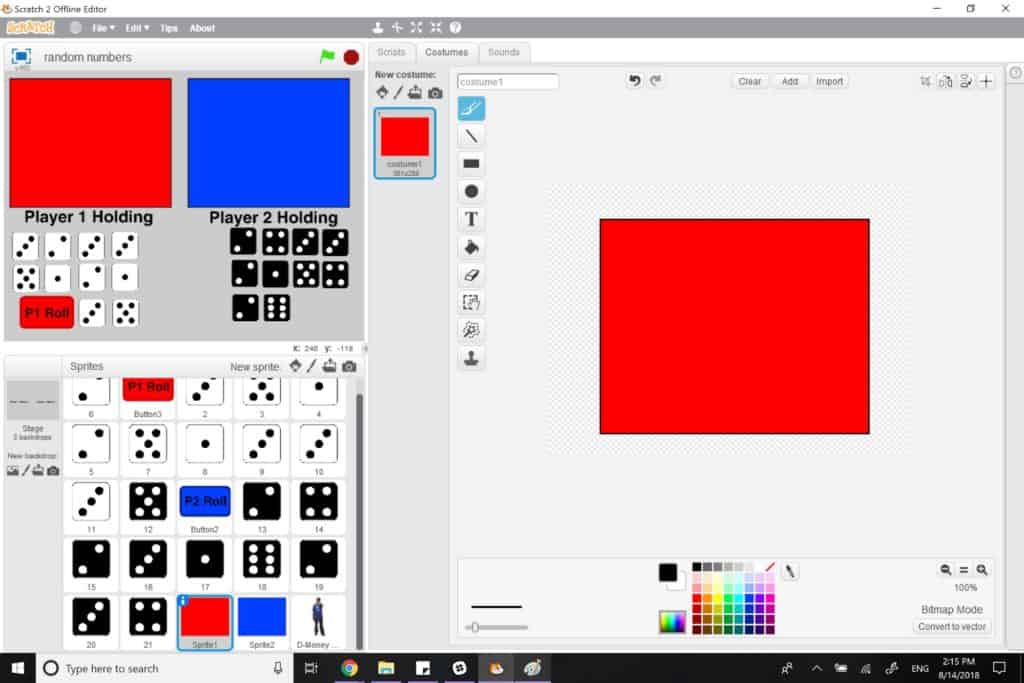
- Start a new project and delete the cat.
- Add a button sprite that will be used to roll the dice. Add text to your button to make it clear which button is for which player. Words can be added by going to costumes and editing the look of the button.
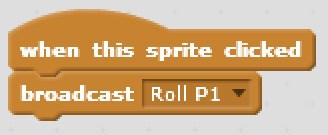
- We want the button to broadcast a message when clicked that tells the dice to roll.
- Create a rolling button that is a different colour for player 2 and program it the same way as above but with the message “Roll P2”. Add text to this button that makes it clear it is for player 2.
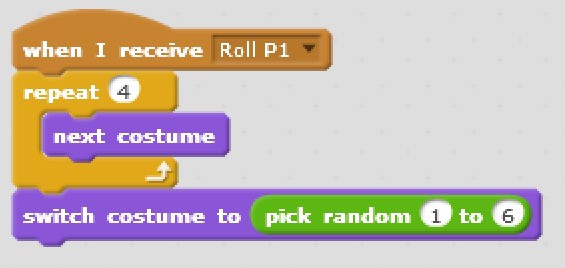
- To begin programming our dice, start by uploading a dice sprite. Set all of the possible outcomes (1 to 6) as costumes. Program the dice to roll as below: The repeat loop for “next costume” gives the illusion that the dice is rolling, then randomly picks a side to display.
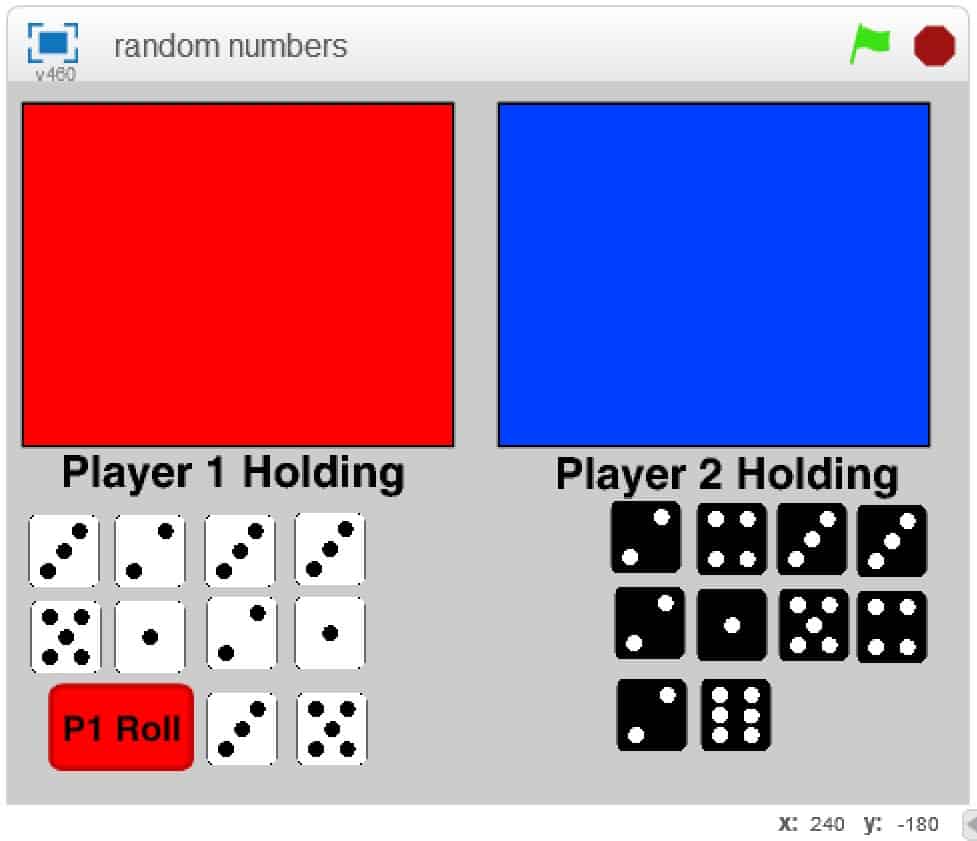
- Create a background by clicking the paintbrush on the left of the screen under “new backdrop”. Select a colour other than white, to make it easier to see the dice. You can add text for “Player 1 Holding” and “Player 2 Holding” to show where each player will be placing the dice they want to keep. This will be finished in the next step.
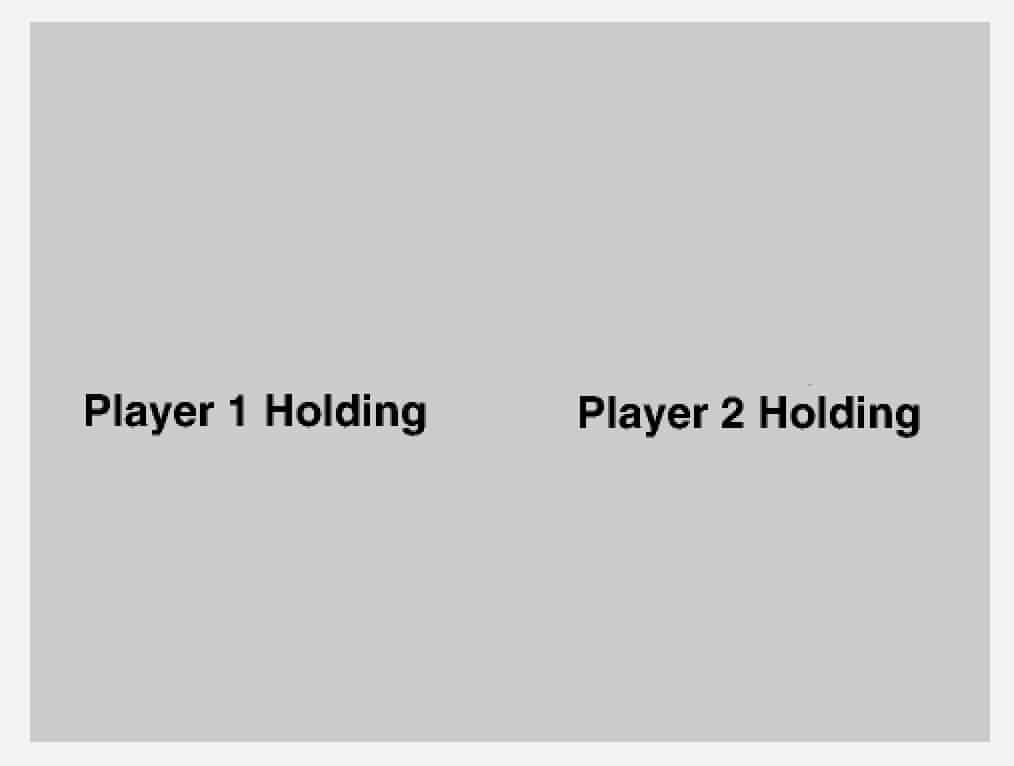
- Create a sprite that is a coloured box, by clicking the paint brush beside “new sprite”. This will be used as the place to hold the dice players want to keep.To keep it clear which area is for which player, make the box colour match the rolling button for each player.
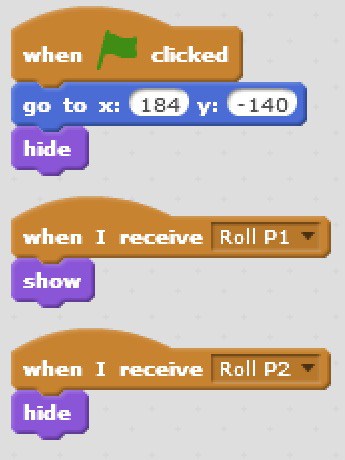
- This is a two-player game where players roll one at a time. To do this we hide one roll button at a time. Pick a location for your roll button, and set it to show when the flag button is clicked. We want the Player 1 roll button to show and the Player 2 roll button to hide when the flag is clicked.
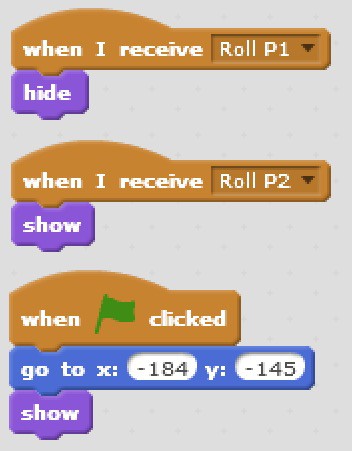
- This is for the Player 1 roll button: When player one clicks the roll button, the message “Roll P1” is broadcast. When the player 1 roll button receives this message it will hide, and the roll button for player 2 will show. When player 2 clicks the roll button, “Roll P2” is broadcast and the player 1 button will then show. Program the opposite of this for the player 2 roll button.
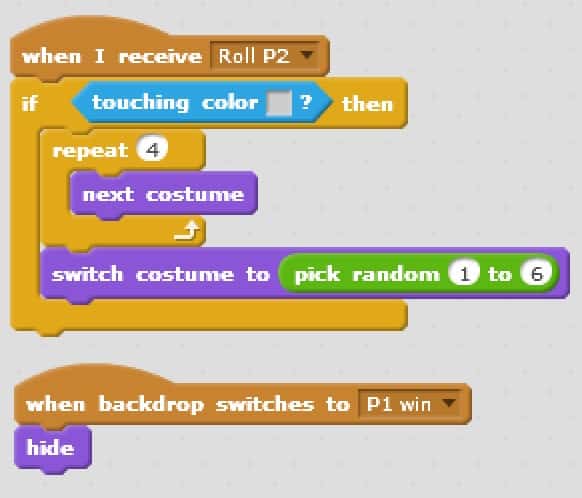
- To prevent the dice from being rolled while they are in the holding area, we will add an if statement to check if the dice is touching the background colour.
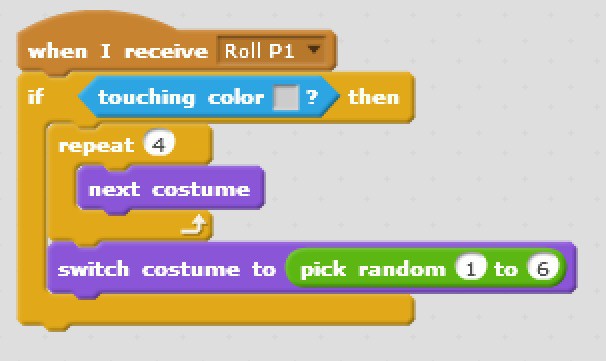
- If it is, then it will roll, if not, it won’t, allowing the dice to stay the same while in the holding area.
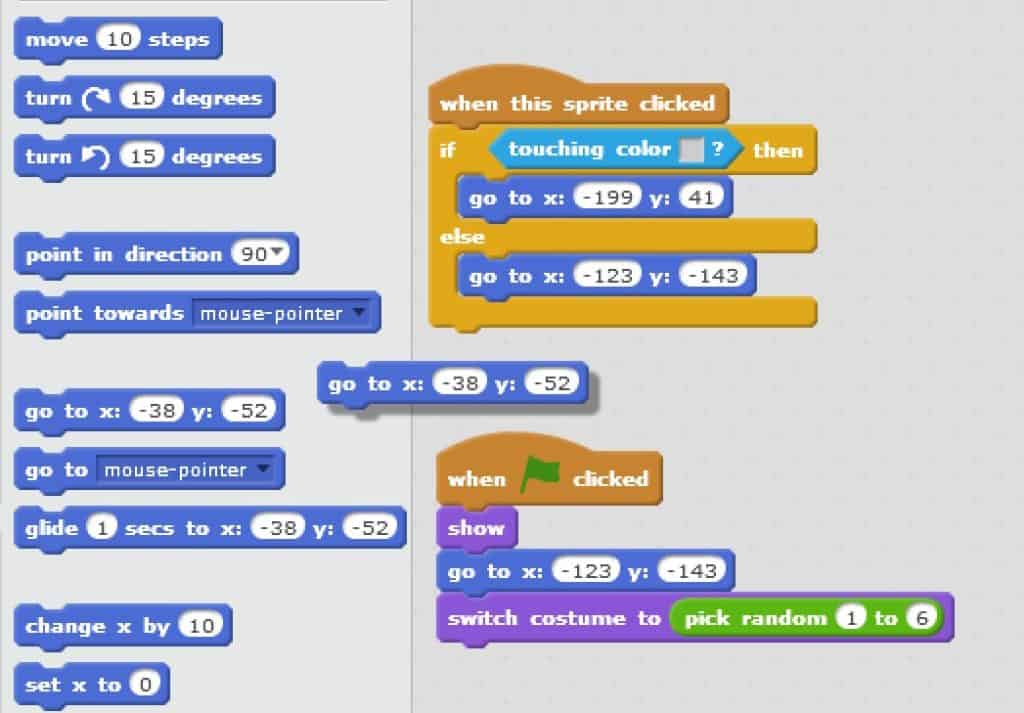
- In this example, the dice are set in a tidy formation around the roll buttons (see below). Before duplicating the dice we want to set their starting location. Then program the dice to go to the holding area and back when clicked.. We will program the dice locations as follows.
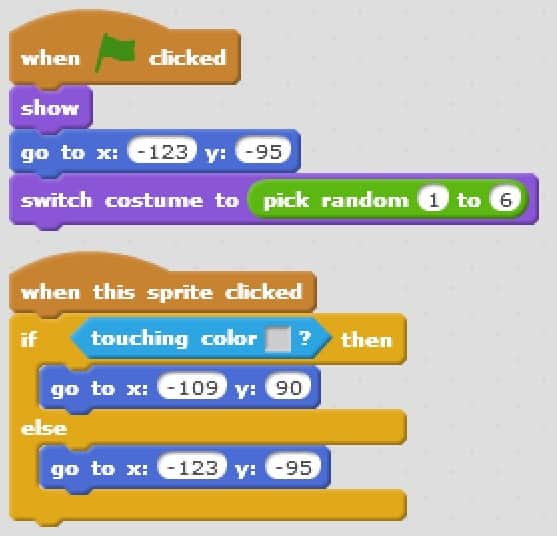
- This shows the dice when the flag is clicked, sets the start location and chooses a random face value. If the dice is touching our background colour when it is clicked, it will go to the holding area. If our sprite is clicked while in the holding area, it will move back to the starting location.
- To announce which player has won, we will change backgrounds. For this example the backgrounds are simple, but feel free to be creative, just ensuring that the dice of the winning player remain visible.
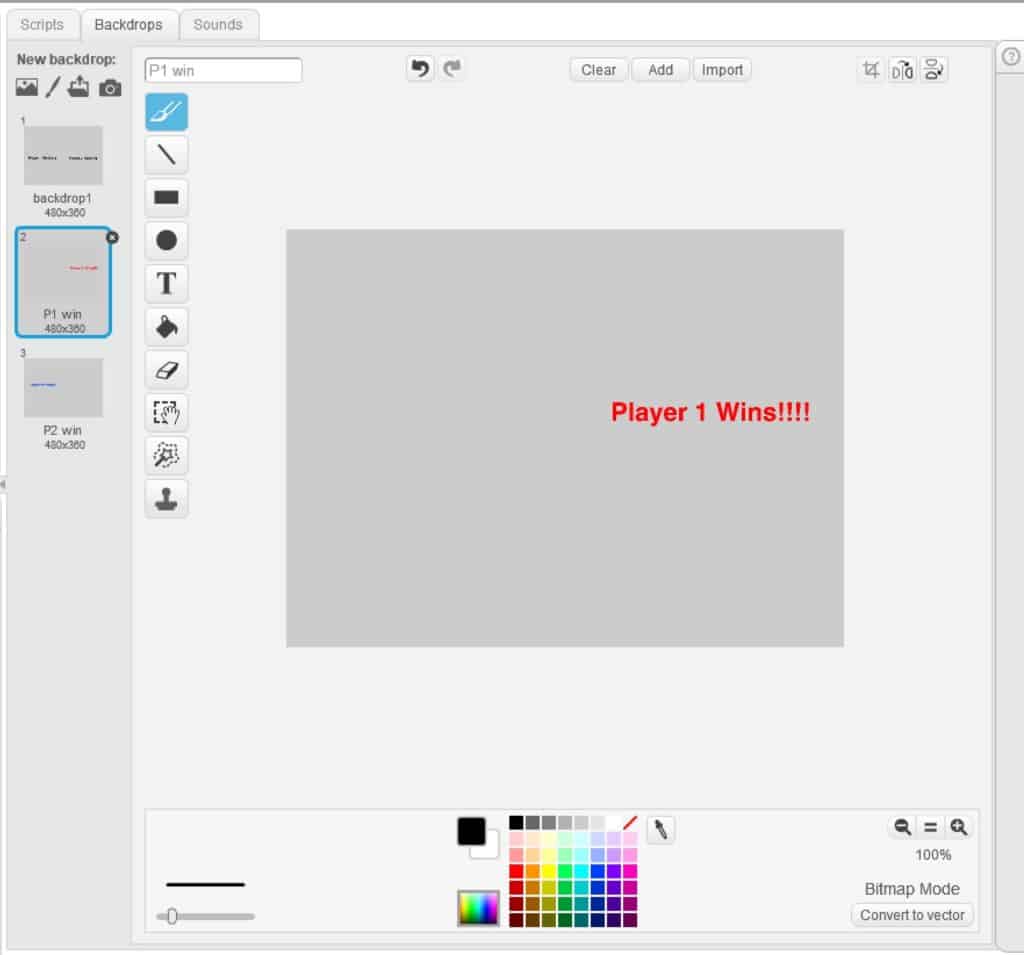
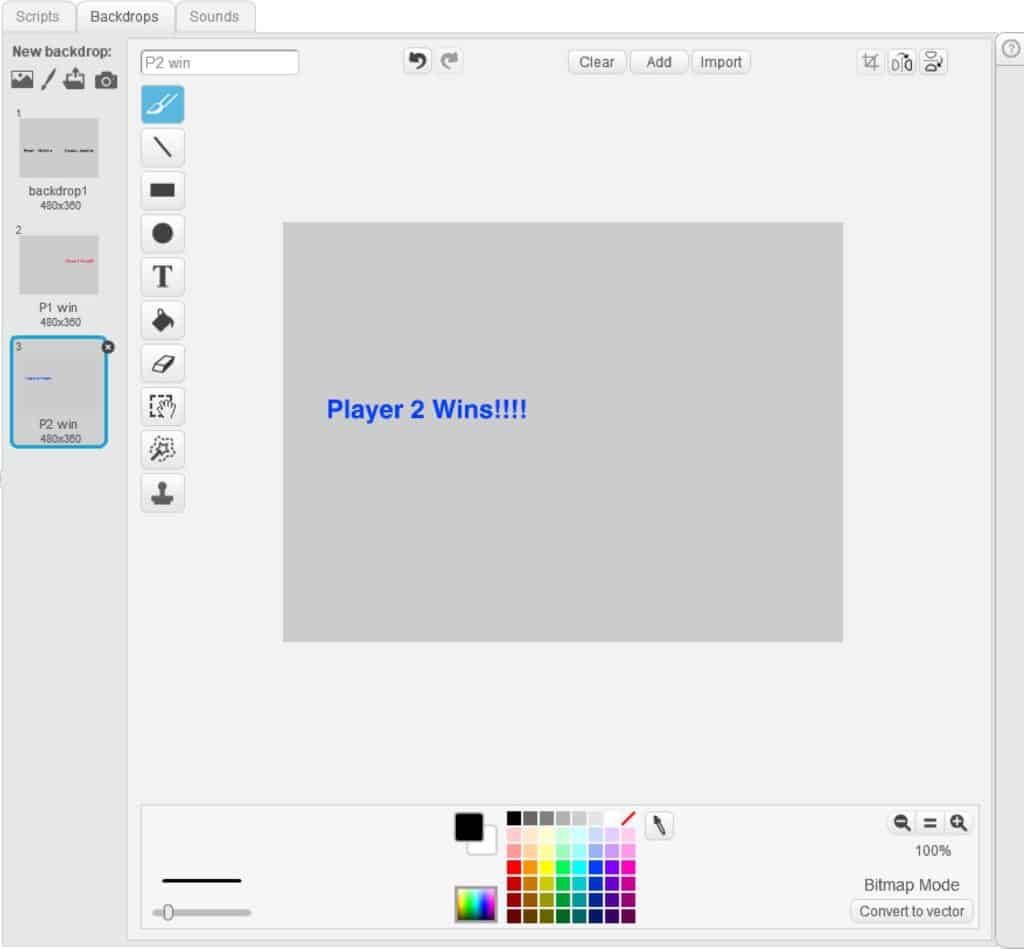
- Switching backdrops will happen at the end, after we have duplicated all the dice.
- Now we will program the dice, buttons, and holding areas to hide when the background changes. If player 2 wins we want all of player 1’s items to hide and visa versa.
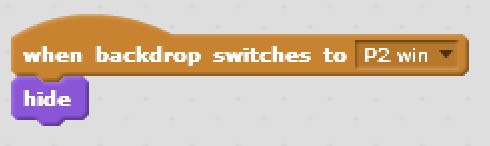
- Above is the program to hide player 1’s items. Repeat the program for hiding player 2’s items, changing the backdrop name to “P1 win”.
- Now we are ready to duplicate and make adjustments to our locations. To duplicate our dice, right click on the sprite and select “duplicate”. Do this until you have 10 dice.
- Go through the scripts for all the duplicated dice and change the locations for all of the “go to” blocks. The simplest way to get the x and y coordinates is to place the dice where you want them, then drag in the new “go to” block as it defaults to the current coordinates of the sprite.
- Now we will make the dice for player 2. Begin by duplicating one of the dice from player 1, then go to costumes and change the colour for all sides of the dice.
- Now change the program so that it applies to player 2 when we duplicate:
- Change the “when I receive” button to “Roll P2”, “P1 win” when the background switches, and the“go to button” to the location of the player 2 dice.
- Then duplicate the player 2 dice until there are 10. Adjust the location of the dice as in step 14.
- To program the backdrop to switch we need to program the holding area sprites. We want the background to switch when all ten dice are in the holding area. To program this we need to set our starting location and “show”. Then add an if loop with and operators within and operators.
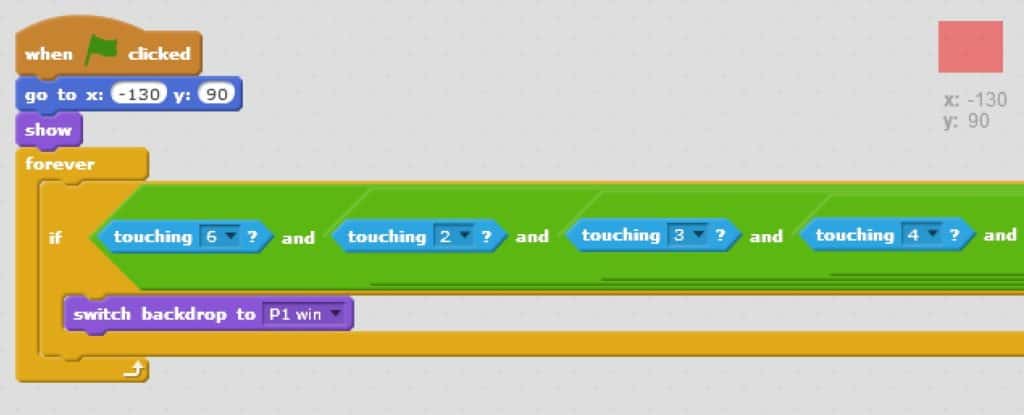
- Above we have our and operators with the “touching” block for every dice. This will become quite large, but we want the program to check that it is touching all 10 dice before switching to the P1 background. Duplicate this and change the sprites the program is checking for before switching the background if player 2 wins.
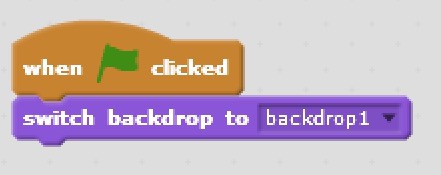
- Lastly we want to program our background to start on the starting backdrop. To do this we will program the following for any sprite.

Additional Challenges
Add an animation to celebrate when a player wins
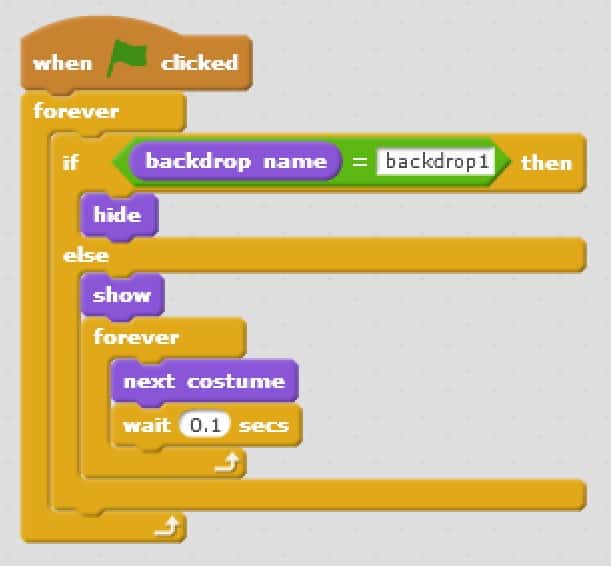
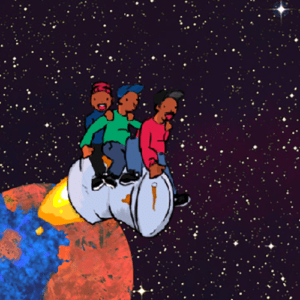
- To celebrate the win, choose a sprite from Scratch with multiple costumes. For this example “D-Money Hip Hop” was used as he has lots of costumes that make for an exciting animation. Add the following script to your celebrating sprite:
- This hides D-Money on the opening backdrop, and only shows and animates him when on either win background.
Add a screen with instructions
- An introduction screen can be added to your program to explain the instructions of the game. To do this click the paint brush under the backdrop section then add some text. You will hide some of the sprites on this backdrop and program it as your starting screen. Include a way to exit the instructions and start the game by adding something for the player to click, or adding a wait block.
Make a variable to track the number of rolls a player takes
- Make 2 variables: “Player 1 Rolls” and “Player 2 Rolls”, programmed for each player’s roll button.
- Set the roll count to 0 when the flag is clicked and increase it by one every time the roll button is clicked.
Additional math activities
- To practice some of the steps involved in conducting probability experiments students could guess how many rolls it will take them to get 10-of-a-kind, then see how their prediction compares with their actual results.
- Students can record the number of rolls it takes to win, and then graph their data.
Extension activities
- Now that students understand the random function in Scratch, they can create other random projects, such as a random answer generator or a virtual ‘Magic 8 Ball’.
Conclusion
Finish the module by creating a random story as a group. This Scratch project can be used to help generate a place, situation, sidekick, genre and character traits.
This activity can also be done off-screen with real dice. Assign six students the numbers one through six. Have them write down words for each category: place, situation, sidekick, character traits, and other elements you want for your story. Working through each category, roll the dice to randomly select a person, and that person reads out their contribution for the category.Keep going until all the categories have been filled. Ideally each student will have an opportunity to contribute to the story. You can keep adding elements to the story until all students have had a chance to participate. This will be a fun activity that can generate a random and interesting story.
Lead a discussion about randomness in games and how randomness allows players to have a unique experience. If a game was predictable or not random, it would likely be rather boring. Adding randomness makes a game different each time it is played, and adds a level of difficulty.
Resources
- This is a Scratch version of the dice game Pig. Students can play the game and look at the code and be inspired for their own game.
- In this blog post, random numbers in game design is discussed.
- Teachers Pay Teachers has some great free resources for teaching probability. This one is a favourite of mine and students enjoy having M&M’s!
- The Education.com website has a few probability activities for children to try. This will further students’ understanding of probability and how it can tie into random numbers and game design.
- This Aboriginal Education website has links to a variety of resources that involve mathematics and includes an Indigenous perspective.
You might also like

Creating An Animated Card In Scratch
 Grade 1 – Grade 3
Learn the basics of animation in Scratch as we look through the Looks section and create a short card animation!
Introduction To Animation And Movement In Scratch
Grade 3 – Grade 6
Based on a book called “Trip to the Moon”, students will learn the basics of animation and sprite movement in Scratch using trip to the moon.
Joke Telling Using Scratch
Grade 1 – Grade 3
In this fun lesson students will create their own jokes and discover their sense of humour using Scratch to share with their peers!
