
Overview
We would like to send you a package in the mail!
Explore the basics of the Scratch programming language. We want to send you five random Mix & Match Scratch Cards and encourage you to explore the code on the cards by placing it into a single sprite. What sort of things happen? Can you modify the code you’ve been given to change what is happening? You will practice how to modify code to make the changes you want in a program.
Background Information
This program is a mail package program. Provide your learner’s address by emailing contact@pinnguaq.com and we will mail out five random cards from Pinnguaq’s Mix & Match Scratch Cards set along with instructions on the basics of coding in the Scratch programming language.
You can learn more about the basics of Scratch by checking out our introductory lessons;
Vocabulary
- Scratch
- Software that allows you to learn coding using building blocks like Lego to combine commands and create your own programs.
- Sprite
- An object that performs an action in a project
Materials
Please list any materials needed in order to complete the activity.
- Scratch (online or offline)
- Five random Pinnguaq Mix & Match Scratch Cards sent by mail. Send us an email, or contact us on our website, Facebook, DM us on Twitter or Instagram with your address and we will send out the cards immediately.
If you don’t want to wait for snail mail, to grab five random cards from this project on Scratch and follow the instructions below!
Step-by-Step Instructions
Once you have your five cards follow these instructions to develop a unique program based on the cards you receive.
We are going to be coding in a language called “Scratch”. It is a basic coding language that uses a ‘building block’ coding style to make coding a visual experience. You can run Scratch in your browser at this link, or you can download it from the Scratch website.
- We will now take a look at the Scratch working environment so we understand where to place the code from our cards. When you open Scratch you should see the following;
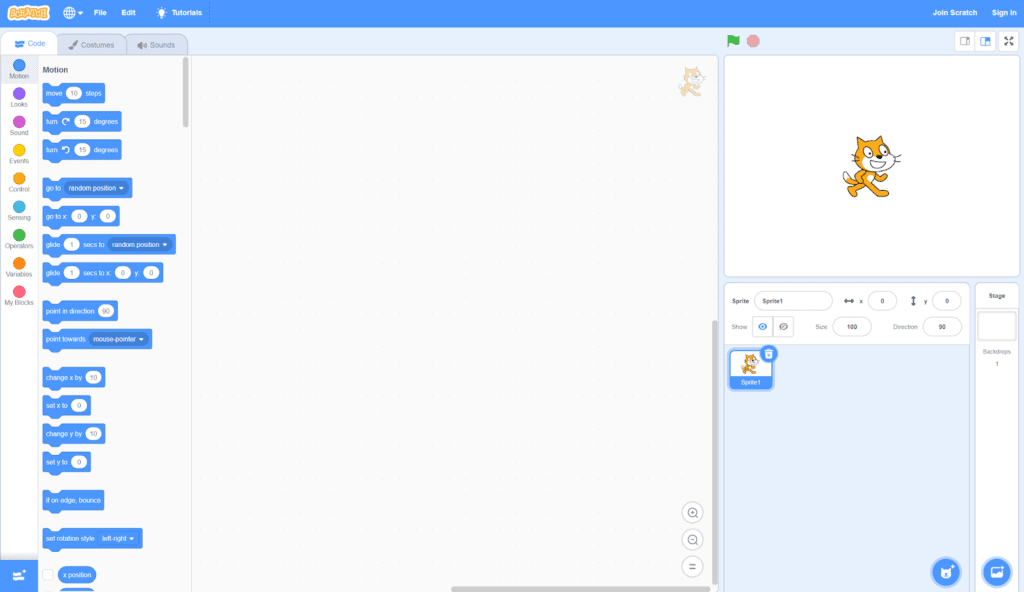
- Scratch allows users to connect blocks of code to create experiences of all sorts. In this activity we will be adding code to control a sprite (an object that performs an action in a project). In this program the sprite we will be controlling is the cat. You can see the sprite in the above window, ready to be used.
- We will be placing our code to control our cat. We will be doing this by dragging, dropping and connecting our code in the code area, which I like to think of as the cat’s brain. Our Cat will do whatever we put into the cat’s brain in the code area. Right now the cat’s brain is empty.
Scratch organizes the types of code you can use into categories and it colour codes them for ease of use. The categories are found along the left hand side of your screen and include;
 | Blocks related to the movement of your sprite |
 | Blocks related to how your sprite looks |
 | Blocks that allow you to add sound and music to your program |
 | Blocks used to sense events which then trigger scripts to run |
 | Blocks used to control scripts including loops and cloning |
 | Blocks used to detect different factors of a project |
 | A set of blocks used to create and modify variables (explored more in other programs) |
 | A set of blocks that are custom made by the user |
Now we have enough information to begin coding!
If you want more information on the Scratch working environment consult the Scratch Wiki or one of the many tutorials built into the software or available on the official Scratch website.
4. We are now ready to code! Let’s use the cards you’ve received and develop a unique program to see what it does to the cat. Line up the cards you received and recreate the code you see on the first one. Remember to match the colours of the code blocks shown on those cards to the categories listed above.
You can test the code you’ve entered in two ways.
If your code starts with the command “When Green Flag Clicked”
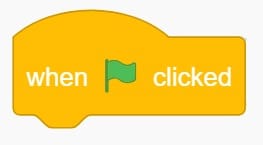
You can click the Green Flag in the top right corner to start the program.
The second way is to click on the code itself in the code area. This will run the specific code that you click.
How does the cat react to the code?
5.) Try placing all of the code on your cards into the cat. Hit the Green Flag and watch what happens. Each program will be unique as we’ve provided you with five random cards.
Try finding ways to change the code you’ve entered. What happens if you change some of the numbers entered? Can you speed up or slow down the cat as he moves around?
Try replacing some of the code blocks with different blocks that are the same colour. What happens? Does your program run differently?
5.) Once you have entered in all five cards to your cat, we want to see your creation!
Let’s save the file so you can share it.
Click on “File” and then “Save to Computer”
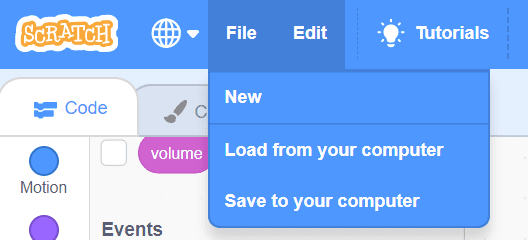
The file will download as a file likely called “Scratch Project.sb3” and likely contained within your computer’s “Download Folder”. It’s now yours to keep, or share!
Follow Up
Each piece of code in Scratch affects the program in a unique way. Take time to explore all that Scratch has to offer and think about how these lines of code could be used in a real software and games.
Most importantly, we want to see your random Scratch creation! Please send us your Scratch program file (as outlined in Step 5), a video or even an image of the program with your five random pieces of code entered.
We want to see the awesome things you’re creating! Take a photo or video and share your work with us by emailing contact@pinnguaq.com or tagging @pinnguaq on Facebook, Twitter, or Instagram. Don’t forget to include the hashtag #LearnWithPinnguaq! You can also upload your project to the Pinnguaq Studio.
