Section Navigation

Introduction
Tilesets used within video games seldom function as purely standalone objects. Variety within an environment requires variants and permutations of tiles where they interact with one another. Building an entire area using a basic tile, even a seamlessly tiling one, is a quick way to develop in-game environments, but it would yield a visually uninteresting result. Permutations allow varied shapes to be created in areas where one type of tile connects with another, often to make environments look more natural, or to establish clear boundaries between environment types.
Learning Goals
Students will learn about the function of tiles within a game and how to create their own. Building on techniques acquired in previous modules they will build important game framework tiles. Students will also learn how to work with layers and transparency within the image creation software GraphicsGale.
Vocabulary
Tile - A modular graphic used to construct scenic elements in a game.
Tileset - A full group of tiles containing all of the scenic elements for a game or a game section.
Seamless Tiles - A tile, or group of tiles, which are placed adjacently without any visual indication where one ends and the next begins.
Layer - A transparent “level” in a graphics editor file which allows separate images or elements to be created and manipulated in the same canvas space, without affecting the other elements.
Transitional Tiles - Tiles used in areas where two or more different environmental textures meet.
Permutations - A set of variant tiles within a tileset that allow for multiple arrangements.
Guiding Questions
- What is a transition?
- Where can you find transitioning textures in nature?
- How many combinations of lines can you form with two equal-sized, perpendicular lines?
Curriculum Links
This module aligns with Art, Computers, and Technology curriculums through the learning of new software and ways of creating graphical game elements.
Materials
- Popsicle sticks
- Glue
- GraphicsGale – Download GraphicsGale
Non-Computer Activity
Popsicle-Stick Permutations
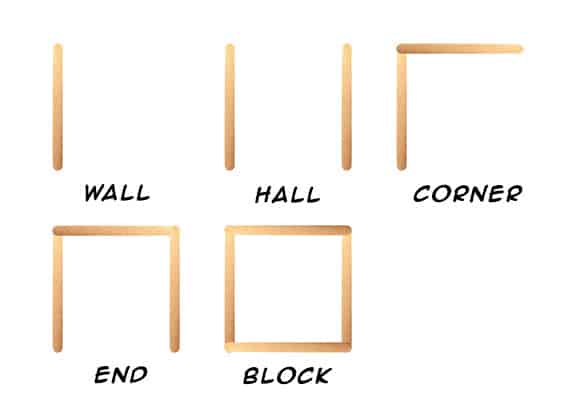
Basic geometric permutations for top-down tilesets often use very standard shapes. By gluing popsicle sticks together you can create some permutation pieces to create a miniature map, which could become a template for level design. The basic shapes you’ll often use are as follows:
Computer Activity
Creating Tile Permutations and Transitions
Tiles will usually be used in conjunction with many other tiles and textures to create a varied environment. Transitional tiles are often used where two tile textures meet, where one type of tile either blends to another tile, or where a defined edge between the two is present. These transitional tiles require multiple permutations, to accommodate the different possible arrangements they may need to indicate.
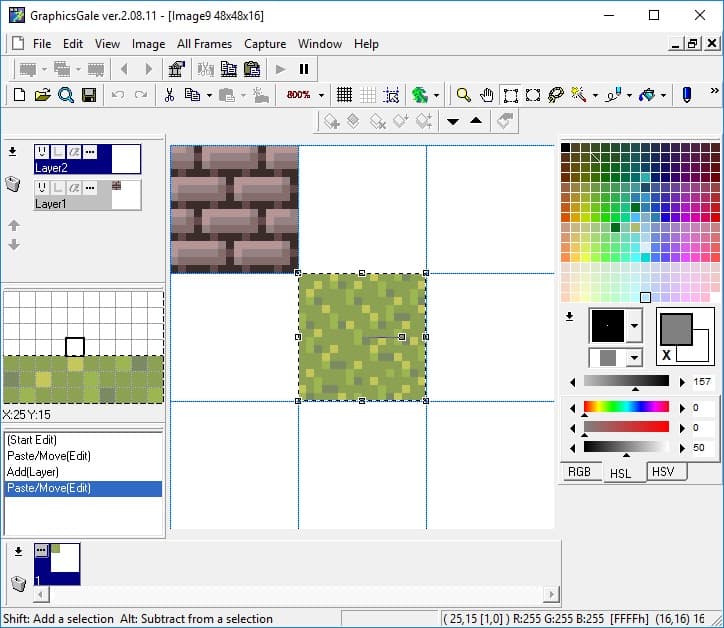
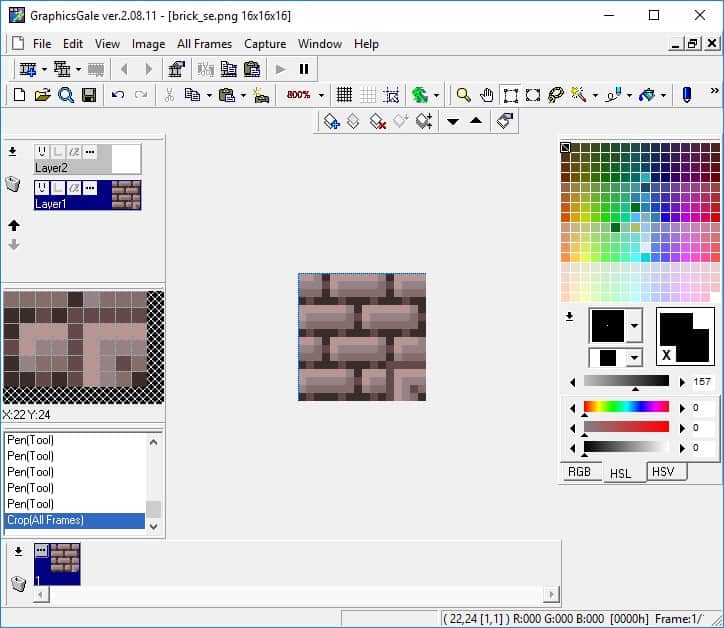
As in previous modules where we made seamless tiles, we will use a 48×48 canvas, but will also use Layers to keep the tiles separate. Go to File>New (CTRL+N) to create a new canvas, set to 48×48 and 16bit colour (so the indexed palettes of both the grass and brick tiles aren’t lost). Import the grass tile PNG by going to Edit>Import, selecting the file, and dragging it to the centre square. Click the Add Layer button and import your brick tile in the same manner.
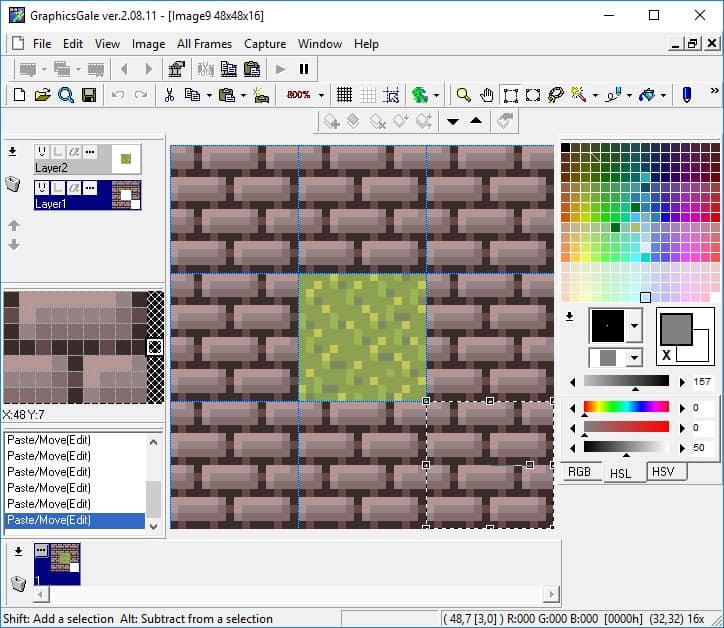
Select the layer with the brick tile and use the Rectangular Selection tool to select it. Copy and Paste (CTRL+C/CTRL+V) your brick tile and drag them so that they surround the grass tile.
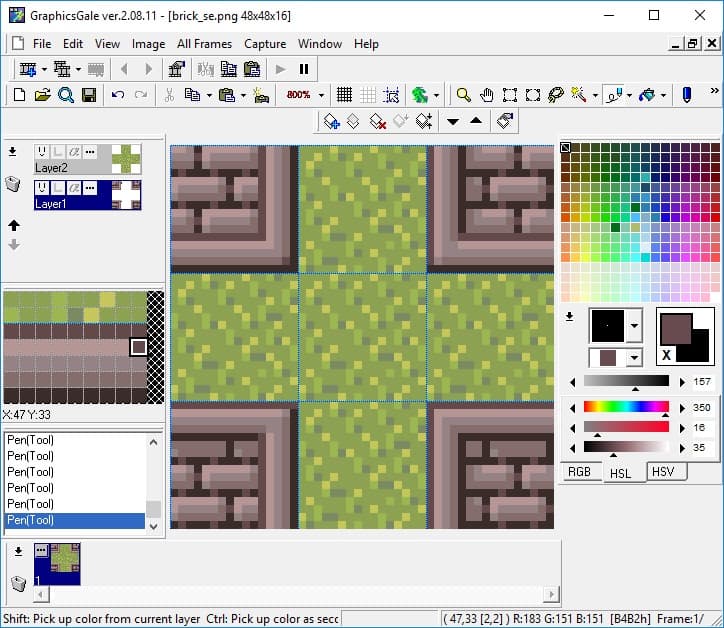
With the bricks layer still selected, use the Pencil Tool to draw some edge trim around the grass tile, 5 pixels deep. Since the previously indexed palette choices aren’t shown in the palette, simply right-click to sample the colours directly from the canvas. Add shadows on the bottom and right sides of the brick trim to give the appearance of depth.
We now have eight unique permutations of the original brick tiles. These will work as transition tiles for any other terrain type, not just grass. To save each of these permutations use the Rectangular Selection tool to select the top-left tile, go to All Frames>Crop, then File>Save As. Give the tile a name that references how it is used. This one is trim for a northwest corner, so something such as “brick_nw.png” is appropriate. After saving this tile, Undo (CTRL+Z) to return to the state prior to the Crop action. Select the next tile, crop, save it, undo the crop and repeat for all eight permutations of the brick tile.
After saving all eight of these new brick edge tiles, we need to make four more, to account for both inside and outside corners. Select the brick tiles in the centre on the top, bottom, left, and right, and delete them (press the Delete key or go to Edit>Delete). Select the grass tile layer by left-clicking it in the Layers panel, then copy and paste the grass tile into the empty spaces left by the deleted brick tiles. Re-select the brick tile layer by left-clicking it in the Layers panel, then draw the same 5 pixel deep trim along the edges where the brick tiles meets the grass tiles. Add shadows and highlights to give depth to the trim.
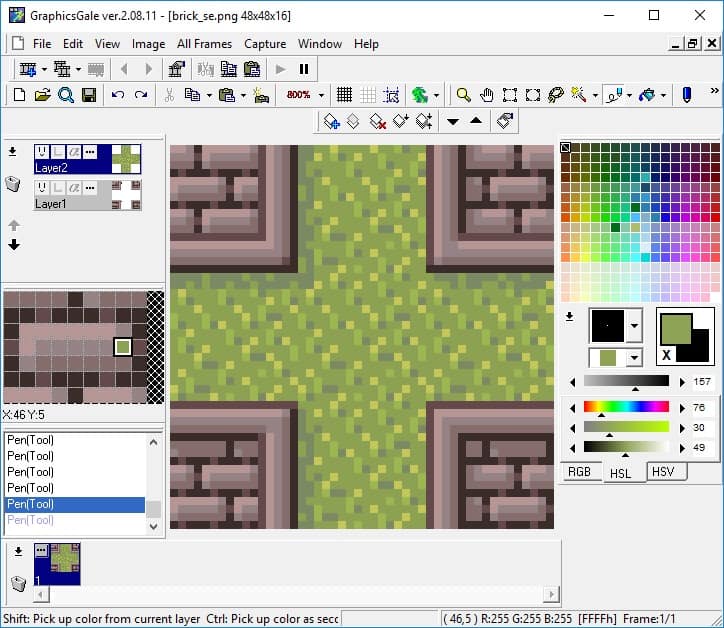
Now we have 12 permutations created which will allow two different tile types to interact in a variety of situations. To make the appearance of different tile materials existing in the same space more natural, we will create some permutations of the grass tile, by adding a shadow cast by the brick tiles. Starting with the current tile arrangement, select the grass tile layer and use the Pencil Tool to right-click the dark colour from the grass tiles. Draw over the medium green pixels in the two rows/columns beside the right and bottom edges of the brick tiles. Select the medium green colour from the grass tiles and colour the lighter green pieces in this shadow area.
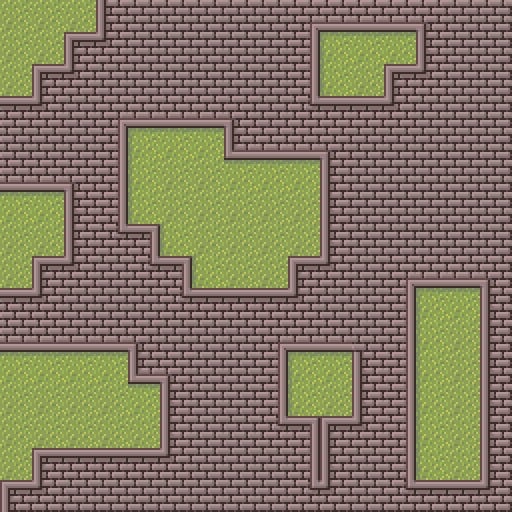
Select, crop, save, and undo for all five of these shadowed grass tiles. There’s one more shadowed tile to create for where grass meets brick on the top and left sides, simply add a shadow two pixels deep along the top edge of the top centre grass tile. Select, crop, and save this one and we’re done! Now you can use your tilesets to make a variety of level designs. Here’s just one example of what could be created:
Conclusion
Tilesets don’t exist independently, they interact with a variety of other tile types. Combining those tile types without creating jarring artificial connections requires transitional tiles and a full set of permutations to accommodate a variety of possible arrangements. Understanding how tile permutations work helps to better plan required assets when developing a game or program that requires a tiled background.
Resources
Additional Resources
- StackExchange Tile Combos
- Starxxon (Twitter) Voxel to Pixel Permutation Process
- Micromages – Art/Design with Severe Limitations