
Section Navigation

Introduction
Through creating a story in Twine, students will learn about the systems in the human body and how they interact with each other. The story they create will branch off in different directions, just assystems in the body take many paths. Students will be developing their programming knowledge while discovering more about the human body systems. The story students tell should be creative and use appropriate vocabulary. This module is for students who have completed the Introduction to Twine module or for those with a working knowledge of Twine.
We want to thank Jaime Fortin who acted as the Cultural Advisor for this module. Jaime is a student at Trent University working on a degree in Indigenous Studies. She is from Chapleau Cree First Nation, a small reserve in northern Ontario.
Learning Goals
By the end of this module students will know how to make changes to the appearance of their Twine story and be more familiar with HTML and CSS programming languages. They will use storytelling to describe the different parts of systems in the human body and how these systems interact with each other.
Vocabulary
Passage - In Twine, a passage is a narrative unit, a building block for stories.
Narrative - The process of telling and structuring a story.
CSS - Cascading Style Sheets is a styling language used for coding the presentation of a document in a markup language.
HTML - Hypertext Markup Language is the standard markup language for designing web pages.
Holistic Health - An approach to life. Rather than focusing on illness or specific parts of the body, this ancient approach to health considers the whole person and how he or she interacts with his or her environment. Many Indigenous people take a holistic approach to their health and way of life.
Guiding Questions
- What systems are in the human body? How do these systems work? Do they work together, or are organs restricted to one system?
- Why is it important to take care of your body? How do you take care of your body?
- Does anybody have any traditional teachings they want to share that relate to care of the human body?
Curriculum Links
This module reinforces material in the following curricula: Biology, as students explore human systems and how they work together; English, as they draw on their vocabulary and grammar; and Computer Science, as they use CSS and HTML to adjust the appearance of their story.
Materials
Twine – Download Twine
Non-Computer Activity
Human Body 101 by National Geographic is a great video that shows how the systems work together so the body can function. It is about five minutes long and should be screened prior to showing your class to ensure it is appropriate for your age group.
After watching the video, have students brainstorm the different systems and how they interact with each other. Encourage them to find ideas that weren’t mentioned in the video. Write this information on the board.
Students choose a system for their project and begin their research. What organs are part of the system? What functions does the system perform? What other systems does it interacts with? Teachers can adjust the requirements and systems of this module as they see fit to meet their course expectations.
Possible Systems
- Cardiovascular
- Digestive
- Endocrine
- Lymphatic
- Musculoskeletal
- Nervous
- Respiratory
- Reproductive
- Urinary
Computer Activity
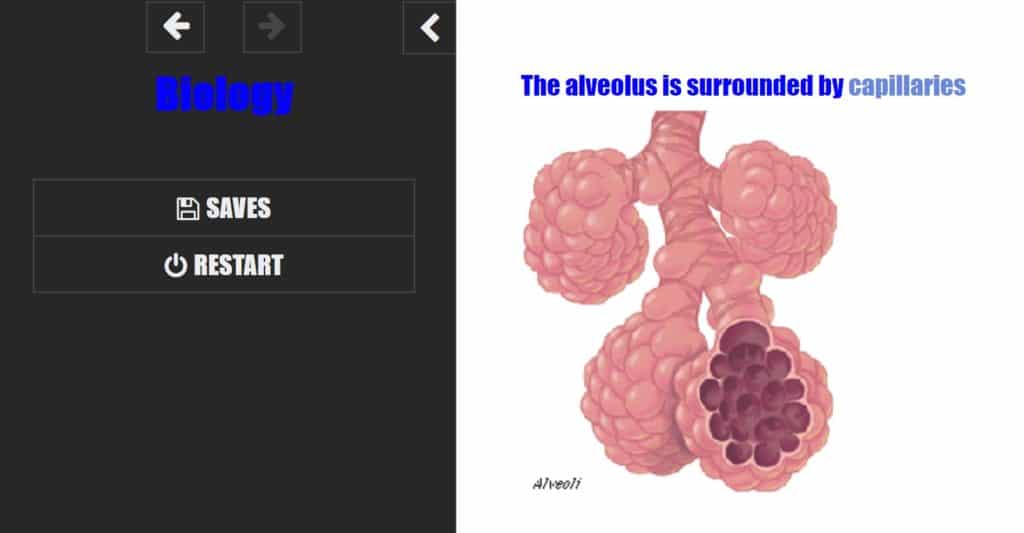
Students will be using Twine to create an interactive story about a system in the human body. They will use the vocabulary they learn from studying human systems and build their programming knowledge. The focus of their story should be the system they choose and how that system interacts with others in the human body. Students may add pictures and videos to enhance their stories. Teachers can add further details for students to include in their digital story.
An additional aspect that could be included in this project, is for students to explain the ways they take care of their body in a holistic way. For example, students could write down self-care ideas, discuss how they attend ceremonies, or explain any other ways they make sure that their mental, emotional, physical, and spiritual needs are met.
Activity
While working in Twine, make sure to give your passages relevant, specific names. As most bodily systems involve organs at multiple points, it may be problematic to name your passages by the name of an organ, using a variation of the name may be required to avoid linking errors. A passage can have a different link name than the display text (see Step 4 under Getting Started).
Getting Started
- Open Twine and start a new story.
- Name your story something relevant to your topic, this can be changed later.
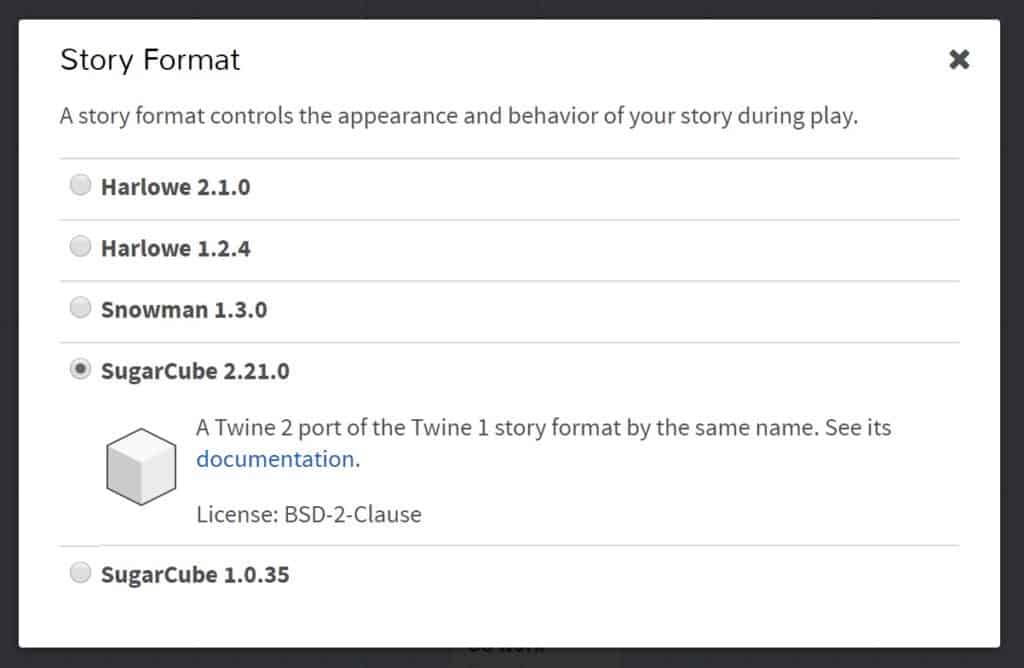
- Change the “Story Format” by selecting the arrow beside the story title. Select “SugarCube 2.21.0”.
- Begin typing your story and linking passages together. Remember to link passages, type the title in double square brackets [[ ]]
- To make the link one word and the title of the passage another, add a pipe (vertical bar) between the names within the brackets. For example, [[Lungs|Left Lung]], distinguishes the link (Lungs) from the passage title (Left Lung).
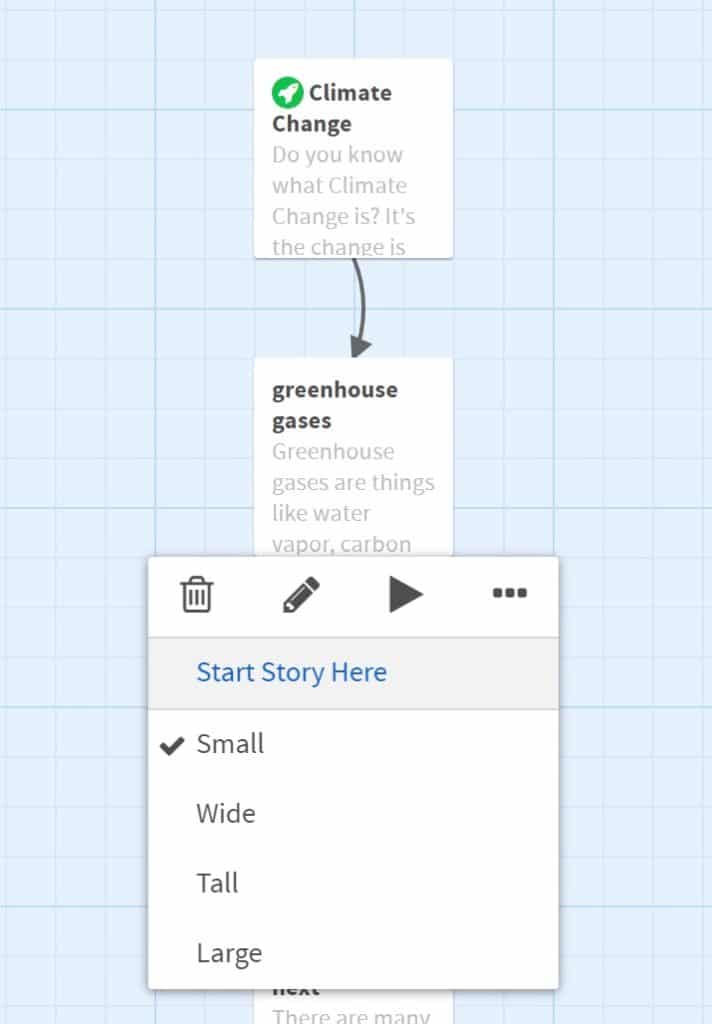
- The first passage is indicated by the green rocket ship icon. To change this to another passage, hover over the passage and click the three dots on the menu that appears and select “Start Story Here”.
Changing The Default Appearance
Once the content and layout of the story is complete, and each path has an ending, you can begin to change the default appearance of your story. Click the arrow beside the title of the story and select “Edit Story Stylesheet”.
There are a variety of colours that can be used in CSS and HTML programming. W3Schools is a helpful site that lists colours by name.
body {
  background-color: MediumSeaGreen;
  color: white;
  font-family: Futura,Impact,Helvetica,sans-serif;
  font-size: 120%;
}
Line 2 changes the background colour to Medium Sea Green.
Line 3 changes the colour of the text to white.
Line 4 sets the fonts. Select multiple fonts to accommodate computers that may not have all of these fonts.
Line 5 makes the font size a little larger.
a {
  color: LightBlue;
}
This script changes the link colour to Light Blue.
a:hover {
  color: LightSteelBlue;
}
This script changes the colour of the links when you hover over them to Light Steel Blue.
Changing An Individual Passage’s Appearance
To change the appearance of an individual passage you will need to add a tag to that passage. To add a tag double click the passage and select “+Tag” under the passage title. Name the tag something that relates to the passage. For example, let’s add a tag called “water”, as the passage talks about oceans, and this tag could be used on other passages that include the topic of water.
.water {
  background-color: CadetBlue;
  color: Coral;
}
To program a class for water, add a period in front of the name, and then format the same way as our default settings.
Adding Images
There are two different ways to add images to a story:
- By URL: add the URL of the image to your script. Some issues with this method is that you are limited to the images on the internet, and you have no control over the sites where these images were found. If the site is removed, your image will disappear.
- From a folder on your computer: create a folder where you will save your Twine story, and any images you plan on using. Then you can add these images by filename to the passage where you want them to appear.
<img src="ocean.jpg">This script inserts the image named ocean.jpg. When you test your program without publishing it, your image may not appear. To properly view your story, you need to “publish to file,” then open that file in a web browser. This will allow you to see how your story looks, and if any of your images need to be resized.
<img src="ocean.jpg" width="50%">This script sets the size of the image to be 50% of the original.
Adding Videos
There are three ways to add videos to your story. As with an image, you can use a URL or insert a file saved on your computer. The other way to display a video is to embed it. To do this from YouTube, click the share icon and select “embed”. Copy the text that appears and paste it where you want the video to appear in your passage. With any of these methods, you can adjust the dimensions of the file as in the following example:
<video src=“https://www.nfb.ca/film/maq_spirit_woods/” width=“640” height=“480”></video>Conclusion
To end the module students can share their stories with their peers. Teachers can facilitate discussion by asking questions, and also having the students ask each other questions. The student’s questions can be combined to make a review quiz or a review before a test.
Resources
- W3Schools has a list of HTML colours by name and hex value.
- Adam Hammond is an assistant professor at the University of Toronto. He has created a guide to programming in Twine. This guide includes videos and detailed instructions on how to make your Twine project the best it can be.
- The Twine Wiki page has links to specific actions such as adding a video.
- Anatomy 4D is an educational app that allows you to see the human body and the various components of each system. It involves using printed sheets to examine the human body and produces an interactive 3D model.
- Docsity has interactive demonstrations that show how some of the human body systems work.
- Guiding Wellness is a good resource for students that want to learn more about Holistic Health.
- I Achieve Learning has some helpful self care tips for students.
You might also like
Mythology Using Twine
 Grade 9 – Grade 12
Students will learn about mythology, legends and folktales while programming a Choose Your Own Adventure style story in Twine.

Creating A Word Monster Game Using Twine
Grade 9 – Grade 12
In this lesson students will learn how to use statements, links, and variables to create a Word Monster game in Twine!

Introduction To Twine
Grade 9 – Grade 12
This lesson is geared towards students who want to learn code or make games. Students will be introduced to Twine with a working prototype.
