
Section Navigation

Introduction
For this module students will create a Word Monster game in Twine using if statements, links and variables. They will explore the different functions in Twine and various ways they can be used. This module is for students who have completed the Introduction to Twine module or for those with a working knowledge of Twine.
Learning Goals
By the end of the module students will understand how live macros work in Twine and how they can be used with variables and links to make an interactive game. Students will also build their computer programming skills and can use the Word Monster game they create to review vocabulary.
Vocabulary
CSS - Cascading Style Sheets is a styling language used for coding the presentation of a document in a markup language.
HTML - Hypertext Markup Language is the standard markup language for designing web pages.
Variable - a place to hold information to be recalled later. In Twine, variables can be words, numbers or booleans.
Boolean - a binary variable that has two possibilities, either true or false.
Link - how passages are connected in the story that allow users to navigate, change variables, or go to external sites.
Hook - the text that follows an interaction with the story such as setting a variable or clicking a link.
If Statement - a conditional statement that completes an action if it is proved true.
Macro - a single command that automatically completes a set of instructions to perform a specific task.
Hexadecimal (Hex) Code - a six-digit number used to represent and specify colour.
Guiding Questions
- Did you ever play word games as a child? Do you think it is a good game for reviewing vocabulary?
Curriculum Links
This module can be linked to the English curriculum as students practice their vocabulary as well as the Computer Studies curriculum as they improve their programming skills.
Materials
Twine – Download Twine
Non-Computer Activity
Hot Seat Vocabulary Game
Split the class into two teams. Set two chairs at the front of the room with their backs to the board. A representative from each team sits in the “hot seat” facing their teammates and tries to guess the word or phrase the teacher writes on the board based on clues from their classmates. The first student to figure out what is written on the board scores a point for their team. A new pair of students sits in the hot seat and repeats the process. The first team to reach 15 points wins.
Computer Activity
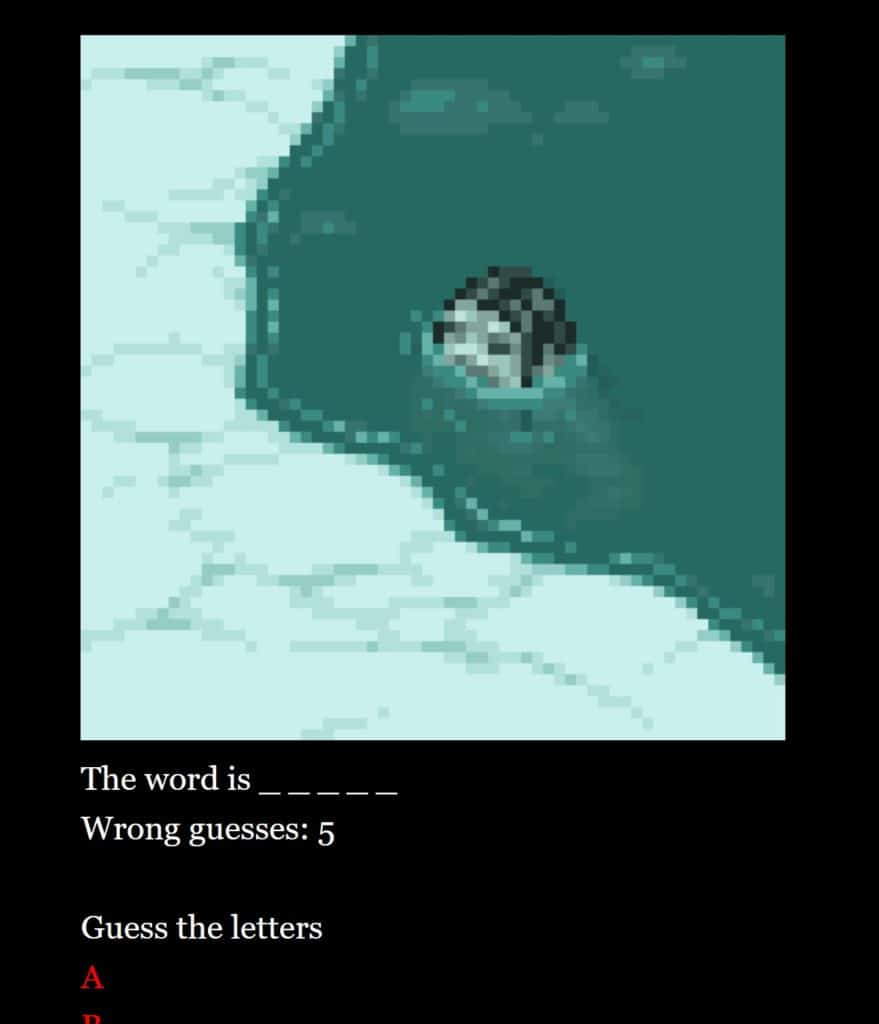
Students will be using Twine to create a Word Monster game. This game will give users letters to choose from to spell the word and allow them a specific amount of wrong guesses. Students will need to use variables, if statements, live macros and links to manipulate variables. There are Qalupalik monster images from an Inuit myth that can be added to show the number of wrong guesses. For each wrong guess a part of the Qalupalik will be revealed, once the whole monster is seen you have lost.
The Qalupalik is a creature with a human-like appearance that lives in the sea. The Inuit myth is that Qalupaliks wear an amautiit (a form of pouch that Inuit parents wear to carry their children) so they can take children away who disobey their parents. This myth was used to prevent children from wandering off alone because they would fear that the Qalupalik will take them underwater to keep forever.
Getting Started
- Open Twine and start a new story.
- Name your story something relevant to your topic. This can be changed later if needed.
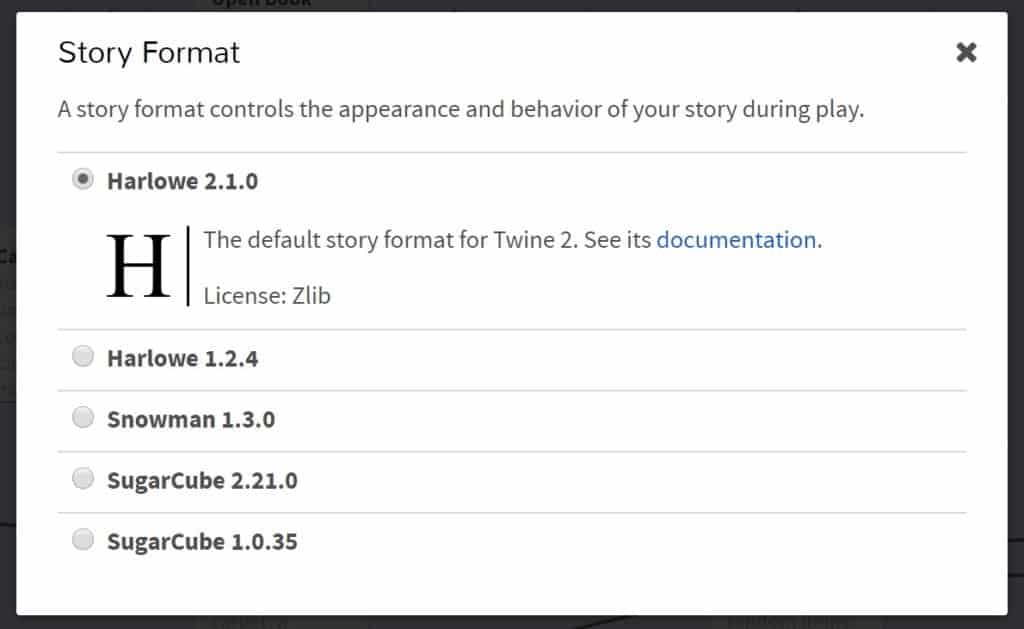
- Change the “Story Format” by selecting the arrow beside the story title. Select “Harlowe 2.1.0”.
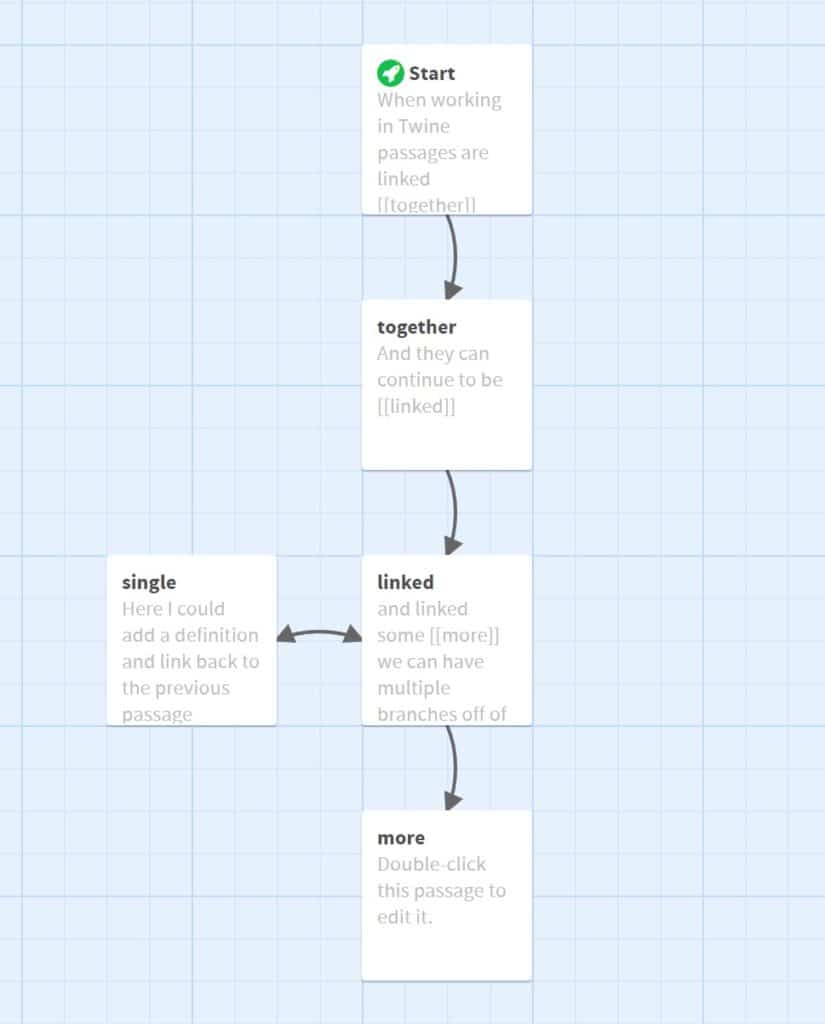
- Start typing your story and linking passages together. To link passages enclose the title in double square brackets [[ ]]
- To have the link one word and the title of the passage another, add a vertical line (pipe) in the brackets. In the example [[Next Room|Room 1]], “Next Room” is the link and “Room 1” is the passage.
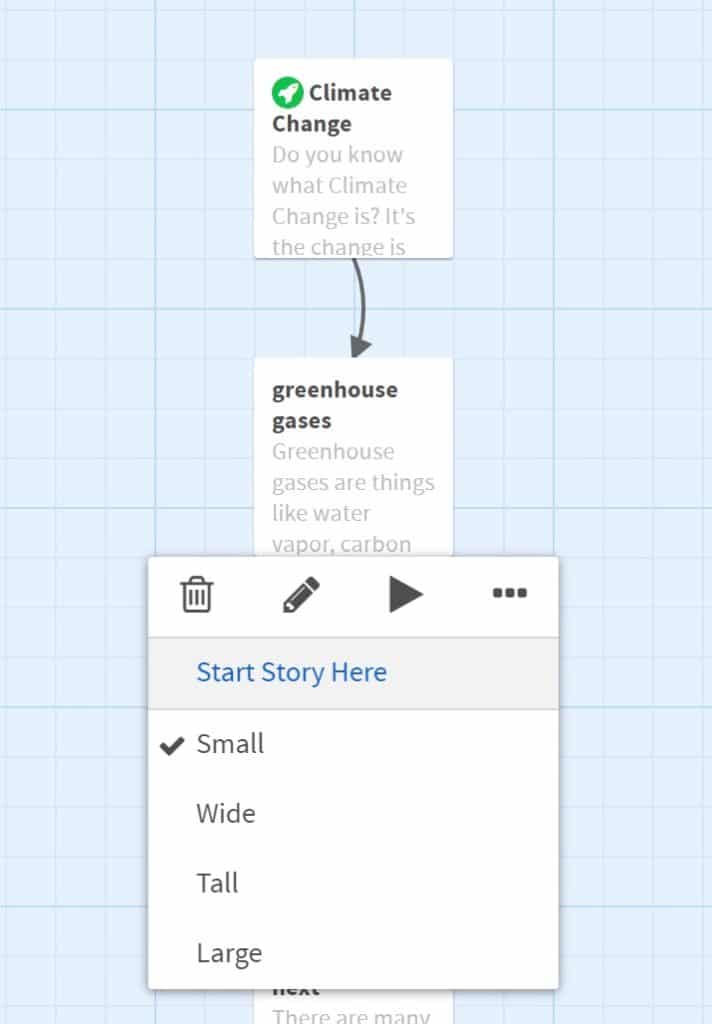
- The green rocket icon indicates the starting passage. To change this to another passage, hover over the passage, click the three dots (ellipsis) and choose “Start Story Here”.
- To create a two-way path between passages, put a pair of square brackets ([[ ]]) around the title of each passage. This is helpful for adding definitions or explanations to your passage.
Building Your Word Monster Game
Create your first passage that includes the game rules and link to the next passage where users begin playing. Decide what word you will use for your Word Monster game. The number of letters in the word determines the number of position variables needed. For each letter create a position variable set to “_” where players can input their guess. Create a variable for wrong guesses and set it to 0 to start. Curly brackets around the code prevents it from appearing in your passage. This project has a starting Word Monster image that changes as the player makes incorrect guesses.
{
(set: $position1 to "_")
(set: $position2 to "_")
(set: $position3 to "_")
(set: $position4 to "_")
(set: $position5 to "_")
(set: $wrong to 0)
(set: $image to '<img src="Word Monster1.jpg">')
}
The live macro allows our position variables and number of incorrect guesses to update continually. The following script executes what is in the brackets with the frequency it is set to. The print command displays the value of the variable. The br tag is used to add a line break in the passage.
(live: 0.5s)[
(print: $position1) (print: $position2) (print: $position3) (print: $position4) (print: $position5)<br>
Wrong guesses: (print: $wrong)
(if:$wrong is 1)[(set: $image to '<img src="WordMonster2.jpg">')]
(if:$wrong is 2)[(set: $image to '<img src="WordMonster3.jpg">')]
(if:$wrong is 3)[(set: $image to '<img src="WordMonster4.jpg">')]
(if:$wrong is 4)[(set: $image to '<img src="WordMonster5.jpg">')]
(if:$wrong is 5)[(set: $image to '<img src="WordMonster6.jpg">')]
(if: $wrong is 6)[(go-to: "Lose")]
(if: $position1 is "T" and $position2 is "W" and $position3 is "I" and $position4 is "N" and $position5 is "E")[(go-to: "Win")]
]
Line 1 sets the code to repeat every 0.5 seconds.
Line 2 displays the position variables which are blank to start (“_ _ _ _ _”), and change to show the correct letters as they are guessed.
Line 3 displays the number of incorrect guesses the player has made.
Lines 4-8 check the value of incorrect guesses and changes the picture to show the corresponding Word Monster image.
Line 9 is an if statement that sends the player to the “Lose” passage after six incorrect guesses.
Line 10 is an if statement that sends the player to the “Win” passage if all letters have been guessed correctly.
Now we need to display the alphabet below the mystery word that the player will choose from for their guesses. Each letter is a link that changes colour after it has been clicked. Letters will either have a hook that changes the incorrect variable by 1, or changes the position variable to reveal the letter in the mystery word.
Guess the letters
(link: "A")[(css: "color:red")[A](set: $wrong to it +1)]
(link: "B")[(css: "color:red")[B](set: $wrong to it +1)]
(link: "C")[(css: "color:red")[C](set: $wrong to it +1)]
(link: "D")[(css: "color:red")[D](set: $wrong to it +1)]
(link: "E")[(css: "color:red")[E](set: $position5 to "E")]
Line 2 creates a link for the letter A. The hook makes the link red after it is clicked, and adds 1 to our incorrect variable as it is not a letter in the mystery word.
Line 6 creates a link for the letter E. The hook again makes the letter red after it is clicked, and changes the variable for position 5 to E as it is the fifth letter of the mystery word.
Lastly we will create “Win” and “Lose” passages for the player will be sent to at the end of the game. The titles of these passages need to match what is programmed in our live macro so that the program knows where to send players.
Changing The Default Appearance
Once you have finished the layout and each path has an ending, you can change the appearance of your story. Click the arrow beside the story title and select “Edit Story Stylesheet”.
There are a variety of colours that can be used in CSS and HTML programming. W3Schools lists colours by name and hexidecimal value.
Note: the Harlowe Story Format uses hexadecimal codes for colours rather than the colour name (except for primary colours).
tw-story {
  background-color: blue;
}

tw-passage {
  color: #708090;
  font-family: Futura,Impact,Helvetica,sans-serif;
  font-size: 6vh; font-size: 6vw; font-size: 6vmin; line-height:normal;
}
The “tw” stands for Twine and is followed by what part the formatting will be applied to (story, passage, link, etc.).
Line 1 states that the formatting will be applied to the story.
Line 2 changes the background colour of all passages to blue.
Line 4 states that the formatting will be applied to the passage.
Line 5 sets the colour of the text in our passages using a hex code.
Line 6 sets the font.
Line 7 sets the font size; “vh” is the height, and “vw” is the width.
tw-link {
  color: #DA70D6;
}

tw-link:hover {
  color: #FFA500;
}
Line 1 edits the links in our passages.
Line 2 sets the colour of our links using a hex code.
Line 4 edits the links when they are hovered over.
Line 5 sets the colour of the link using a hex code.
Timer
To add a timer to a passage use the following code:
(set: $counter to 10)
You have (css: "color: red; font-size: 250%")[|amount>[$counter]] seconds left!
(live: 1s)[
(set: $counter to it - 1)
(if: $counter is 0)[(go-to: "Next Passage")]
(replace: ?amount)[$counter]
]
Line 1 sets the amount of time, in seconds, a player has to complete the game. Line 2 displays the number of seconds remaining in large, red numbers. Line 3 sets the frequency with which the code is repeated. Line 4 decreases the timer by 1 second. Line 5 sends the player to the passage indicated by the title in quotations when the counter gets to 0. Line 6 sets the time displayed as it decreases each second.
Conclusion
To end the module students can play each other’s Word Monster games and see if they can successfully determine the word. This can be done to review terminology before a test or throughout a unit.
Resources
- W3Schools has a list of HTML colours by name and hexidecimal value.
- Twine Wiki has links to specific actions such as adding a video.
- The Science Fiction and Fantasy Writers of America explains how to use variables in a Twine story.
- Twine Tutorial – Variables looks at the different types of variables in Twine and how to program them.
You might also like

Using Twine To Explore Environmental Preservation
 Grade 9 – Grade 12
In this lesson students will learn about the impact of climate change on the environment, and create an interactive story using Twine.
Mythology Using Twine
Grade 9 – Grade 12
Students will learn about mythology, legends and folktales while programming a Choose Your Own Adventure style story in Twine.

Introduction To Twine
Grade 9 – Grade 12
This lesson is geared towards students who want to learn code or make games. Students will be introduced to Twine with a working prototype.
