
Introduction
Have you ever looked at your math homework and thought it was beautiful? You might not think so, but mathematicians find beauty not only in doing math but also in geometric objects that have symmetry. Symmetry is a word from the Greek language which means “to have an agreement in dimensions and proportion”. Symmetry is found in many places such as nature, architecture, music, and mathematics. An object can have many types of symmetry but today we will focus on reflective or mirror symmetry to help us make digital art inspired by floral artwork/beadwork.
Vocabulary
- Transparency: how much light can pass through an image.
- Opacity: In graphic design, this refers to how transparent an image is. The more opacity in an image means that it will be less transparent.
- Ellipse: a geometric shape that looks like an oval or flattened circle.
- Motif: a decorative design or pattern.
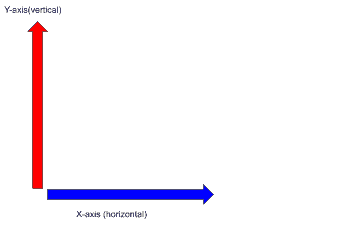
- Axis, plural axes: an imaginary line that is fixed for the purpose of measuring coordinates. In two-dimensional planes, there is a horizontal X-axis and a vertical Y-axis
- Symmetry: A 2D object is symmetrical when you can draw a line through it and both sides of the line look the same. In mathematics, it is an object that is unchanged when it undergoes transformations such as reflection, rotation, translation, and scaling.
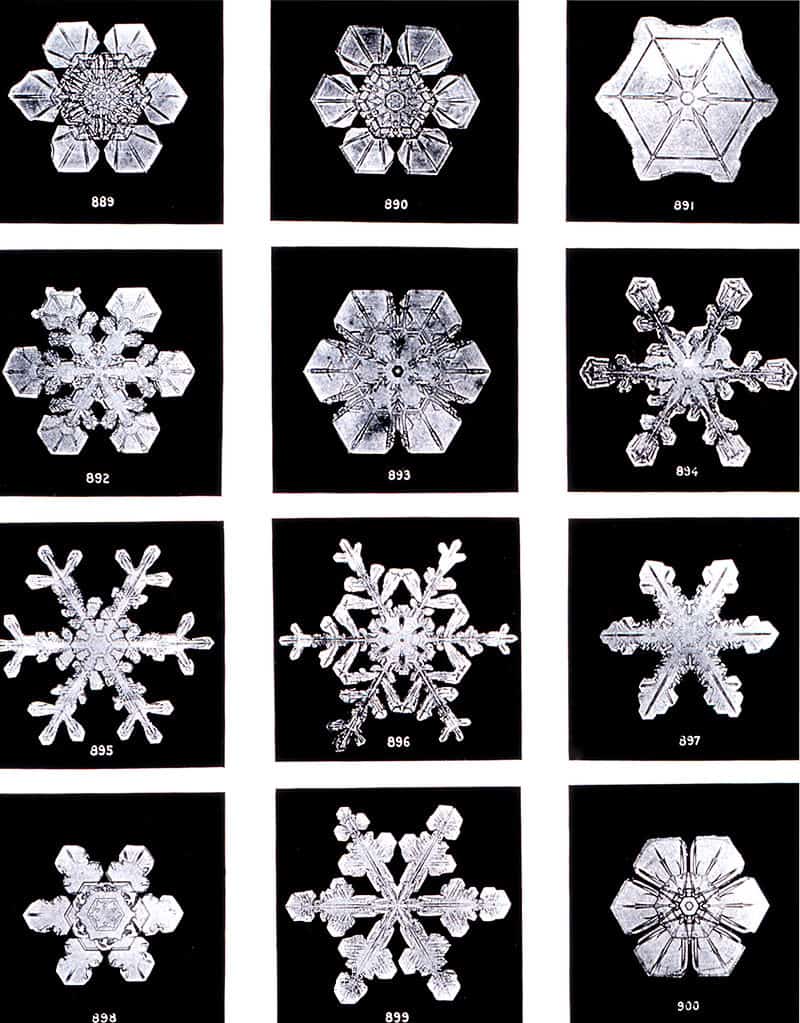
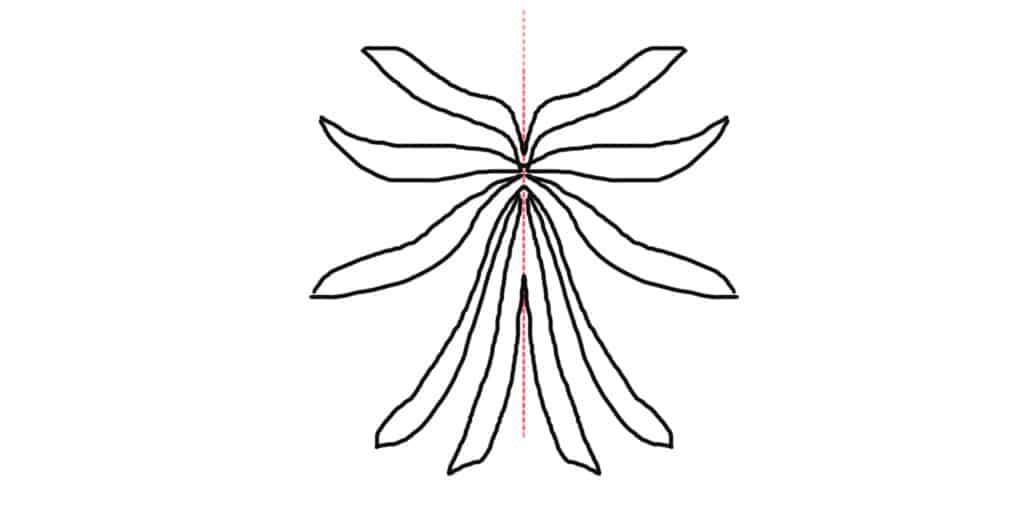
- Rotational/radial symmetry: An object or image has rotational symmetry when it looks the same after some rotation around a central axis.
These snowflakes are radially symmetrical on 6 axes
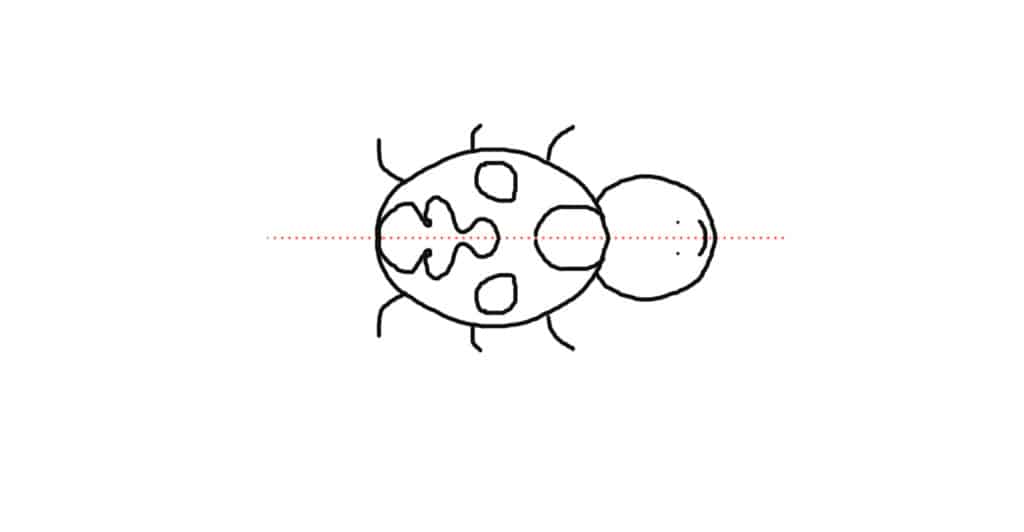
- Bilateral symmetry: These images show examples of bilateral symmetry because both halves of an image on each side of the axis are identical.
Symmetry in Nature
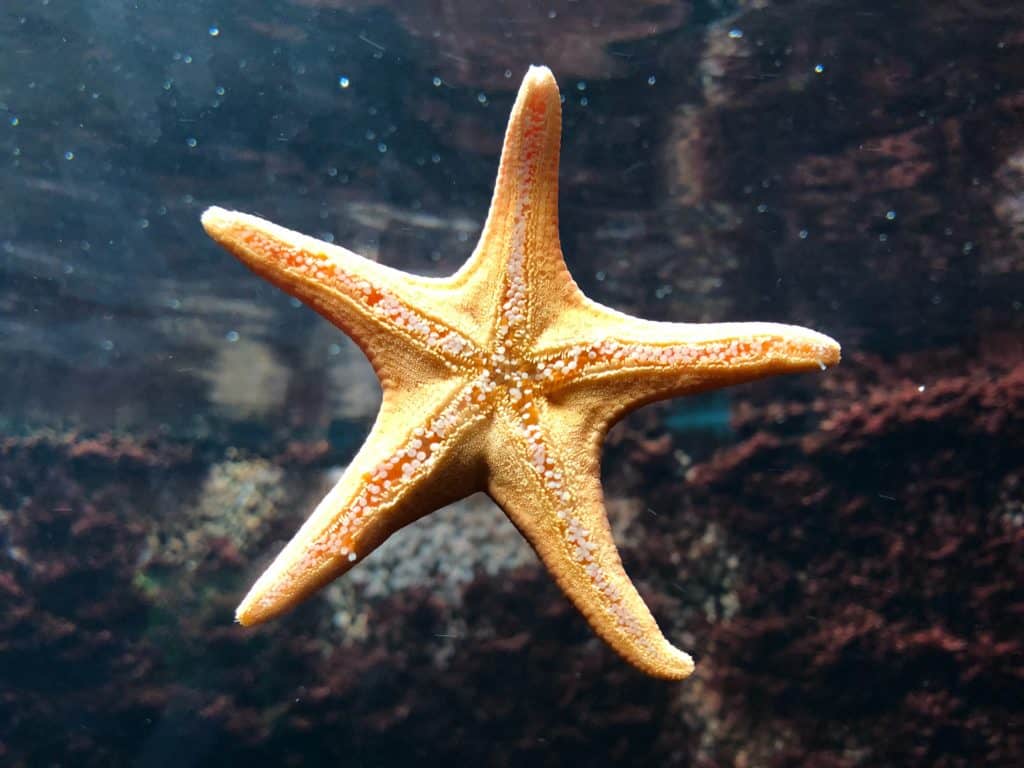
This starfish has radial symmetry
This tiger has bilateral symmetry in its fur pattern

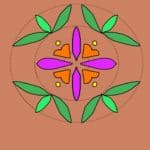
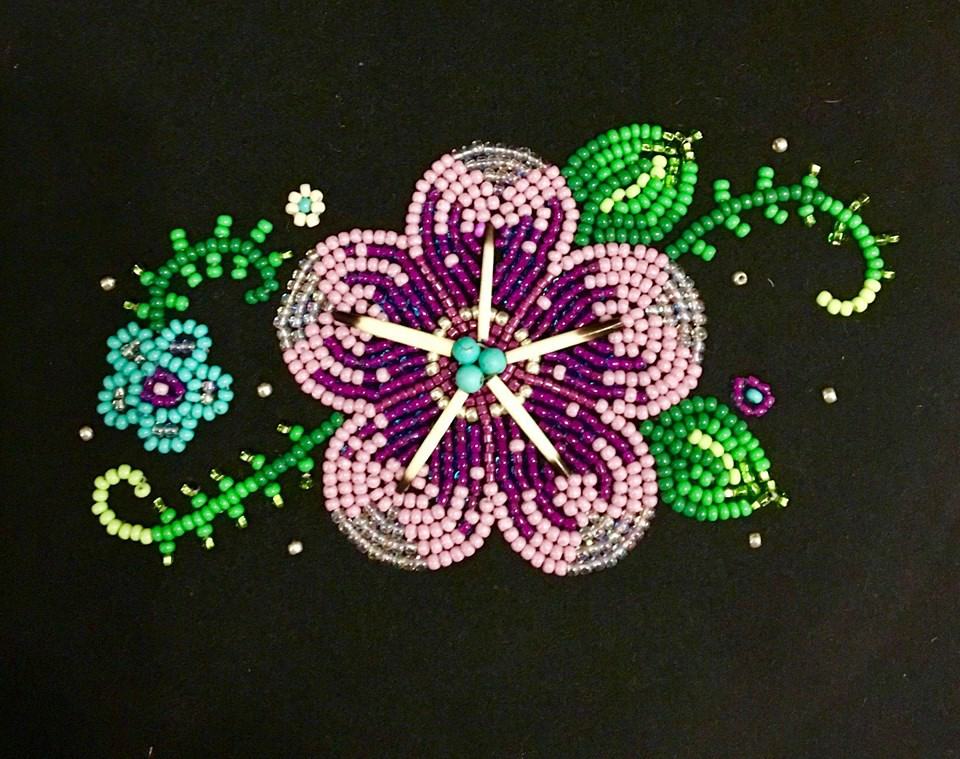
Symmetry in art

Materials
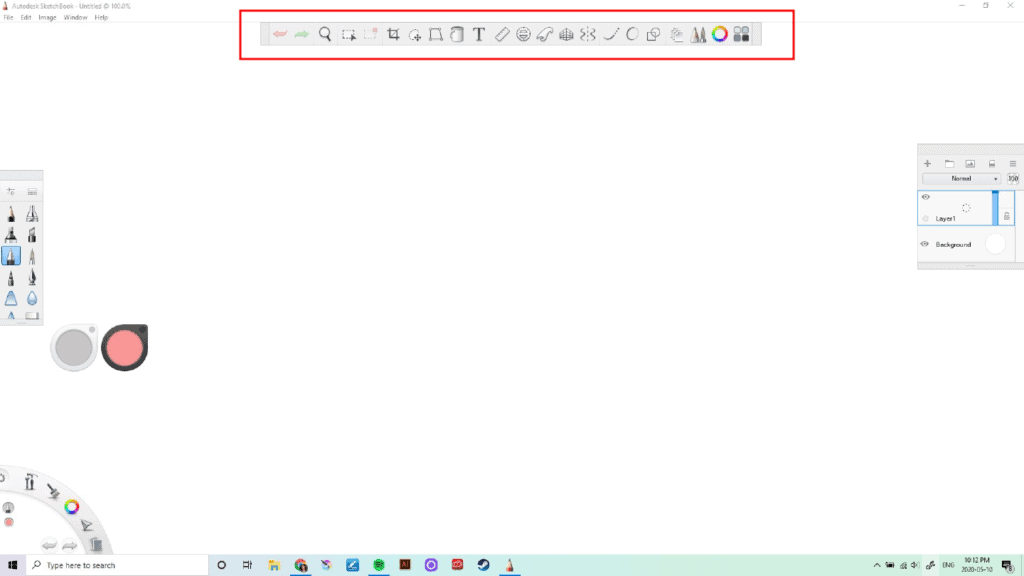
Download Autodesk SketchBook
Computer Activity
- Open up Autodesk Sketchbook and get to know the location of your tools by looking at your toolbar at the top of our screen.
- Choose a brush so that we can draw with dots. On the right side of our toolbar click on the Brush Palette button. This will open up a window with different brush options.


- Now we will set the size and opacity of our brush. Double click the ballpoint pen button to open up the brush properties window. Here you will find a basic tab and an advanced tab. In the basic tab, we have two sliders to adjust the size and opacity (darkness) of our brushstrokes. Bring the size slider to the maximum (4.0) and the opacity to 100%

- Now we will set the spacing of our brushstrokes. Click the Advanced tab and you will find different drop-down menus. Click Stamp and this will show a Spacing slider. Set it to 10.This will insert a space between the brushstrokes and give a dotted appearance.

- Select the color editor button on the toolbar. This will open up a color editor that will change the color of our brushstrokes. Select black.

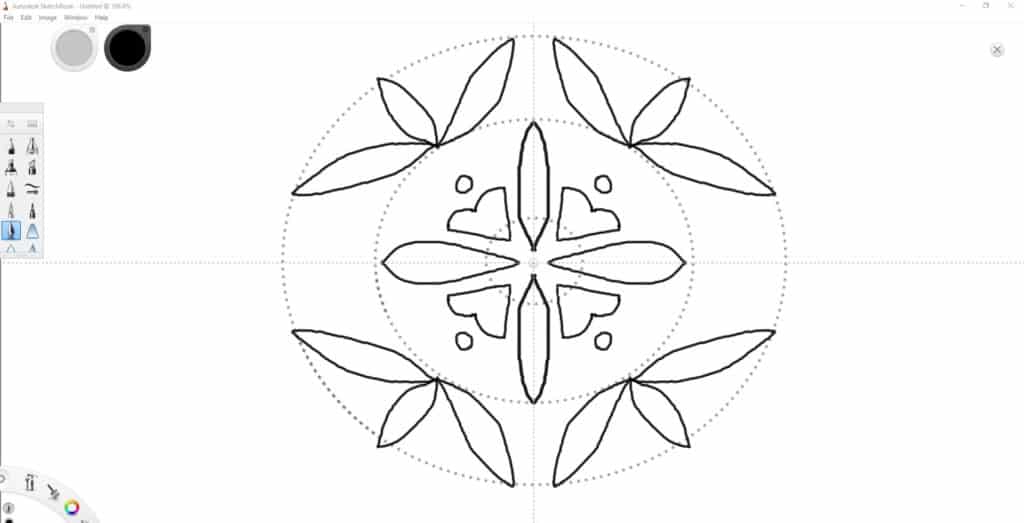
- We will use some guide tools to help us make circle shapes. These dotted circles will help us draw shapes and keep them proportional. On the toolbar select the ellipse tool. Slide it to the middle of the page by clicking the button in the center and drag it to the middle of the page. To draw a circle, click and hold the mouse button and drag it around the circle guide.


- Now we will make our circle guide bigger to draw a bigger circle on the outside. Click the left side button and drag the circle/the button to make a bigger circle.
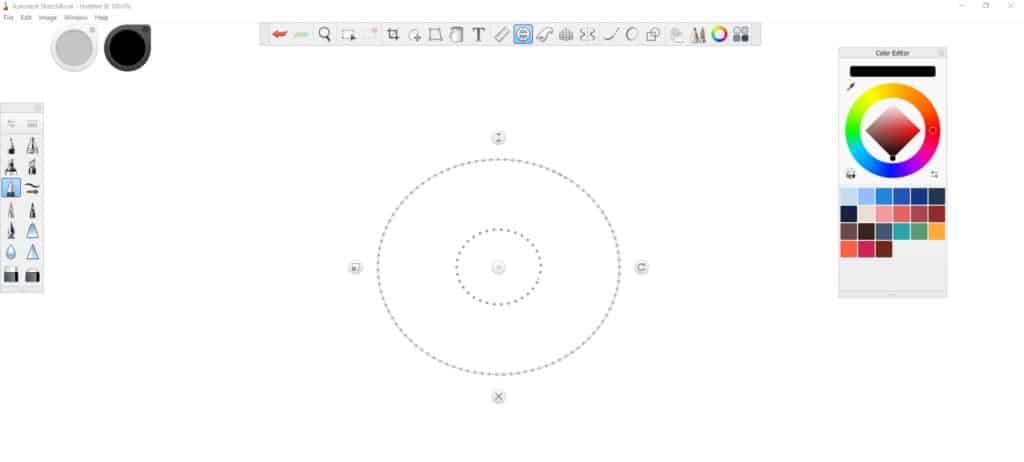
Repeat steps 6 & 7 to make two more circles so that you will have three circles in total. It should look like this:
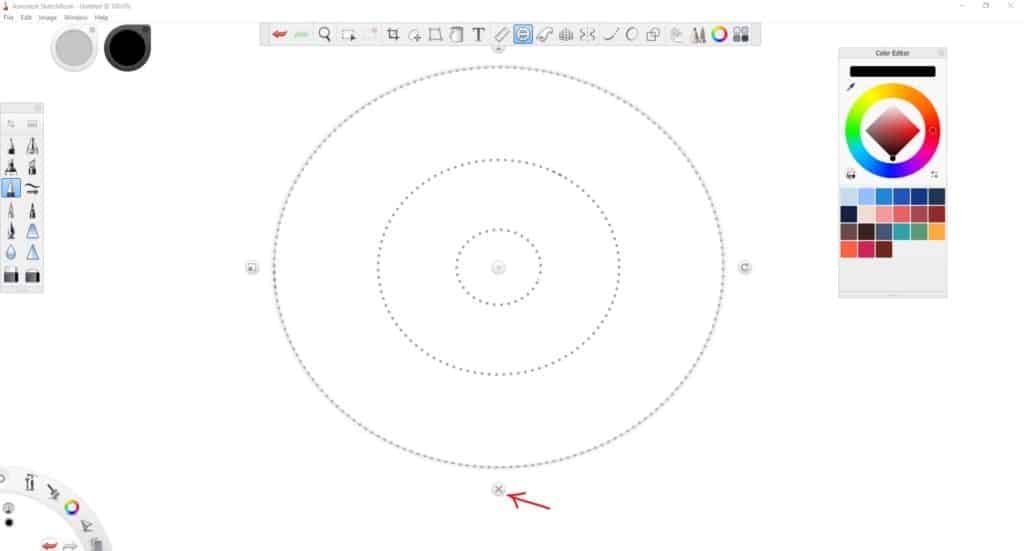
- Close the guide by clicking the X button at the bottom of the ellipse guide tool.
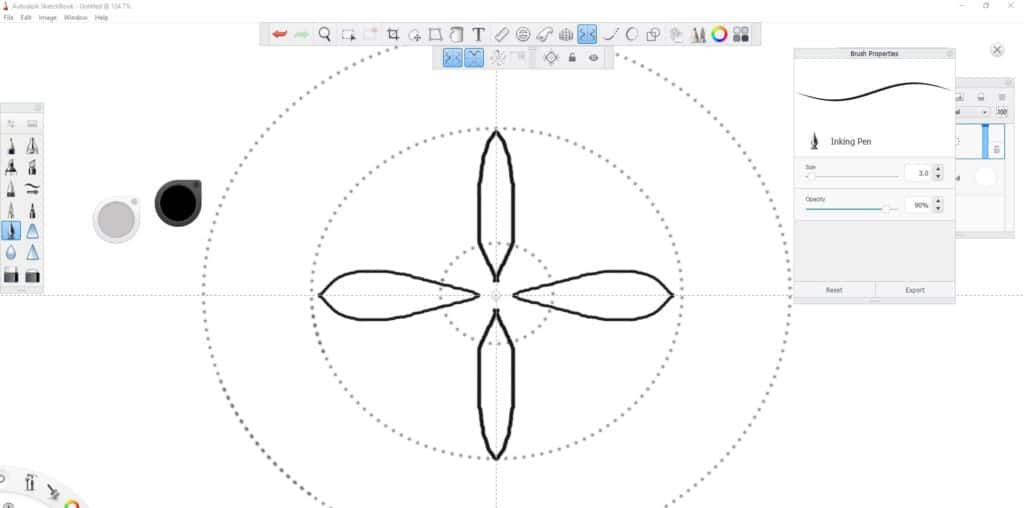
- Now we can start drawing some floral designs with the help of the symmetry tool in our toolbar. Select the symmetry button. This will open different options. We will select Symmetry Y and Symmetry X. This will show a dotted line on the x and y-axis with a button where they intersect. Click this button to drag our lines of symmetry to the center of our circles.

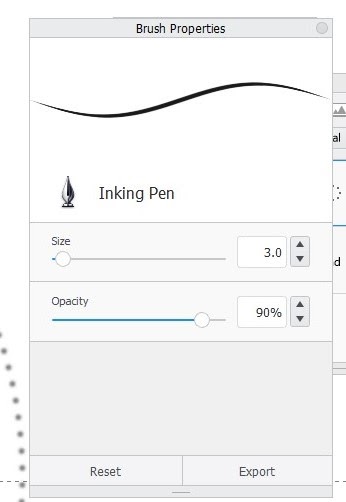
- Now we will use the inking pen to make the outline of our design. Select the inking pen in the brush options and double click to open the properties. Change the size to 3.0.

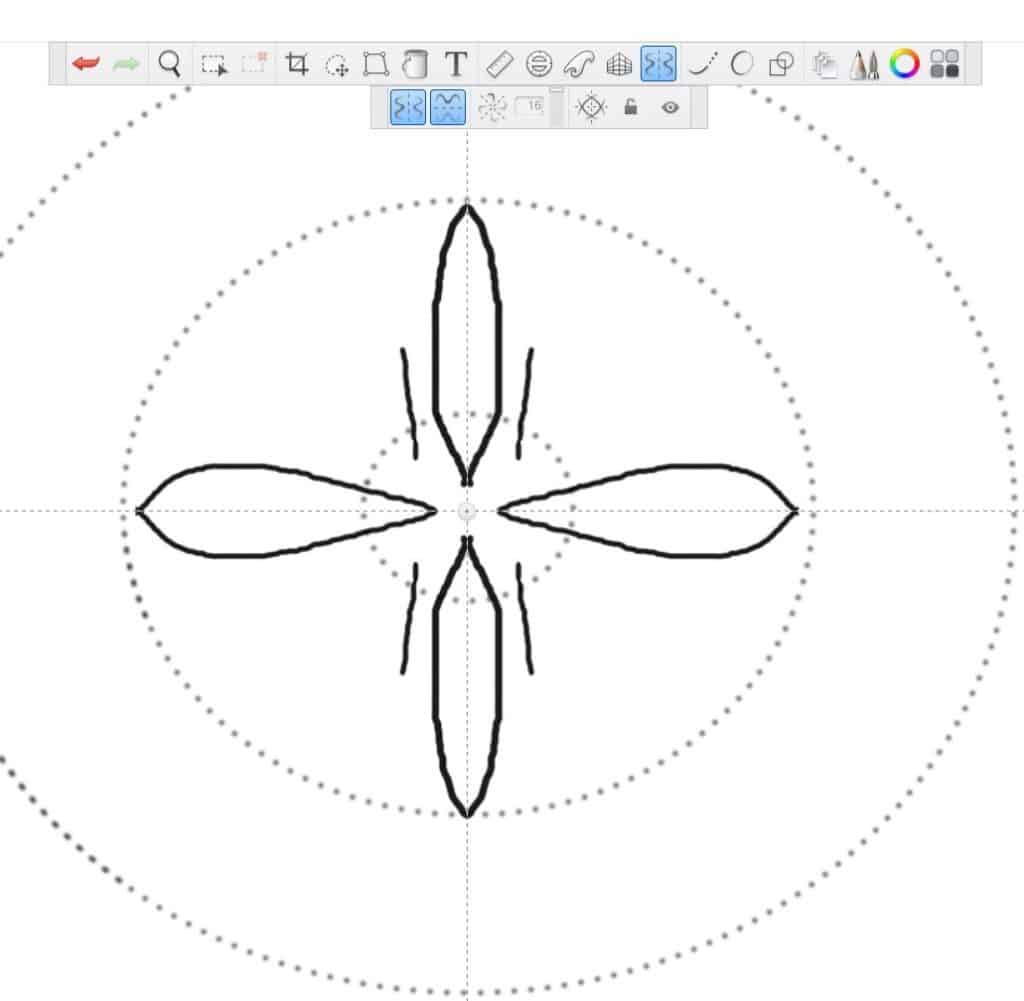
- Add some long petal shapes by left-clicking and dragging the mouse from the center of our first circle up until we reach the second.
Draw the same shape horizontally from left to right.
- Continue to add shapes to your design like this heart shape. Starting from the center circle, draw a straight line between the two petals.
Add a second line to make the base of the heart.
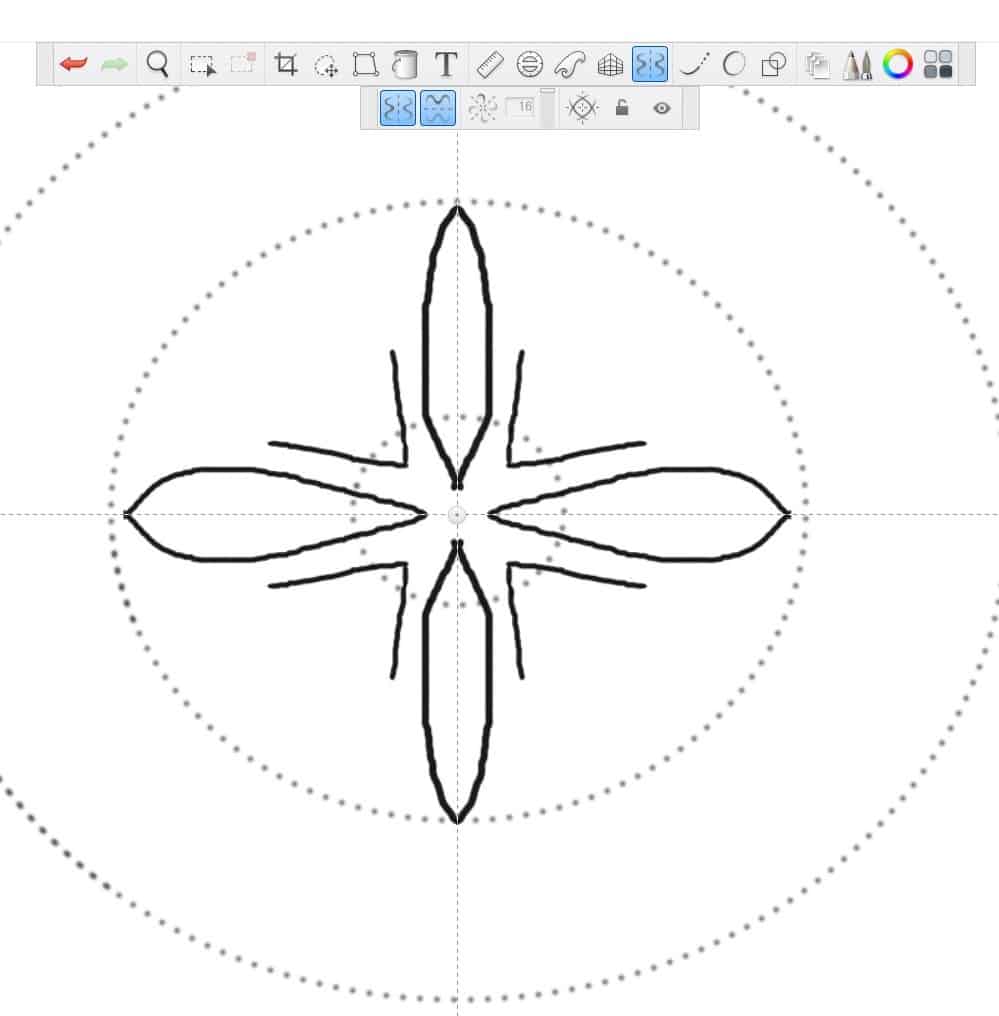
Draw the top of the heart using curved lines


Great, Let’s add some leaves. To rotate your page, hold the spacebar and click and drag to move the page. We will draw two slightly curved lines from the second circle to the third to make our first leaf.
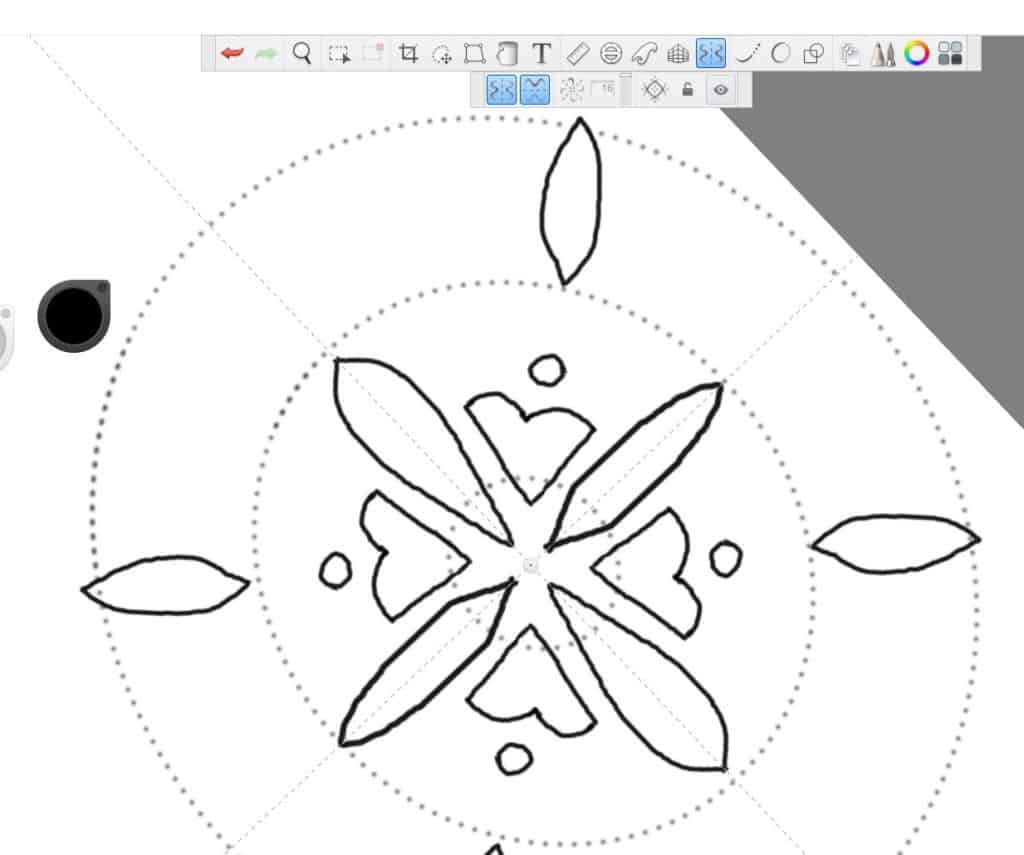
On each side of this first leaf, add a second leaf shape.

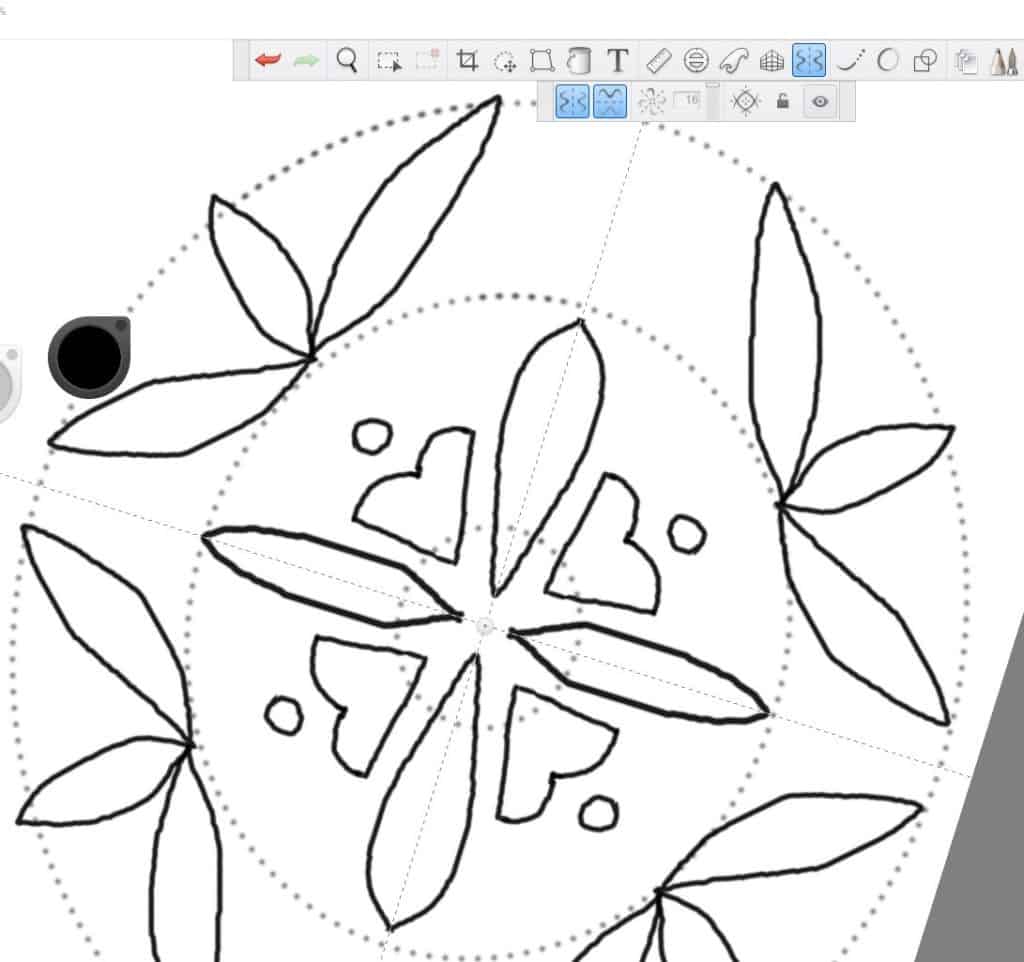
Here’s our finished outline!
- Now we will fill the shapes in our design using the flood fill tool. Select the bucket button on the toolbar and select the color of your choice using the color editor.

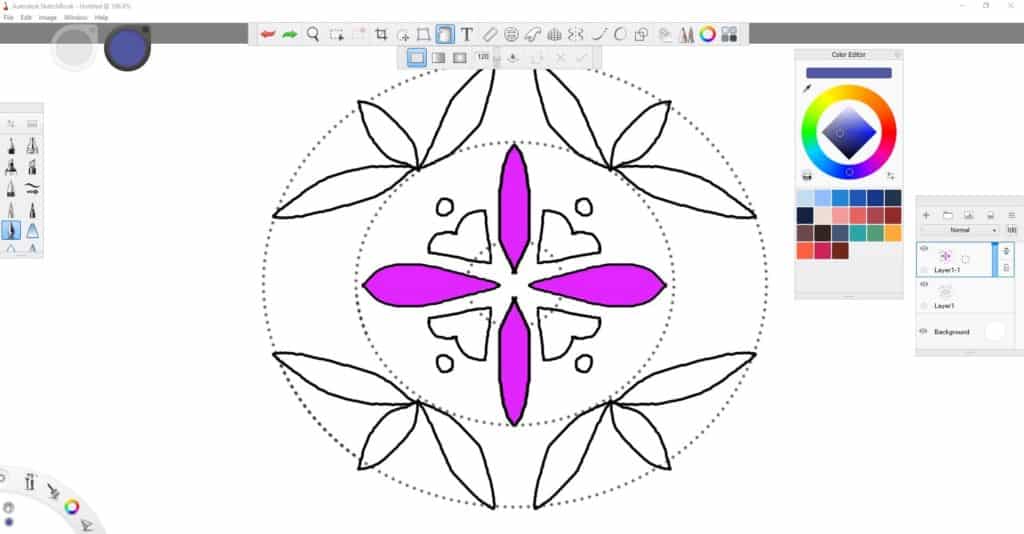
Go ahead and Fill the rest of your design with color!
If you make a mistake, press Ctrl-Z on your keyboard to undo or you can use the red arrow on your toolbar.
Conclusion
We want to see the awesome things you’re creating! Take a photo or video and share your work with us by emailing media@pinnguaq.com or tagging @pinnguaq on Facebook, Twitter, or Instagram. Don’t forget to include the hashtag #LearnWithPinnguaq!
Resources
Design inspiration by Eruoma Awashish
More about Traditional art
View our Creating Traditional Metis Dot Art lesson plan
Social Media Resources
- Quarantine art teacher Wendy MacNaughton free art classes for kids
- Free floral designs made by members of the beading community on instagram
You might also like
Blob-Art Challenge
The Blob-Art Challenge is a fun way to create unique characters and works of art from your imagination!
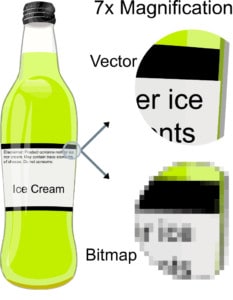
Working with vector graphics art in Scratch
In this tutorial, you will learn about the differences between vector graphics and raster graphics (also called bitmap graphics or pixel graphics) and how they are used in Scratch as well as how to use Inkscape to make vector-based art for use in Scratch.
Curve Lake Camp 2019: The Art of Digital Storytelling
 July 7, 2020
In August 2019 the Pinnguaq staff and some volunteers had the pleasure to work with youth members of Curve Lake First Nations, read about what happened!
