
Section Navigation

Introduction
Because video games are a visual medium, storyboards are a great way to map out the story being told through the video game. In this module students will have an opportunity to look at storyboards and consider the visual cues that can help tell a story.
Learning Goals
Each student will use a storyboard to share a story they create.
Vocabulary
POV(Point of View) - POV, or the point-of-view shot, is just that: it allows the audience to see what’s going on through a character’s eyes.
Master Shot - A term referring to a shot that runs for the length of a scene and shows all of the characters in view.
Zoom - Zooming is a movement of the camera lens as opposed to a movement of the camera itself. Zooming in means adjusting the lens to frame in closer on the subject, while zooming out means the opposite: adjusting the lens to take in more of the scene.
Track - A tracking shot is another way to follow subjects. This type of shot involves moving the entire camera from one place to another, and often follows a moving subject. Tracking can involve moving the camera with tracks or on a dolly, or it can be done handheld.
Guiding Questions:
- How does the selection of shots contribute to the overall feel of the scene?
- What kinds of shot (close up vs. wide shot) convey different meanings and emotions?
Curriculum Links
This module provides an opportunity to address curriculum expectations in the grade 7 -8 Arts, Language Arts and Media Studies and Character Education. Students will apply and share their ideas, personal perspectives and creative thoughts through the storyboard activity. In particular, students will have the opportunity to map a story out using storyboards and demonstrate how visual cues can help communicate feelings, ideas and understandings when telling a story.
Materials
- Scratch – Download Scratch
- Adobe AIR (required for Scratch to run) – Download Adobe AIR
- Storyboard templates – Template One, Template Two
- A film or a video game students will use to storyboard their favorite scene
Non-Computer Activity
Part A: View a Scene from your favourite video game or film
- Can you find a moment where changing shot types (wide shot, medium shot, close-up) help emphasis a story point?
- How does the staging and framing heighten the emotional impact of the scene?
Part B: Pick a scene or sequence from your favourite video game or film and create a storyboard for a brief scene (3-5 minutes in length)
- Sketch the frame for each shot in the scene selected. Indicate if it’s a wide shot, medium shot or close-up in the description.
Computer Activity
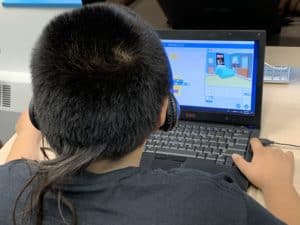
With Scratch, you can program your own interactive stories, games, and animations.
Storyboarding is a great introductory exercise to do with students before using Scratch to help plan and map out the story of your game or interactive story. This activity will guide you through that process.
First, choose some common guidelines for students to follow to create their interactive story or game. These might include a theme each interactive story or game should address (for instance, bullying, community, identity) and also where the story takes place. The following provides a framework for how you may choose to structure your story:
- Act 1 is the “beginning,” Have students answer Where, When, Who, What and Why of the story.
- Act 2 is the “middle,” where characters attempt to achieve goals and encounter conflict.
- Act 3 is the “end,” where the conflict is resolved and the protagonist’s true character is revealed.
Complete the Storyboard
Use one of the templates (template one, template two) to provide a cell structure in which students can illustrate their stories.
- Template 1: The simple storyboard
- Template 2: This template has additional cells for more characters or actions allowing for a more complex plot
- Template 3: This template gives students (and teachers) an opportunity to play with their story as they develop it and to learn to tell stories in different ways
Allow enough time for students to do rough and final drafts of their storyboards. When each student has completed their storyboard, have them exchange with their peers to share.
Conclusion
After students have been illustrated their storyboards, cut each cell out and rearrange the sequence of events. Ask students to line up the cells in different orders to consider how this changes the story before deciding on a final outcome. This process introduces the concept of experiential media and demonstrates the basics of story structure by revealing how the story can change depending on how events are sequenced.
Once storyboards are complete each student has a map to start their project in Scratch.
Resources
- Scolastic Articles – What Are Storyboards?
- Teach Wire – 10 of the Best Storyboard Templates And Creative Story Writing Resources
- The National Film Board Film Playlist – Unikkausivut: Sharing Our Stories
The National Film Board of Canada, in collaboration with the Inuit Relations Secretariat of Aboriginal Affairs and Northern Development Canada, the Government of Nunavut (Department of Education), has selected more than 60 films from its collection, the most important worldwide, that represent all four Canadian Inuit regions (Nunatsiavut, Nunavik, Nunavut and Inuvialuit), some available in Inuktitut.
Social Media Resources:
- Follow Edutopia on Twitter at @edutopia or visit www.edutopia.org for storyboard resources
- Pixar Animator video – walk students through the process of storyboarding for a film
You might also like

Math Storytelling Using Twine
 Grade 9 – Grade 12
Using students knowledge of probability and data management, students will create a math question children’s story using Twine!
Creating A Short Story Animation In Scratch
Grade 1 – Grade 3
Students will learn how to create a short folktale animation while also learning programming skills and build upon their knowledge of algorithms.

Comic Book Storytelling Using 7 Grandfather Teachings
Grade 3 – Grade 5
Art and storytelling is very important in Indigenous culture. In this lesson we combine the Seven Grandfather Teachings with digital comic book strips.
