Overview
The premise of this experiment is that you can use the sun to “cook” things. It’s a first step to understanding the concepts of renewable energy, and how the sun’s heat can be harnessed as a tool to help us achieve our goals, without using nonrenewable energy sources. It’s a hands-on activity designed for children aged 5-9.
Background Information
Some of us have heard the phrase “it’s so hot you could cook an egg on the sidewalk”. Some of us took that as fact, made a mess, and got in trouble for wasting a perfectly good egg. Because we didn’t know how to make a solar oven.
This experiment shows that the sun can indeed be used for culinary purposes. It’s a great way to introduce the concept of renewable energy, and a great way to ignite imagination on a STEAMy summer day.
Learning Outcomes
- Introduces the concept of renewable energy, specifically solar energy, as a resource we can use.
- Gross and fine motor skills.
- Enhances understanding of how solar energy can be harnessed for practical use.
- Encourages creativity and problem-solving through building and testing a solar oven
- Develops scientific inquiry and observation skills
- Promotes discussion on sustainability and the importance of using renewable energy sources
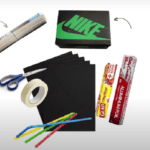
Materials
- Cardboard box (shoebox or pizza box)
- Aluminum foil
- Plastic wrap
- Black construction paper or poster board
- Scissors
- Tape
- Marshmallows, chocolate, etc (NO EGGS, we promised mom)
- Optional: Thermometer, food items for heating
Step by Step Instructions
Step 1 – The crazy idea
Did you know that you can cook without using fire or electricity?
That’s the sort of challenge that ignites curiosity in young minds, and it’s the perfect way to kick off this experiment. Explain that the sun gives us power all the time, all we need to do is harness it, and explain that this is a basic idea of how renewable energy works.
Step 2 – Build your oven
- Start by cutting off the top flaps of the cardboard box, leaving the bottom intact. This will serve as the base of the solar oven.
- On the inside of the box’s top panel, cover it entirely with aluminum foil. Secure the foil with tape to ensure it is smooth and reflective.
- Cut a piece of plastic wrap large enough to cover the opening of the box. Tape it securely around the edges to create a transparent window.
- Line the bottom of the box with black construction paper or poster board. This will absorb the sun’s heat and help transfer it to the food items.
- Optional: If you have a thermometer, place it inside the box to measure the temperature.
Step 3 – Get cookin’!
- Choose a sunny location outdoors and position the solar oven so that the plastic wrap window is facing the sun.
- Place the food items inside the box on the black construction paper. Make sure to choose items that can melt or cook quickly, such as marshmallows or small pieces of chocolate.
- Leave the solar oven in the sun for approximately 30 minutes to 1 hour, depending on the strength of the sun. Monitor the temperature inside the box if using a thermometer.
- After the allotted time, check the food items to see if they have melted or cooked. Discuss with the children how the solar oven uses the sun’s energy to generate heat and cook the food.
- Optional (joking – DO IT!): Enjoy the cooked or melted food items as a treat and discuss the importance of renewable energy and how solar energy can be harnessed for various purposes.
