
Introduction
Welcome to the Make your own game, Scratch Mix and Match Cards Challenge #2! There are three cards with each challenge. Your mission is to use the code from at least two of the featured cards to make your own game or story. I’ve put together some examples of how you might use these pieces of code. You can add in any other code that you want into your game and you can adapt the code on the cards to best fit your game or story. The yellow Events block you see at the beginning of some of the code cards is there only as an example. You can swap that Events block out for any other way that you want your code commands to begin. As you begin collecting the cards, you will also want to notice the colour coding of the code blocks in Scratch. Use the colour coding of the code blocks to help you find the code that you need to make your game or story.

Materials
- Challenge Version Throat Singing Game online Studio
- Say Hello Navigate the North starter project
- Say Hello Navigate the North completed project
- Scratch Offline
- Throat singing game
Play the game
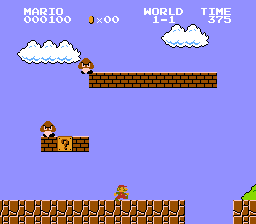
Play the game to find out the three cards for this challenge, or watch the video below to see Critter reveal the three cards
Instructions for the game: Use the L/R arrow keys and the space bar to make Critter move around the game and jump or bump into the numbers to reveal the cards for this challenge.
Scratch Mix & Match Challenge #2
Thanks so much to Craig MacArthur for his Power Shutoff
Use the code from at least two of the Mix & Match cards for this challenge
Add a Score
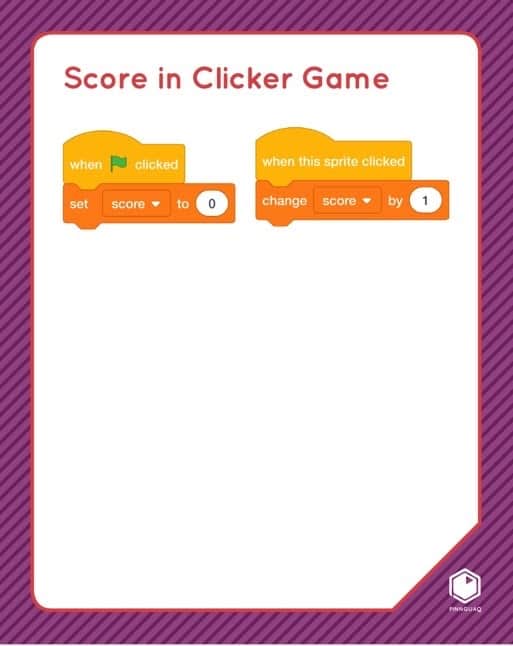
Just as when you play a sport or a board game with your friends, adding a score can make a game more exciting. It builds in motivation and a way to measure your success. You can even challenge yourself to better your score in single player games. Learn the basics of adding a score and other variables to your game or story with the code on this card. Variables are any information in your game or story that can change. For example, in the Magic Keys game that I’m working on, I’ve created a variable to keep track of and show how many keys have been caught. Once a certain number of keys have been caught, the scene switches to a new setting and a new level in the game. Watch the video tutorial or follow the steps below to learn more about the basics of adding a variable, like a score, to your game. Remember, you can adapt the code on this card in any way that best fits your game or story. Once you learn the basics of adding a score, check out Jonathan’s tutorial on making fancy script numbers for scores.
Thanks so much to Nat Keefe and BeatMower for sharing their track, I Feel Like Partying Right Now
Follow the instructions given by the Throat Singers and use the arrow keys and the spacebar to make the Throat Singers sing. To learn more about Throat Singing, and how to create this game, check out Talia’s throat singing in Scratch tutorial.
Score in a Clicker Game
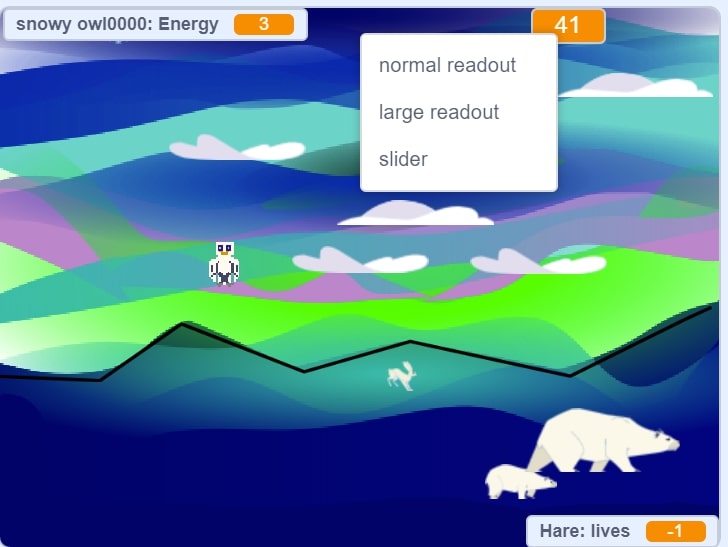
- Variables are information in a game or story that can be tracked and that can change during the game or story.
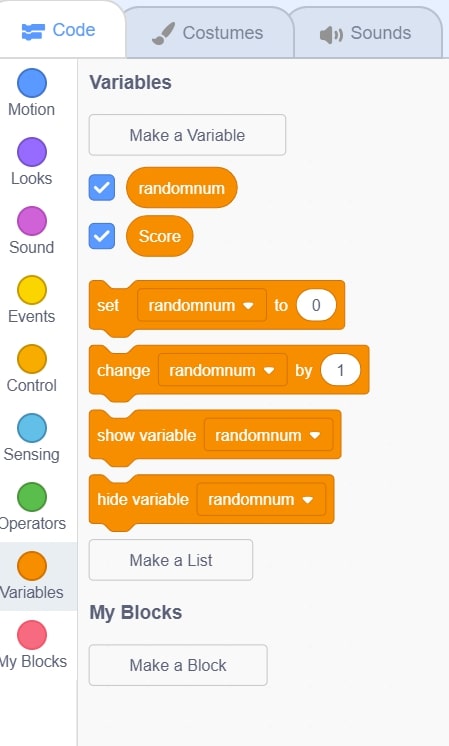
- Go to the deep orange Variables Blocks.
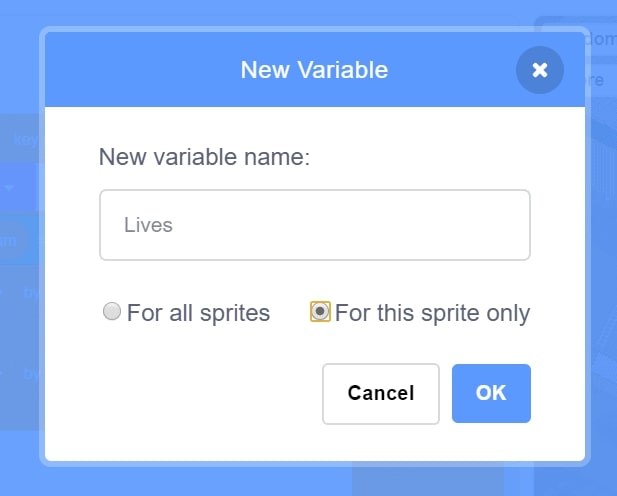
- Choose Make a variable and give it a name. (E.g. score, lives)
- Check the circle for all sprites or this sprite only
- A score might be for all sprites
- A variable that tracks the lives of one sprite would need the box, “for this sprite only” checked like in the image below.
- Check the box, show variable if you want that variable to be shown on the stage during your game. (Uncheck it if you don’t want that variable to show on your screen.) Note that if you choose to have the variable showing, you can drag the variable on the stage to where you want it. Right clicking on the Variable on the stage will open a menu of choices for how the Variable looks on the stage.
- Set up your Variable for the start of the game
- From the yellow Events blocks drag in When green flag clicked
- From the deep orange Variables, drag in set variable to 0
- Use the drop down arrow to see all the variables in the game and choose the one you made
- Change the 0 to be whatever number you need the variable to start the game (for a Score variable, that might be 0)
- Add code to trigger your variable to change. Does it change when a sprite is clicked like this challenge card? Does it change if another sprite is touching it? Maybe it gets bigger if it touches one sprite or maybe it decreases and the amount gets smaller if it touches another sprite (If the hare in the Owl Survival Challenge game is touched/caught by the owl, it loses a life. The owl eats the hare and gains a point for its energy variable.) Or, maybe you need to match a key pressed with the directions given like in the Throat Singing game with added challenge to score points?
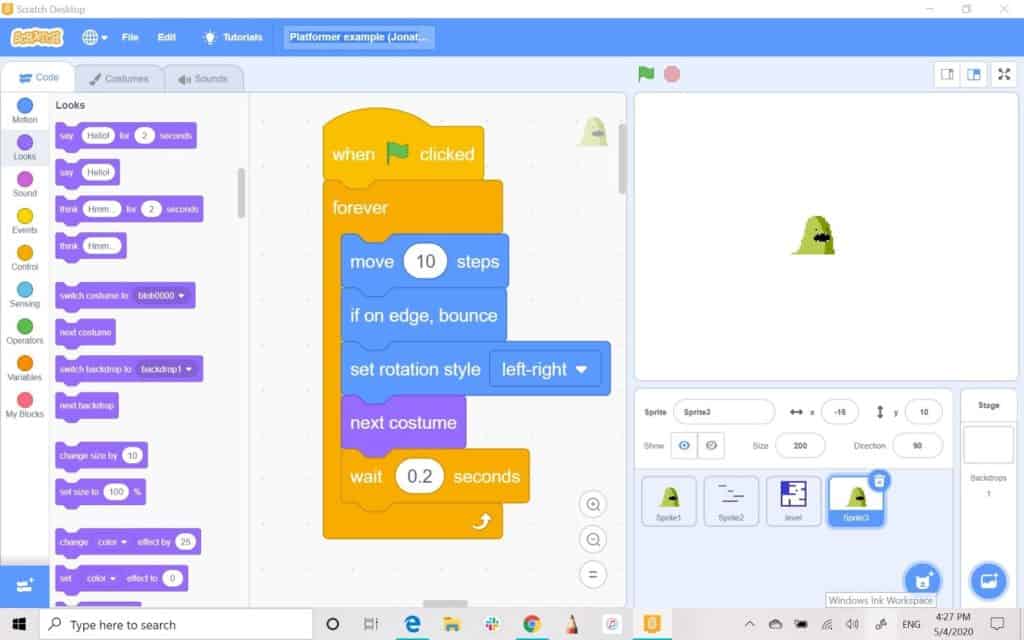
Move Up, Down, Left, Right — Add movement with the arrow keys
Using the Arrow keys (or any keys) is a great way to control the movement of your Sprites in your Scratch game or story. Controlling the movement of your sprites with the arrow keys lets the player of your game, the “user” of your game, drive or move the sprite and gives the player a lot of control over the movements. This makes it a great way to help a sprite navigate through an environment in a game like in this Lost in Space maze game or a map game. Maybe your sprite is following clues or moving along the X/Y grid to complete a challenge like in the X/Y Hide and Seek game. The code on this card shows you the basics for moving a sprite with pressing keys. If you are interested in learning more about this kind of player control in a game, check out Jonathan’s tutorial on Player Control in Scratch here.
Moving With Arrow Keys #1
- Add a sprite to your game or story that you wish the player to control its movement by pressing keys.
- From the yellow Events blocks, drag in four When (space) key pressed blocks. Open the drop down arrow in the middle of the blocks to choose four different keys to move your sprite.

- Remember that under every game or story in Scratch, even when you can’t see it, is the X/Y grid and this allows us to control movement and placement of sprites
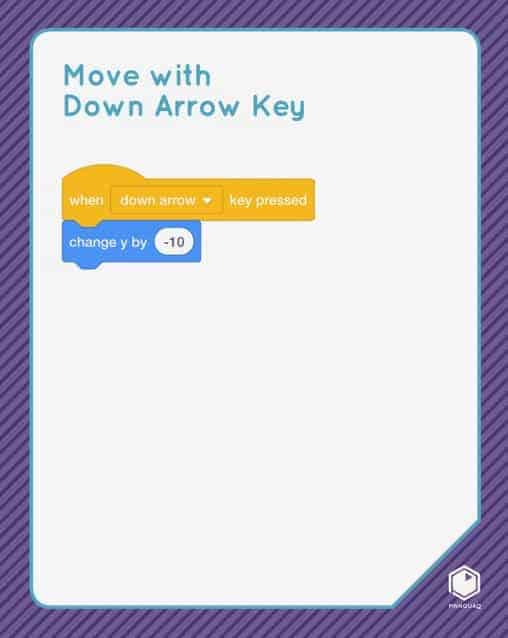
- From the blue Motion blocks, drag in two change x by (number) blocks and two change y by (number) blocks. Put one blue Motion block under each yellow Events block.
- You can put any positive number in the number spot for the key to tell the computer to make your sprite move up and to the right. (10)
- You can put any negative number in the number spot for the keys to tell the computer to make your sprite move down or to the left. (-10) Use the dash key to make the negative sign in front of the number.
- Click the green flag, press the keys and test!
Moving with Arrow Keys #2- If an Arrow Key is Pressed, Then
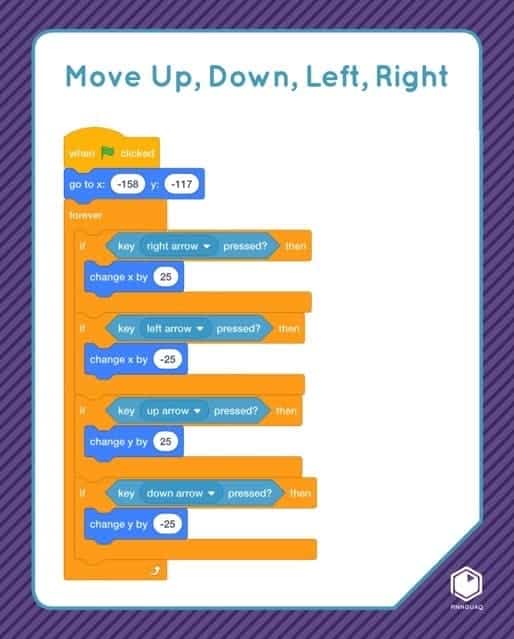
- Choose a yellow Events block fto start your code for this sprite in your game.
- To begin the game with your sprite in a starting position, drag your sprite to that spot then go to the blue Motion blocks and drag in go to x:(number) y:(number).
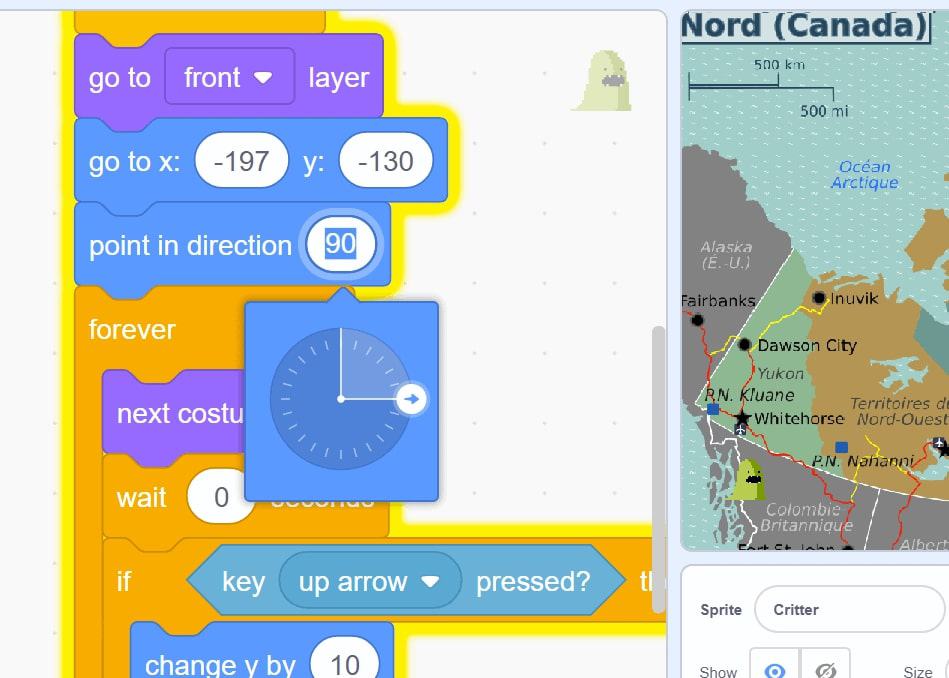
- Check the value numbers below the stage that show the location of that sprite to see if they match the values in the go to x:(number) y:(number) block.
- Point in direction block tells the sprite which way to face. You can put the value number into the bubble as in the image, showing, point in direction 90 degrees (Image B).
- Test! Click Stop, drag your sprite to a different spot then click on the Green Flag. Did your sprite return to the start position?
Set up your key controls
- From the orange Control blocks, drag in a Forever loop block and place it after the go to x:(number), y: (number) block. The Forever loop tells the computer to continue looping and running the code that it wraps around.
- From the orange Control blocks, drag four If then statements inside the Forever loop. Notice the shape of the hole inside the top bar of the If… then block. The If…then blocks tell the computer that if something happens in the game or story, then something should happen next.
- Now we need a Sensing block so that the computer can sense and report if a certain key has been pressed. Go to the light blue Sensing blocks and drag in, key (space) pressed? block and place it inside the matching shape in the orange If… then block. (You will notice the edges of the hole light up which tells you that that block will snap into that hole.) The light blue Sensing block, key (space) pressed? helps to tell the computer if that key has been pressed.
- Open the drop down menu in the middle of the light blue Sensing block and choose the key you want to control moving in an up direction
- You can choose any keys to make your sprite move.
- Go to the blue Motion blocks
- The blue Motion blocks, change y by (number) tell the sprite to move up or down. A positive number (10) tells the sprite to move in the up direction. A negative number (-10) tells the sprite to move in the downwards direction.
- Drag in one blue Motion block, change y by (number) and put it inside the opening of the If… then block for moving up. You need a positive number to tell the computer that your sprite should move in an upwards direction.
- Set up your next movement key in with another If then block.
- Drag in another light blue Sensing block for moving your sprite “down”and put it into the hole in the If… then block.
- Choose the Down Arrow key (or the key you choose for moving down) from the drop down menu.
- Put a negative number like this negative 10 (-10) into the number spot in the blue Motion change y by (number) block to tell the computer that the sprite should move down the stage.
- Now you need to set up left/right movements
- The blue Motion blocks, change x by (number) tell the sprite to move to the left or right, along the x axis. A positive number (10) tells the sprite to move to the right and a negative number (-10) tells the sprite to move to the left.
- Set up your next movement key with another next If… then block.
- Drag in another light blue Sensing block for moving your sprite to the right and put it into the hole in the If… then block.
- Choose the Right Arrow key (or another key that you choose) from the drop down menu.
- Put a positive number (10) into the number spot in the blue Motion change x by (number) block to tell the computer that the sprite should move to the right.
- Set up your next movement key with another next If… then block.
- Drag in another light blue Sensing block for moving your sprite to the left and put it into the hole in the If… then block.
- Choose the Left Arrow key (or another key that you choose) from the drop down menu.
- Put a negative number (-10) into the number spot in the blue Motion change x by (number) block to tell the computer that the sprite should move to the left.
Say Hello- Add Narration to your game or story
Many games include narration, a story that happens inside the game. The “say hello” block shows you how to add words on the screen to your game or story. This could be to show characters talking to each other, or talking to you, the player. It could be a way of adding instructions or clues to your game. It could be a way to show that you have won the game or lost. You can build in choices to your game or story using this code. Try to think of all of the different ways you could use this code.
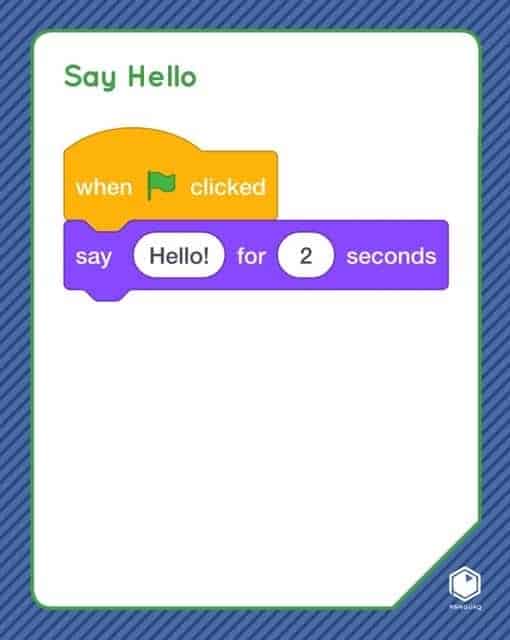
- Add the, say hello block from the Looks blocks into the code for your game or story wherever you want words to appear on the screen.
- You can type any words into the word bubble and any number into the value bubble for how many seconds the words will stay on the screen.
- Make sure you have the words on the screen long enough for people to read them. One word showing for 2 seconds is fine. If you have more words, you will want to change this to last a longer time like 3 to 5 seconds or even longer for full sentences.
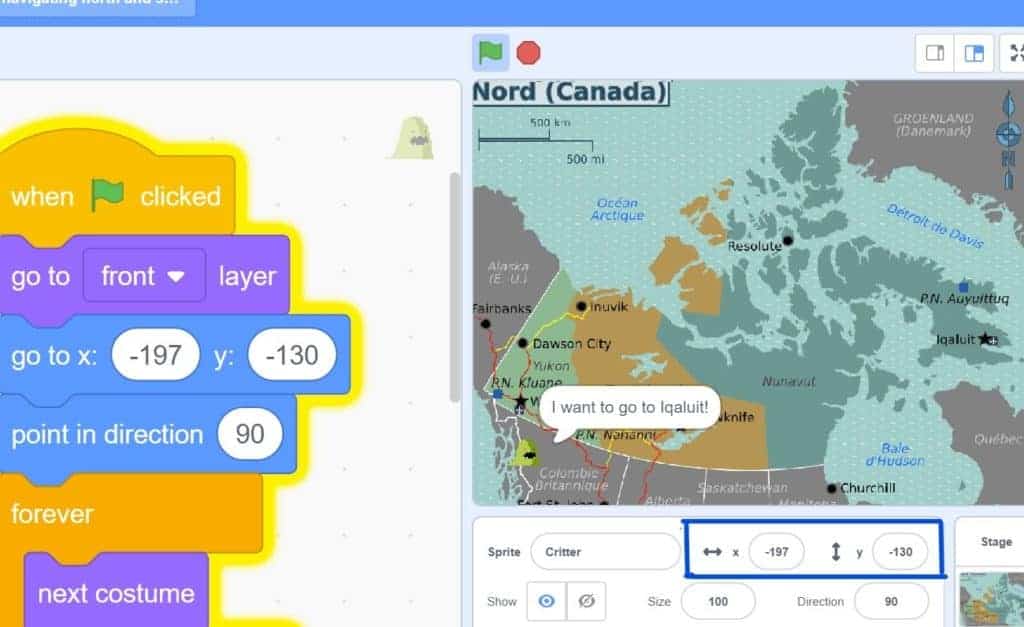
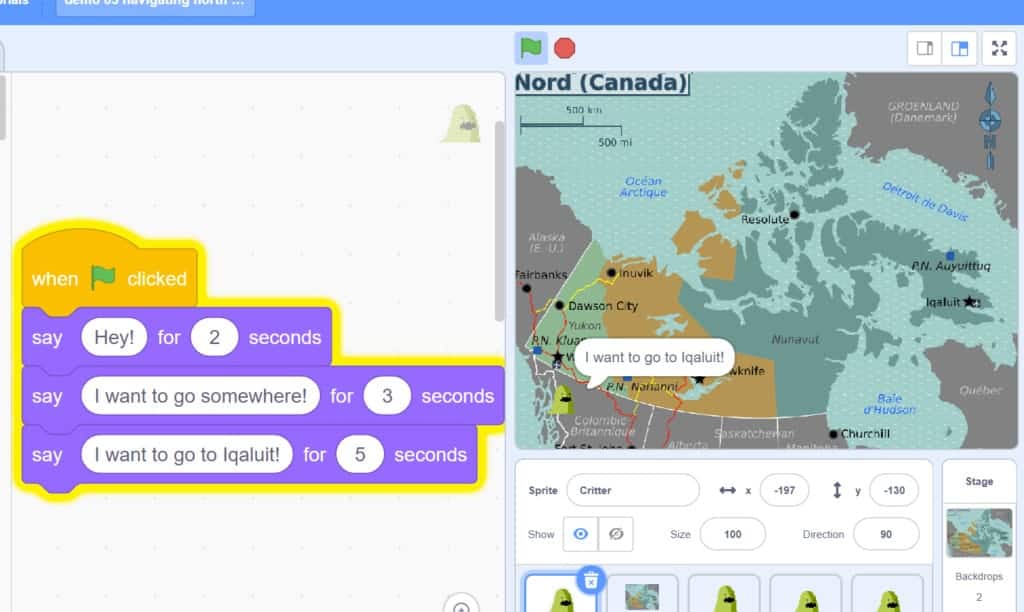
- You could break your text, the words you want to appear on the screen into shorter bits and use more than one Say hello block as I have in the Navigate North game.
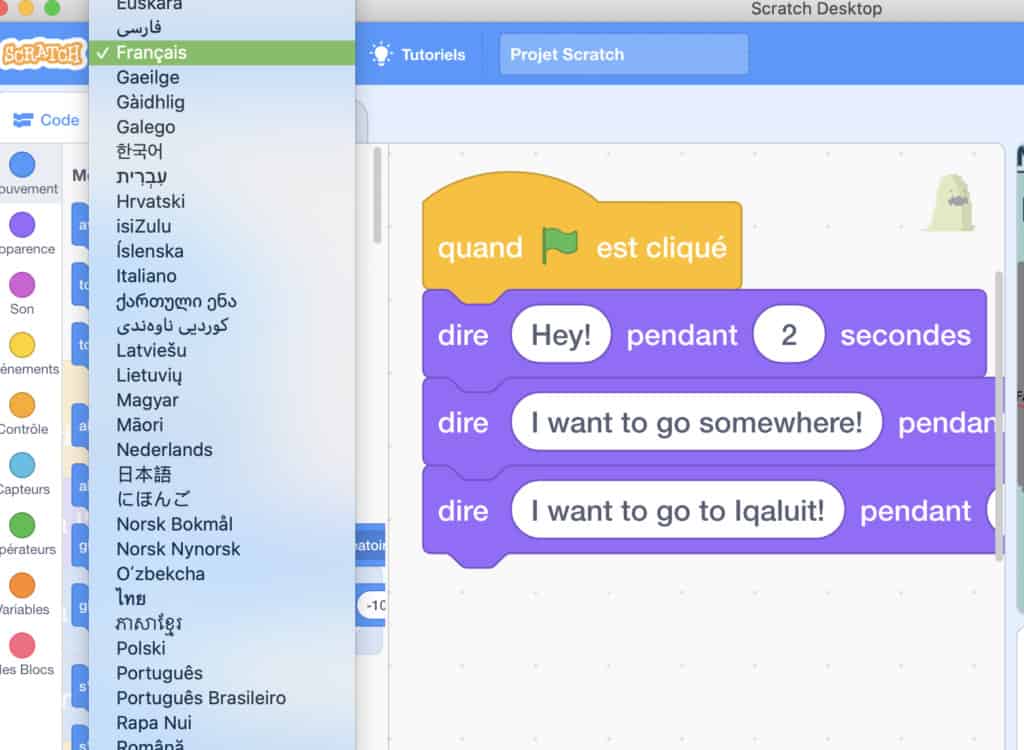
- You can change the language of Scratch blocks by clicking on the globe at the left in the top menu
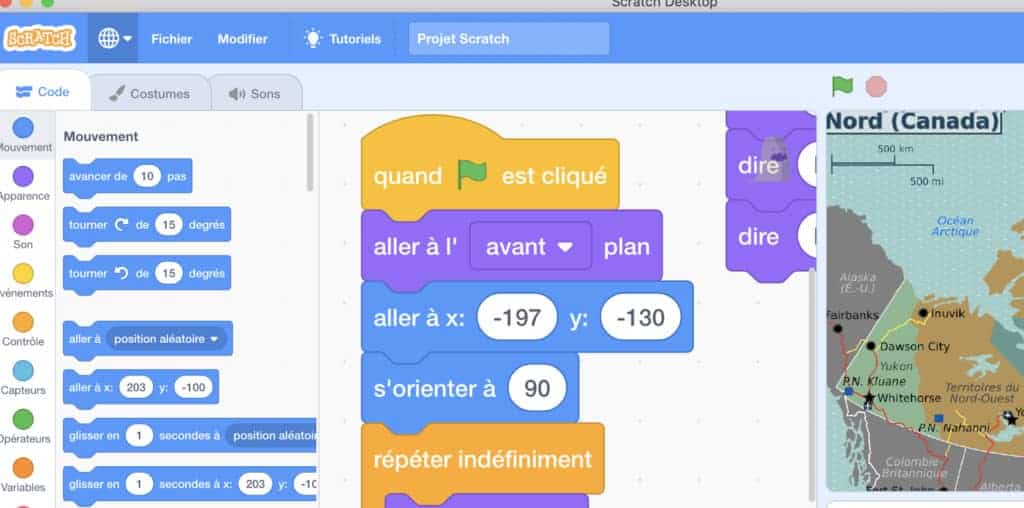
- Choose the language you want from the drop down menu
- Note this will not change the language of any words you have typed in (which is a really good thing if you look at the next point!)
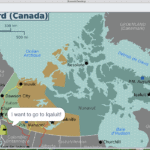
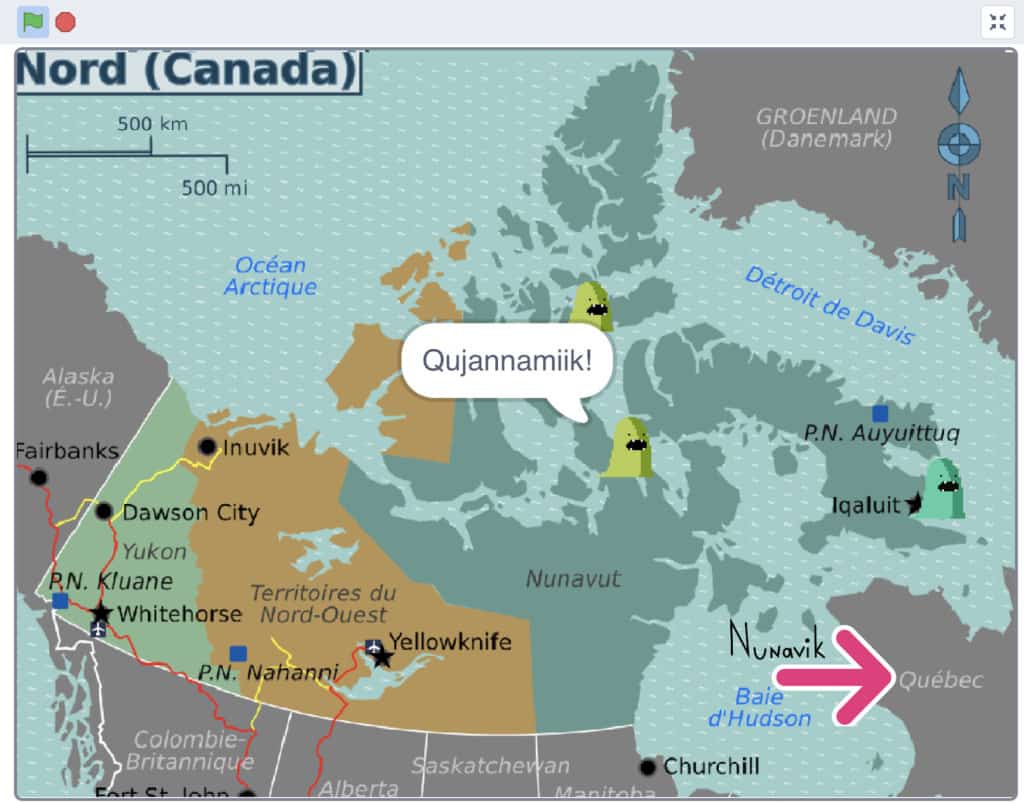
- Another really cool thing is that you can write in the text bubble in whatever language you want, including heritage languages that are not yet language options in Scratch. Here you can see Critter saying “thank you”, Qujannamiik! to his friend in Resolute.
Shaund / CC BY-SA Creative Commons Page
Visit the Pinnguaq online Scratch Mix and Match Challenge studio here or download the Starter Project from the Materials list and make your own Say hello, Navigate the North game. You can play the completed game, moving Critter around Northern Canada with the Arrow keys right here! If you save it to your computer, you can remix the completed game!
Download Activity
Conclusion
We want to see the awesome things you’re creating! Take a photo or video and share your work with us by emailing media@pinnguaq.com or tagging @pinnguaq on Facebook, Twitter, or Instagram. Don’t forget to include the hashtag #LearnWithPinnguaq! You can also upload your project to the Pinnguaq Studio.
For more fun activities, visit the Pinnguaq website’s learn section!
You might also like

Scratch Mix and Match Bonus Challenge: Move
 Grade 7 – Grade 12
Learn how to add basic movements to your game or story in Scratch with the Move card from the Scratch Mix and Match cards.
Working with clones in Scratch: Making fancy text
Middle – Grade 12
In this tutorial, learners will explore using clones to display text using a custom font in Scratch.
Fancy numbers in Scratch: Modifying and adapting existing code
Middle – Grade 12
In this tutorial, learners will analyse, modify and adapt code from a previous tutorial to display custom art for number-based readouts.
