
Introduction
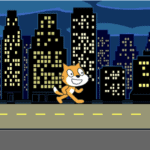
In this quick tutorial, I will show you a technique to create an iris wipe scene transition animation, pictured below:

This specific type of transition is called an iris wipe, since it looks like the closing or opening of an iris. As part of learning about this transition technique, you will also learn about some of Scratch’s limitations when it comes to sprite size and how they can be overcome to achieve the desired effect.
Transitions, originally found in live theater productions and in film, are used between different scenes to create a sense of connection or cohesion while still creating a separation for a scene’s boundaries (i.e. a scene’s start and end).
In video games, scene transitions serve much the same purpose, such as helping to signal the end of a level or a chapter of a game; helping to introduce the player to a new area or level; or helping to create connections between game play and game settings elements like the “start”, “game options/settings”, or “save/load” menus. While transitions might not be strictly necessary, they help to create a better user experience by making a piece of media—be it theater, film, or a video game—easier to understand.
Vocabulary
- Iris wipe (film editing)
- Originally found in film, but now also in video games, a type of transition where a circle either opens from a point or closes to a point.
Materials
- Scene Transitions (starter project)
- Scene Transitions (completed project)
Computer Activity
Starter Project
The starter project for this tutorial has a sprite named “Transition” that has three costumes:
1. The “Solid Black” costume, which is a solid black rectangle that is the size of the stage.
2. The “Iris” costume, which is a solid black rectangle that is the size of the stage and also has a small circle cut out from the middle of it.
3. The “Tiny Hack” costume, which is a small (2×2), empty costume that I created by going to “Choose a costume → Paint”. This costume can be any small sprite and it doesn’t matter what it looks like since it will only be used for its small size.
Changing sprite size
I will be using the “Iris” costume to create the iris wipe effect by changing the size of the “Transition” sprite. There are two blocks to change sprite size in Scratch: the “Change size by” block and the “Set size to” block, both in the “Looks” block category.

Like the other set/change blocks (e.g. “Set color effect to”/”Change color effect by”, “Set variable to”/”Change variable by”), these blocks allow you to either directly set a value or to change a value by a given amount. In this case, the value that is being set or changed is the “Size” property of a sprite, found in the sprite pane, beneath the stage.
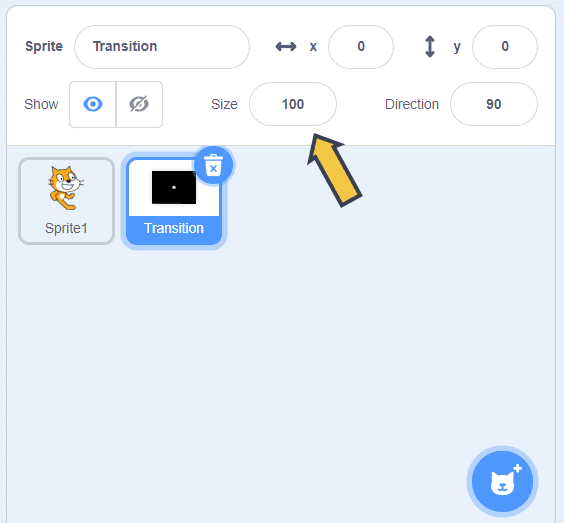
The “Size” property describes a sprite’s size as a percent, with 100 being normal/full size. Scratch imposes a few rules on how big or small a sprite is allowed to be:
1. No dimension of a sprite can be made larger than 150% of the corresponding stage dimension when using the set/change size blocks. This means that you can’t make a sprite wider than 720 pixels or taller than 540 pixels using those blocks.
2. The size limitation on how big a sprite can be is determined based on the current costume of a sprite. For example, for a sprite that is using a costume that is 10 pixels by 10 pixels, the largest size would be:
540 (the smaller dimension of the stage) ÷ 10 (the height of the costume) ⨉ 100 (to convert to percent) = 5400%. You can check the size of a sprite’s costume using the costumes tab:

3. 1% is the smallest valid size. Anything below 1%, such as decimal numbers, zero, or negative numbers, will just be changed to 1.
4. Changing a sprite’s costume doesn’t automatically change the size property of that sprite.
Rule #4 means that I can overcome the size limitations of rules #1 and #2 if I switch to a smaller costume (e.g. the “Tiny Hack” costume) to set and change the sprite size, since changing back to the larger costume won’t reset the size.
Sprite size algorithm
Your sprite scaling animation code probably normally looks something like this:
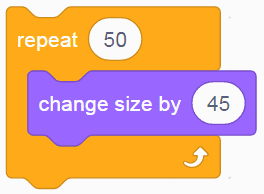
If you’re not trying to exceed the dimensions that are allowed by Scratch, that code would work perfectly to give you a sprite that gradually increases in size. To exceed the limitations that Scratch sets, however, your code will need to look a little different. I will start by detailing the algorithm that you need to follow, based on the rules and workaround described above:
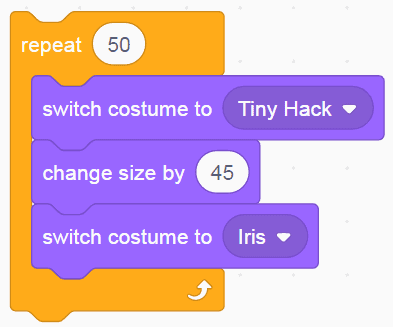
- Change to a small costume
- Change size by 45
- Change to a large costume
This makes your code only a little bit more complex, with the addition of two “Switch costume to” blocks from the “Looks” category. Try doing it yourself before looking at how I did it below:
Getting the transition code ready for use
With that scaling algorithm in mind, you need only to add a few more blocks to make this usable in your project:
- Set/reset the sprite size before starting the transition.
- Bring this sprite to the front layer so that it’ll be on top of everything else.
- Start from the “Solid Black” costume.
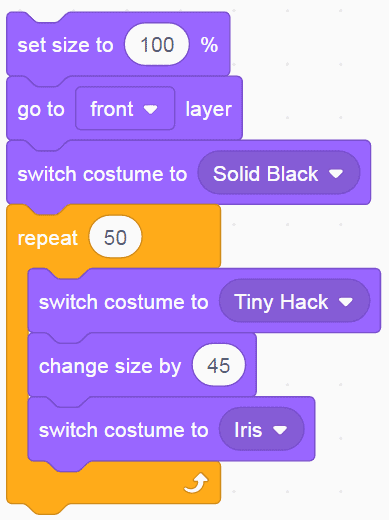
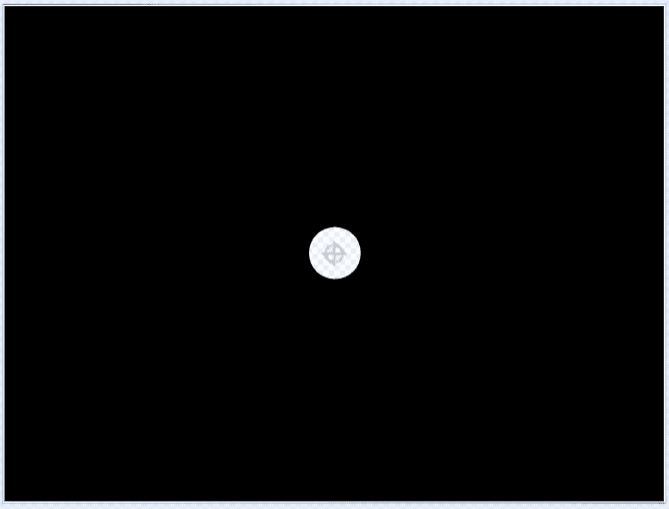
Once you have built the code above, click on it to test it out. It should start from a black screen that opens up using a circle. I will refer to this as an “iris wipe in” since it brings in a new scene.
Reversing the transition
Since most of the work of figuring out how to do this transition is complete, making the opposite transition—a shrinking circle that ends in a black screen, i.e. an “iris wipe out”—should be fairly straightforward. I want you to give it a shot, before looking at the solution below. Start by copying the code that you have for your “iris wipe in” since the principle remains the same.
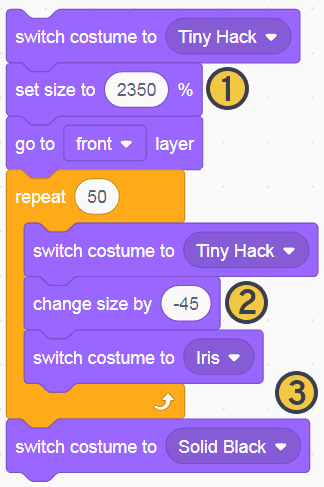
As you can see, the code is indeed very similar, with a few notable changes:
- I had to switch to the “Tiny Hack” costume to set up the initial size, which is far larger than the “Iris” costume is allowed to be. This number may not be exactly the same for you, since it depends on what number you’re using for the “Change size by” block. A smaller “Change size by” value would mean that you would use a smaller initial size.
- The “Change size by” value is negative, since we’re making a big sprite smaller to create the effect of a shrinking circle/iris.
- After the shrinking is complete, the costume is switched to the solid black rectangle costume. This is an important detail since otherwise, there would be a small hole remaining.
Conclusion
Having worked out both the “wipe in” and “wipe out” code blocks, you need only to figure out where you want to include these into your Scratch project. How else might you use this transition? And what sorts of other transitions can you think of? What other challenges might other transitions present? For an example of how I’ve used this transition, check out my “Animal Valley: Extreme Bass Fishing” game, Where I use this transition to switch from the starting instructions to the actual game itself after the player clicks:
We want to see the awesome things you’re creating! Take a photo or video and share your work with us by emailing media@pinnguaq.com or tagging @pinnguaq on Facebook, Twitter, or Instagram. Don’t forget to include the hashtag #LearnWithPinnguaq! You can also upload your project to the Pinnguaq Studio.
Resources
- Scratch wiki – “Overriding the Costume Size Limit”
You might also like
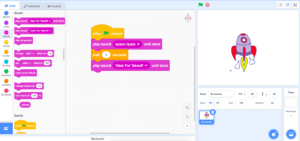
Scratch Basics Episode 4: Adding Sound
In this series, the basics of Scratch will be introduced to provide learners with the foundational skills required to begin creating in Scratch.
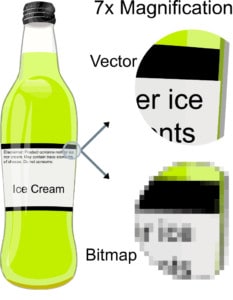
Working with vector graphics art in Scratch
In this tutorial, you will learn about the differences between vector graphics and raster graphics (also called bitmap graphics or pixel graphics) and how they are used in Scratch as well as how to use Inkscape to make vector-based art for use in Scratch.

Scratch Basics Series
In this series, the basics of Scratch will be introduced to provide learners with the foundational skills required to begin creating in Scratch.
