Section Navigation

Introduction
Most of the sounds in a film or video game are made from sounds that were originally recorded with a microphone and put into a sound library. This module presents a basic approach for finding and importing audio from a sound library, and making two different kinds of sound effects by combining layers of separate audio files.
In the previous module we learned some of the basic features of Reaper. This module applies that knowledge by importing sounds from a library and editing them to suit our project goals.
Learning Goals
By the end of this module students will be more comfortable with basic audio editing in Reaper.
Vocabulary
Ambience/BG - Background and quiet sounds that set a mood or suggest the character of a particular place.
Audio Interface - A device which allows for recording and playback of audio signals through various input and outputs.
Cloth - The phase of foley production where the foley artist performs with different materials to recreate the sound of clothing.
Coverage - A subjective level of completeness of a full soundscape.
Dialogue - The sound component of a production that involves voices.
Field Recording - Recording audio outside of a studio setting.
Foley - The art of recreating the sounds of the human body and other incidental sound effects by performing them in sync with video footage.
Foley Stage - The art of recreating the sounds of the human body and other incidental sound effects by performing them in sync with video footage.
Foley Pit - A tool used by foley artists to recreate the sounds of feet walking in different environments.
Microphone - A device which converts acoustic energy to electrical energy. Simulates the role of an ear and allows for the capturing of sounds.
Prop - A device used by foley artists to create sounds.
Render - To produce a copy. Refers to exporting selected elements of a production to a deliverable form.
Sound Effects - An artificially reproduced sound, other than dialogue or voice, intended to create a dramatic effect in a production.
Sound Recorder - An artificially reproduced sound, other than dialogue or voice, intended to create a dramatic effect in a production.
Synthesizer - A device which creates audio signals which can be imitative of real sounds or unique.
Walking - The phase of production where a foley artist recreate the sound of character’s footsteps.
Guiding Questions
- How do we use previously recorded sounds to create a soundscape?
- What are some different categories of recordings for sound design for visual media?
Curriculum Links
The concepts presented in this module provide a helpful foundation for an understanding of sound, which could be linked to an Arts and Music curriculum, and any other subject that makes use of sound recordings. For example, recording an interview in the community for a History, Heritage & Culture, or Civics and Economics project. Learning the functions and tools of the software application Reaper builds students digital learning skills and aligns with a Computer Studies curriculum.
Materials
- Computer with Reaper installed – Download Reaper
In most films, the natural and ambient sounds are from a performance by a foley artist. As a general rule, foley tries to recreate the sounds a human body makes in an environment: clothing being put on, shoes creaking across a floor, handles and knobs being turned, objects being picked up and manipulated, etc.
Non-Computer Activity
Different Categories of Sound Design
There are numerous ways to categorize sounds, which is helpful for organizing your sound files. This module covers some of the basic categories of foley sounds.
Foley
This word comes from an early sound pioneer, Jack Foley, who was one of the first to perform sound effects live to picture. These sound effects were recorded and gave a believable presence to the activity in a film.
In most film productions, the sound recorded on set is focused on capturing dialogue, and ambient noises are added afterward. Over time many techniques have developed to create soundscapes to accompany the recorded dialogue, and foley is one of them.
Foley is usually recorded in a purpose-built room called a foley stage. This room has special floors and a room nearby with all kinds of props for making sounds. A recordist operates the recording equipment while the foley artist watches the video footage and performs sounds in time with the picture. These sounds are captured with microphones and edited later in a DAW like Reaper.
All of these sounds are grouped into some primary categories:
- Feet or Walking – for a period of time foley artists were called “walkers” because this was the primary part of their work. They wear various footwear and act out the footsteps of the characters on-screen while walking in foley “pits.” A foley pit is just that, a small pit that contains different materials to imitate different surfaces. Grass, leaves, gravel, dirt, sand, etc. They also have different sections of flooring for surfaces like concrete, hardwood, linoleum, etc. A foley artist gives characters different personalities with their walk; listen for these nuances next time you’re watching a film, and think about what emotion and meaning they were trying to convey.
- Cloth – The microphones used on set are not sensitive enough to pick up the sounds of people’s clothing. Foley artists use different materials to imitate the movement of clothing. Nylon, cotton, leather, etc. This may sounds silly, but these details make a huge difference in adding a sense of realism to visuals. Try noticing these details next time you’re watching a film, and imagine what the scene would be like without these sounds.
- Props – This is the area where a foley artist can really shine. Prop foley can be very inventive to achieve a sound that reinforces what is happening on-screen, and also what is off-screen. Prop foley creates the world around the image and brings it to life. Prop foley sometimes crosses over into the category of sound effects, which are sounds not created by the human body.
One of the phrases often used in sound design is coverage. This refers to the amount of sound work that has been done to fully realize a scene. When you watch a film, think about not just what you hear, but what you don’t hear. The amount of coverage is a creative decision of the sound designer, and is different between genres, and from designer to designer. A simple rule is that the audience only picks up on three different layers while viewing a movie, and one of them is dialogue, so think about your coverage carefully. Make sure there is adequate coverage to feel real, but not too much that it feels overwhelming. For example in a chase scene, not every car needs foley, and not every person needs audible footsteps.
Sound Effects
This category of sound refers to things that are not covered in foley (although there is often crossover). Things like machines, guns, cars, electronics, nature sounds, menu screens, etc. Sound effects are usually cut from a sound library or recorded specifically for a project during a field recording session, where sounds are collected from the environment using portable recording equipment. Synthesizers generate sounds by many different means, and these sounds can be sculpted for different purposes, which add unique layers to sounds that may not exist in reality.
Ambience
Ambience are sounds of a longer duration that form the background for a scene. They are sometimes called BGs (short for “backgrounds”). For an exterior scene you may find a single perfect sound, or you can layer sounds like trees, wind, distant vehicles, people walking by, a dog barking, etc. For interior scenes there can be sounds from open windows, appliances, buzzing lights, a television in the background, etc. Ambiences provide realism and a sense of space to a soundscape, and make other sounds more believable.
Computer Activity
Let’s Make a Sound Effect!
Now let’s layer a few sound effects to make one composite sound to exported and use in a video or game. Our first sound will be a short sound effect that lasts two to four seconds. It will rise quickly to its loudest point, and then fade out.
Sound Library
For this exercise we will search for sounds in the open source online sound library Freesound.org. This site is a helpful resource for those without access to professional libraries or a library of their own.
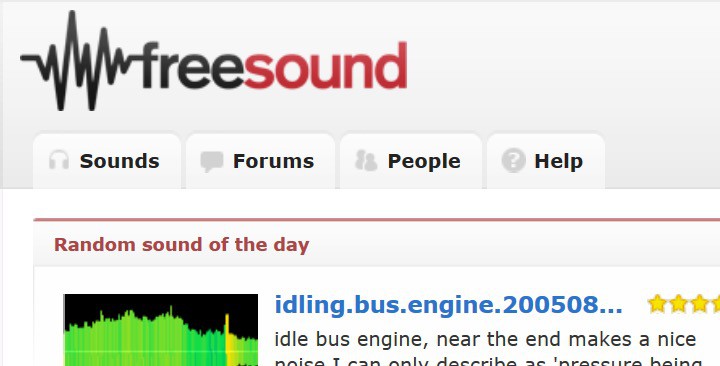
Accessing Freesound
Go to freesound.org and register to gain access to sound files. You can search for and listen to sounds without logging in, but you cannot download them. Use the search bar in the top right corner to look for sounds. Describing sounds in words is its own language but here are some keywords to try: whoosh, impact, splat, fly-by, magic, ambience, sfx, foley, scary, beam, ambience, horror, soundscape, the options are endless!
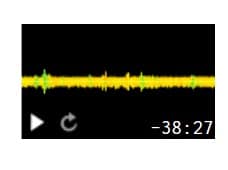
Each sound has a visual preview and a play/pause button. You can even play multiple sounds and try making a soundscape within the browser! When you find a sound you want to download, click on the name to open that sound’s page, and click the download button. Save it to the folder you’ve created to hold your temporary files. Not all file formats work in Reaper, which you’ll discover as soon as you drag them in. They can be converted, but that’s beyond the scope of this module.
Tip! Below the preview on a sound’s page is a list of word tags for that sound. Click any of those words to search for sounds with that same tag. This helps locate sounds that are similar to each other.
Building a Sound Effect
Layering Sounds
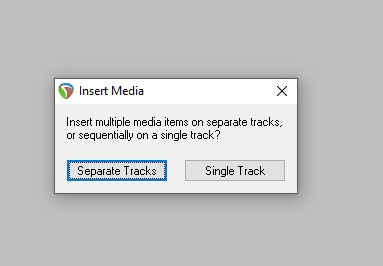
Once you have a few sounds in your library folder, you can select them and drag them into Reaper. When you drag in multiple files, a popup that asks if you want your files on separate tracks or on a single track. Pick “Separate Tracks.” This gives each audio clip its own track that can be played back simultaneously.
Here’s an example:
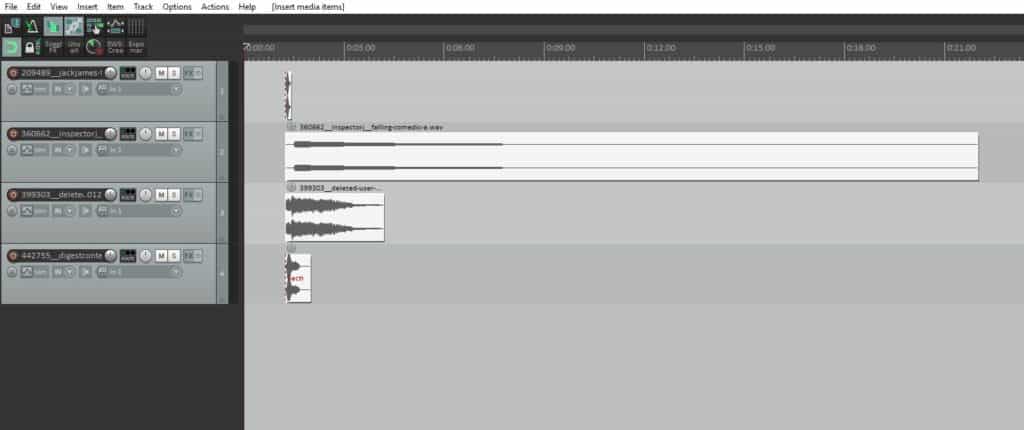
Track Selection
To select a track, left-click anywhere on a track in the arrange area. The track controls for that track will illuminate on the left-hand side. Alternatively, in the track control area, hold shift while clicking tracks to select multiple clips.
Soloing Tracks
To hear only the track you have selected, press the “S” key to put the track into solo mode, and “S” again to take them out.
Trimming a clip
Notice in the example that one of the sounds is longer than the others. Let’s shorten it using the “trim items to selected area” command. Left-click and drag on the bottom half of the sound you want to edit. Press CTRL+T to trim everything outside of your selection.
Horizontal Scrolling
Navigation is a significant part of editing; expect to be zooming in and out a lot as you edit. By default, Reaper does not have horizontal scrolling. To scroll horizontally, click and drag the slider at the bottom of the arrange area.
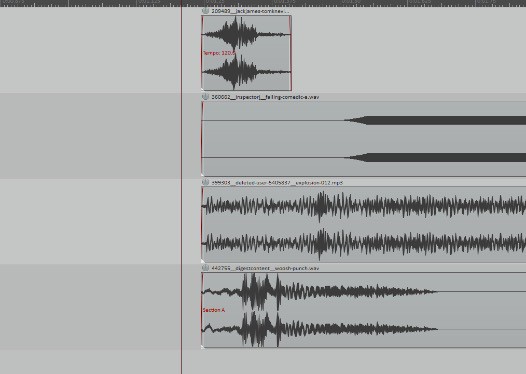
Timing
In the example, from top to bottom the sounds are a zipper pull, a whistle sound with a long drop-in pitch, an explosion, and a slappy punch.
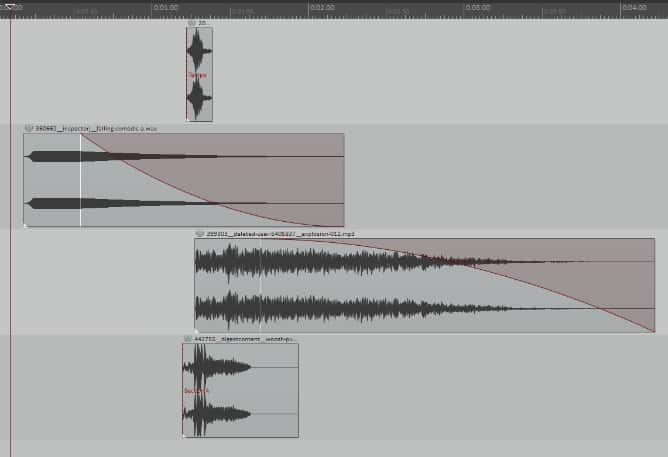
Each sound is on its own track and can be arranged or moved anywhere along the timeline to work with the other sounds to achieve the effect you want. Shifting the whistle sound to start before the others creates a nice lead up to the explosion and other impact-like sounds. Add fades by clicking the upper right corner and dragging towards the center. When the mouse hovers over the corner the cursor switches to a fade icon. After making the fade, the cursor changes to the fade icon when the mouse is near the red fade line.
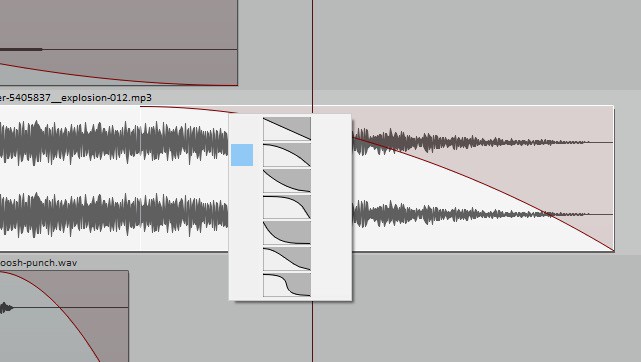
Right-click the fade icon to select an option for the kind of fade. This is helpful for sculpting how your sounds fade in and out. Try making long sounds shorter but shaping them with fades.
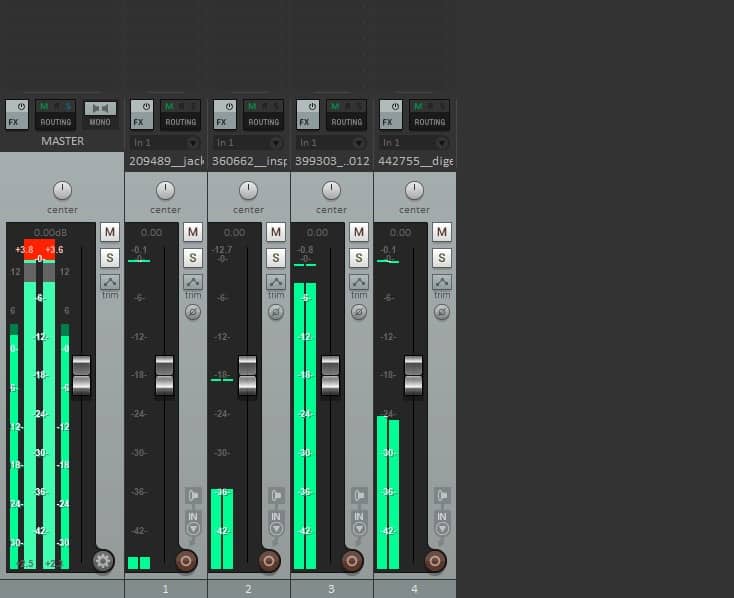
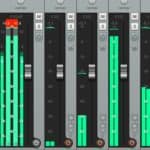
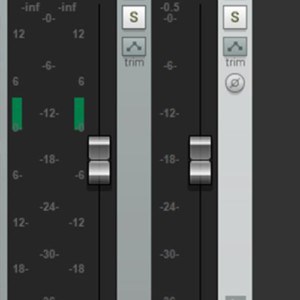
Press CTRL+= to toggle between the editing screen and the mixer. The mixer arranges tracks vertically which is a helpful view for managing volume. The mixer shows the master output track on the far left. Master output is where all the sounds are combined before being sent to your speakers or headphones. The other panels represent the tracks in your arrange area from top to bottom laid out from left to right. Press spacebar to see if your tracks overload the master track.
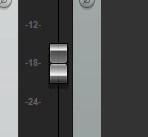
The loudness is indicated by the moving green “meters” on each track. The volume fader, shown here, can be dragged up and down to set the volume. Press the spacebar to start and stop playback from wherever the playhead is positioned. Keep moving the faders until your sound sounds as you intend, but isn’t overloading the master track. The red overloud indicator can be reset by clicking the red square.
This process is the beginning of what is called “mixing.”
Before continuing on to creating an ambience, proceed to the “Rendering your sound effect” section to render your sound effect.
Building an Ambience
Creating an ambience works with the same tools as for a sound effect, but instead of building a brief sound, you build a sound that lasts for a longer duration.
For games and other interactive media, ambiences need to be loops that play for however long a player stays in an area or level. Ambiences for film need to last as long as the scene.
Find some ambiences on Freesound that fit the kind of atmosphere that you want. Some sample search terms are: interior, exterior, atmosphere, background, BG, soundscape, city, people, traffic, road, night, day, morning, urban, rural, vehicle, plane, train, alley, town, ambient, etc. You can also search a sounds tags to hear similar sounds.
As a general rule, you want sounds without a distinct ‘event’ that becomes noticeable when looped. This is easier said than done! For non-interactive media that does not loop, this is less important.
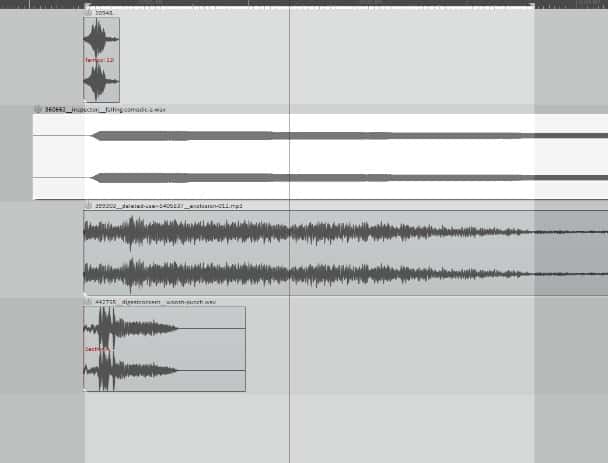
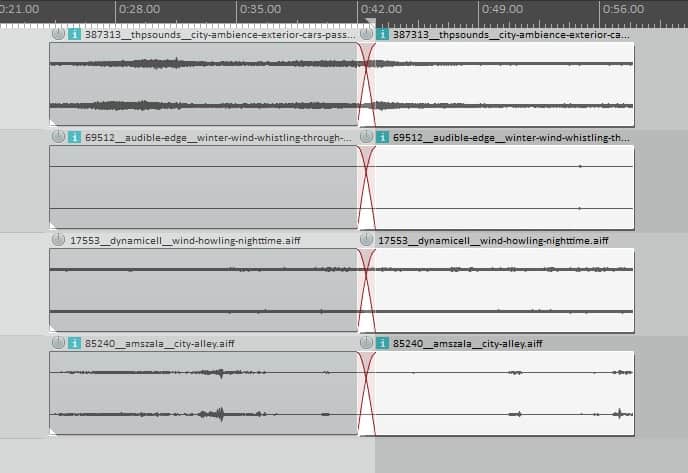
Bring the sounds into either a new Reaper project, or onto separate tracks in a different position than your sound effect, like this:
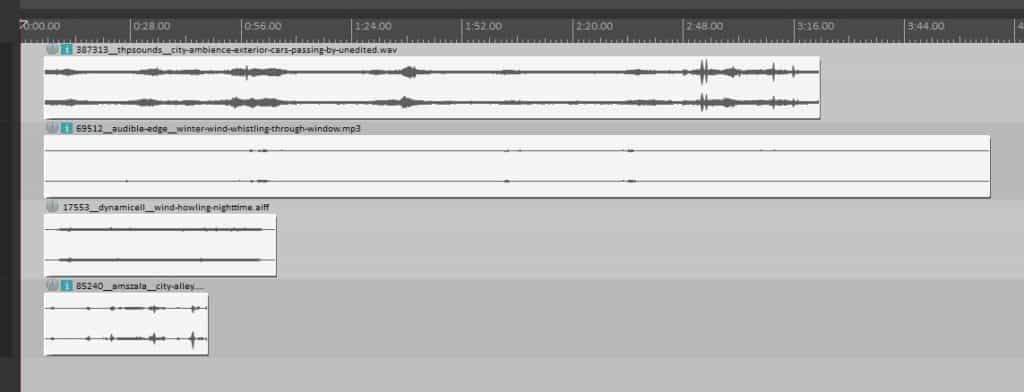
Some of the clips are quite long. We will cut them to be a little bit shorter than the shortest clip.
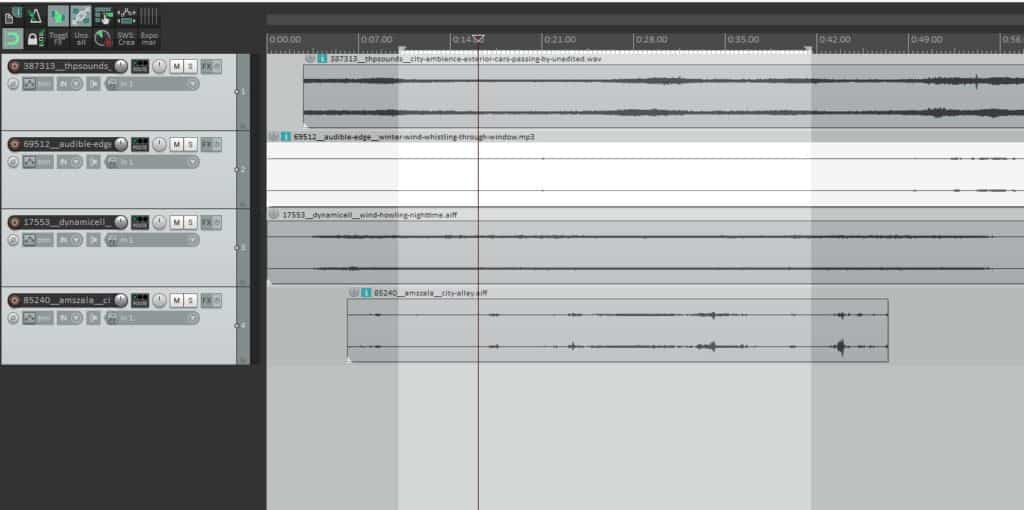
We’ve zoomed in on the start of the arrange area and moved the second and third clips further along the timeline. We want to make sure there isn’t a fade where we cut as that causes a drop in the loudness when it repeats. Select the area of the timeline to loop by holding shift and left-clicking the top half of each of the clips to select them all, then press CTRL +T. This trims any audio outside the selection area on all tracks.
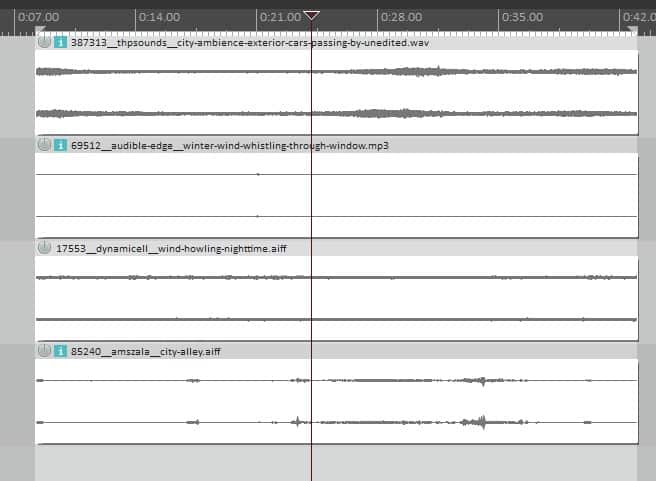
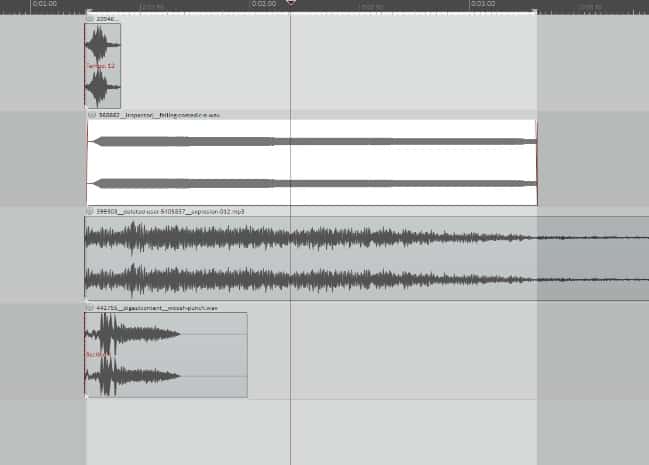
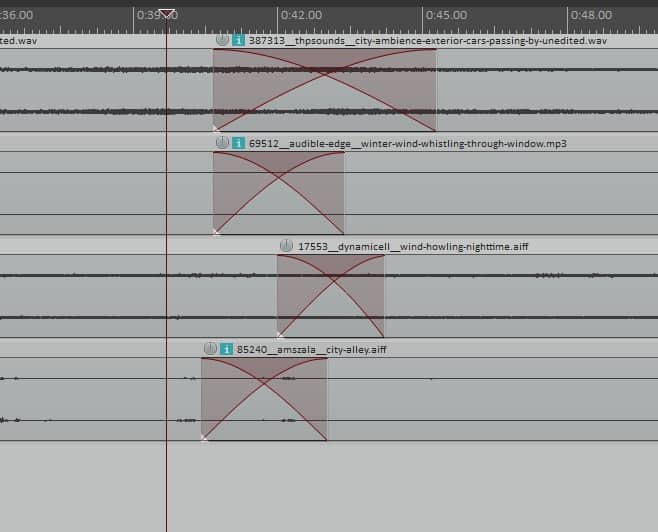
You will be left with a square of tracks (as in the picture on the right). With the clips still selected, move the playhead to the middle of the tracks and under the Item menu select “split items at cursor.” This cuts all the clips in half.
Now left-click on the top half of all the clips on the left side of the split so they are all highlighted.
Then left-click the top half of a clip and drag it to the right so that they overlap slightly. Reaper automatically creates crossfades to smoothly blend the sounds.
Listen to the crossfade and make adjustments as you would a normal clip, maybe dragging the edges to extend or shorten the crossfade.
If you extend an edge past the length of the original clip a little notch appears on the top and bottom of the track, so watch out for that! Play the sound back and listen for any problems.
It may seem strange that we have a bunch of clips that crossfade in the middle but have cuts on either edge. But since the start of the clips are the exact moment after the end of clips, they loop perfectly. This is a really useful technique to make a looping ambience.
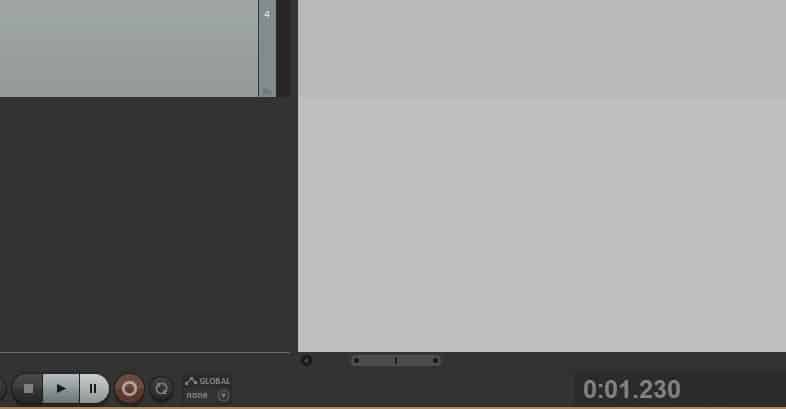
Press CTRL+A to select all clips. Press Shift+X to make your time selection match your selected clips. At the bottom left on the transport bar, activate the looping button. Press spacebar, and when the playhead gets to the end of the clips it loops back to the beginning seamlessly.

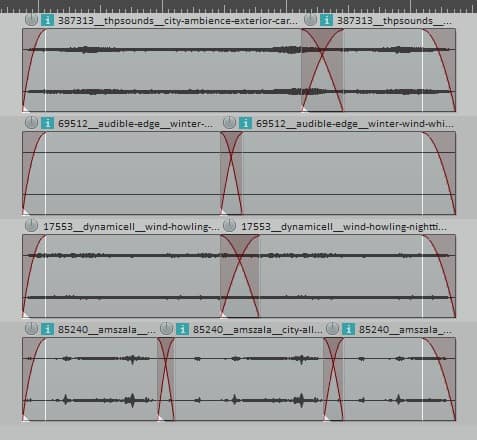
To extend a looping region in Reaper, select your clips on either side of the crossfade and press CTRL+D to duplicate your selection. Since they loop seamlessly, this section will also playback seamlessly in sequence.

There is a simpler way to create ambiences if you only need them for a specific duration. Armed with your knowledge of duplicating, trimming, fading and crossfading, you should be able to figure it out. Remember that all typical cut and paste features work in Reaper. CTRL+left-click on the top half of a file to create a duplicate that can be dragged around in the arrange area. The result will look something like the image on the left.
As with our sound effect, when you are ready to export, toggle to the mixer screen (CRTL+=), and use the volume faders to blend all your sounds. Play with the faders for each track to sculpt your ambience. Keep the level fairly low, as an ambience is meant to be a background sound.
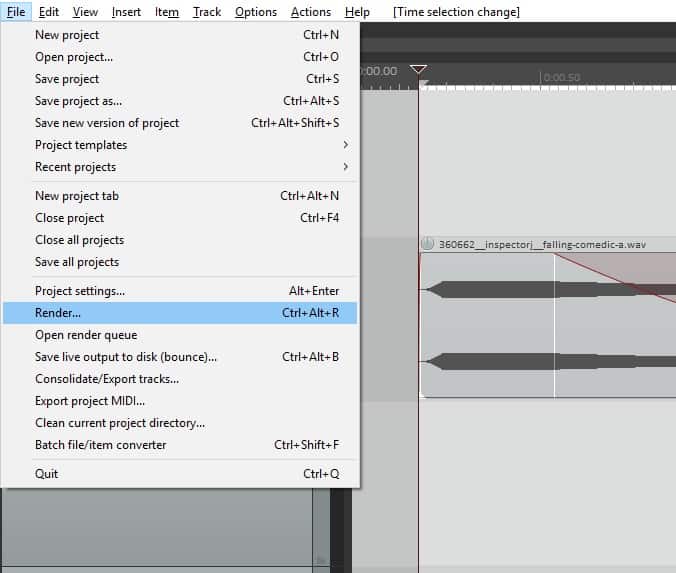
Rendering your Sound Effect
Select the length of the sound you want to export by pressing CTRL+A to select all of your clips, then Shift + X to adjust your time selection to match your selected clips. Under File, select Render…
Render Settings
In the dialog that opens, there are many options to specify that control how the file is output.
For our purposes, we only need to specify a few options. At the top under Bounds:, select “Time Selection” from the drop-down menu.
Create a filename that adequately describes what sound is in the file so you can easily find it later.
Select a location under Render to: where the file will be exported. As with your filename, create a folder name and location that is logical to help you later when you need to find a specific file.
Drag and drop the file you rendered back into Reaper to listen to it. This is your first sound effect! Congratulations on your start into the world of sound design!
Conclusion
Look at images or scenes and try putting together sounds that suit what you see. Make the imaginary real with sound! Pay attention to movies you watch, and listen for all the different layers of sounds and imagine what the sound designer was thinking when they layered those sounds together. In sound design the learning opportunities are endless but, with software like Reaper and access to learning materials on the Internet, anything is possible!
Resources
Online Sound Libraries
- Free Sound – an open source sound library.
- Sound Ideas – produce some of the most widely-used professional sound libraries in film and games.
- A Sound Effect – is a sound library site made up of independent contributors.
Audio Production
- Film Sound – great reference site for sound design.
- Reaper Video Tutorials – continue your learning with Reaper’s great video tutorials.
- Synthesizer Academy – a good place to start on the fundamentals of sound synthesis.
Books
- The Sound Effects Bible: How to Create and Record Hollywood Style Sound Effects – An overview on field recording and sound design techniques. A fun and informative read.
- Practical Art of Motion Picture Sound – covers the art and craft of film sound from it’s early days to now. A mix of theory, anecdotes, advice, and technique. A great resource for those interested in doing film sound professionally.
- The Essential Guide to Game Audio: The Theory and Practice of Sound for Games – introduces the major areas of game audio and applies these principles in the Unity game engine.
You might also like

Introduction To Audacity
 Grade 5 – Grade 7
Learn about Audacity, a free program that allows you to record and edit audio.
Introduction To Sound Design And A Digital Audio Workshop
Grade 6 – Grade 9
In this lesson students will be introduced to the basic functions of Reaper.

Introduction To Sound
Grade 6 – Grade 9
Students will be introduced to how sound works, how to describe it, and understand the different aspects of sound.
