Section Navigation

Introduction
Sound design for film is referred to as a “practical art.” Sound designers aim to add believability and realism to the accompanying visual media, and at the same time communicate meaning, ideas, emotion, etc. Since its beginnings in the early 20th century, producing sound for film has become increasingly accessible through advancements in technology. What used to take an entire facility of specialized machines and a team of people can now be done by a single person with a laptop and a bit of software and hardware. This module uses the audio software called Reaper, which is an affordable digital audio workstation (DAW) with a generous trial period and great online documentation. With Reaper users can record, edit, design sound, and compose music and audio all in one place. The DAW is the primary software tool for sound design and the place to start building your skills.
Learning Goals
In this module students will learn the basic functions of Reaper.
Vocabulary
Bit Depth - The number of bits of information in each audio sample.
Deliverable - The final output to be delivered from a production such as an audio file or video.
Digital Audio Workstation or DAW - A software or hardware device for recording and producing audio. Most often associated with computer-based software programs like Pro Tools, Reaper, Nuendo, etc.
Editing - The process of collecting, creating, arranging, and preparing content.
Fade - A gradual change across a set of time. In audio terms, fade usually refers to gradual changes in loudness.
Field Recording - Audio that is captured outside of a recording studio using portable recording equipment.
Mixing - The process of combining multiple audio signals down into a few merged signals. Taking multiple tracks of edited audio and combining them into a stereo deliverable.
Sample Rate - The number of individual or discrete samples taken per second of an incoming or outgoing signal. DAW’s use this to convert those samples back to audio signal for speakers. Entire projects are often done in one sample rate depending on the platform it is being delivered to.
Soundscape - The overall sound of a project that is experienced by the audience.
Sound Design - The practice of creating sound for various mediums.
Synthesizer - A device which generates electric or digital signals that are used to create sound.
Track - A single stream of audio.
Transduction - The conversion of one form of energy into another.
Waveform - A representation of an audio signal in visual form.
Guiding Questions
- How do we apply the concepts from the first module to create a soundscape for a video?
- What is the most efficient way to achieve a soundscape that suits the project?
Curriculum Links
The concepts presented in this module provide a helpful foundation for an understanding of sound, which could be linked to an Arts and Music curriculum, and any other subject that makes use of sound recordings. For example, recording an interview in the community for a History, Heritage & Culture, or Civics and Economics project. Learning the functions and tools of the software application Reaper builds students digital learning skills and aligns with a Computer Studies curriculum.
Materials
Computer with Reaper software installed – Install Reaper
Non-Computer Activity
What is a Sound Designer?
The specific tasks of a sound designer can vary, but the role revolves around the creation of sound to accompany film, games, theatre, radio, etc. They may make the creative decisions regarding sound for a project; or sculpt sounds from different sound sources, such as synthesizers and field recordings; or be responsible for the sound of a film in post, that is, after it has been filmed.
As you start producing your own audio for projects, you will encounter numerous tools and tactics that can make the task feel overwhelming. Sound design is such a broad subject with endless things to learn; the biggest challenge at the outset is not the learning curve itself, but how big the learning curve to can seem. Learn to focus on the intended goal, and what tools you need to get there — ignoring features that are too advanced and irrelevant at this stage. Do you need to know every word in the English language to write poetry? No! Do you need to know what every button or menu does in a DAW to design sound? Absolutely not.
As described in the previous module, sound is vibrations that move through the air, that are picked up by our ears, and converted to energy which is sent through our nervous system to our brains. The tools used for sound design work on the same principle, called transduction, where energy is transformed from one type to another. Microphones are used to pick up acoustic energy and convert it to electrical energy which is sent down a cable and recorded as digital information. The way sound is captured digitally, is like taking a picture of the amplitude of the incoming sound, tens of thousands of times per second. Then it can be played back like a flip book animation, but with sound, recreating the complex wave behaviour through speakers or headphones. The number of times this “picture” is taken is called the sample rate, and use the term hertz to refer to the number of times per second (just like frequency in the first module). The two primary sample rates used are 44,100 hz or 48,000 hz, the first typically used for recording music, and the second for sound for video or games. For simplicity’s sake, we will use kilohertz, which means one thousand hertz, which makes these rates 44.1 khz and 48 khz. Sample rate is important as it relates to the quality of the output. But the higher the sample rate, and quality, the larger the file size and processing power required, so you need to choose an appropriate sample rate for your project.
While sample rate is the number of pictures per second, bit depth is what is actually in the picture. With audio, we are capturing sound waves. Bit depth records the state of the amplitude, in each picture. You will primarily encounter bit depth values of 16-bit and 24-bit which means a value between 0 and 65,536 (16-bit) or 0 and 16,777,216 (24-bit). With a 24-bit sample rate extremely quiet sounds can be recorded without loss of quality, which makes it well suited for recording and sound design.
Computer Activity
Introduction
This is where we put these concepts into practice. Just like an artist’s canvas, a digital audio workstation (or DAW) like Reaper is the place where a sound designer lays out all the pieces that go into an effective soundscape. From a simple voice recording to hundreds of layers of audio and music, it’s all put together in a DAW. The main challenge is to not get overwhelmed by all the advanced functions of the software . A sound designer generally relies on only a few dozen tools to get the vast majority of their work done, so don’t feel discouraged if you are confused by all the options. Reaper is a robust application with powerful capabilities that you can continue to learn as your needs and interests advance.
Install the Reaper software following the instructions on the website.
Run the Reaper software. On the startup splash screen, select “New Project.”
Pick a location to save your project to keep things organized. When Reaper opens a new project, it allows you to work without saving; your work goes into a temporary folder until you specify a permanent one. Let’s specify that location now, so we make sure we are saving our work from the outset.
Opening Reaper and Saving Projects
Pick a location to save your project folder.
When you type a name and hit enter, Reaper makes a folder with the same name and creates a Reaper project file. This .RPP file is where all your settings and editing work goes.
Reaper also makes a folder called “Audio.” Anything you drag and drop to your file will be copied to this folder when you save.
It is a good practice to add a “_01” to the end of your filename, and every time you make a significant change to your project, select “save as” and save the project to the next number: “_02”, “_03”, etc. This way you retain the earlier versions of your work, to revisit if you want to change something or need to retrace your steps. At some point in your media producing career you will lose work, and it will remind you to always be mindful about when and where you save your work.
When you want to archive your project or use it on a different computer, just take that entire project folder and everything will come with it.
Interface
Arrange Area
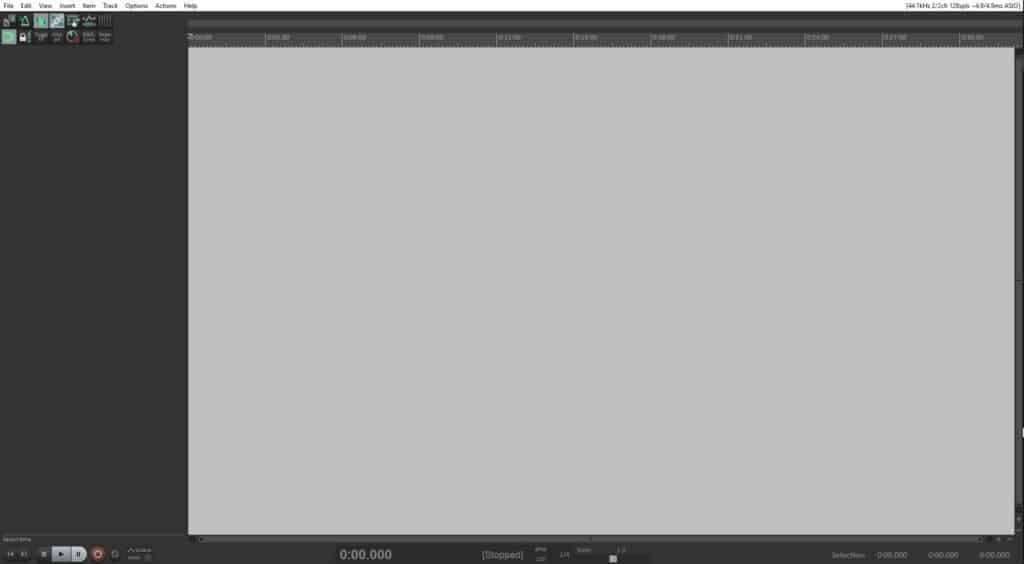
The arrangement area is the lighter grey area that takes up most of the interface and is the primary space where you will work with audio clips.
When you drag and drop an audio file into the arrangement area, Reaper automatically creates a new track for the audio file. Press space bar to hear it play back.
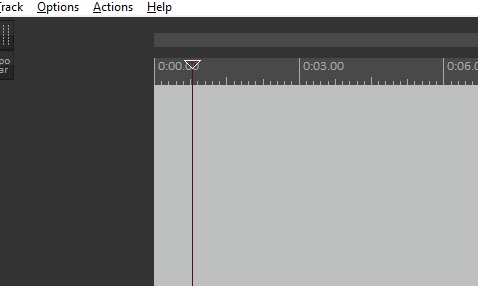
Playhead
At the top of the arrangement window is the playhead. This triangle and line shows where playback will start from when the spacebar is pressed. Imagine it as the place where your eyes are when reading a sentence.
Drag and drop another audio file in the space below the previous track. This creates a new track. Press spacebar to hear it playback simultaneously with the other audio file.
This feature is referred to as multitrack, and is a key feature of a DAW. It allows different sounds to be layered. For example, multiple sound and voice tracks for a film soundscape, or a variety of instruments and vocal tracks for a song.
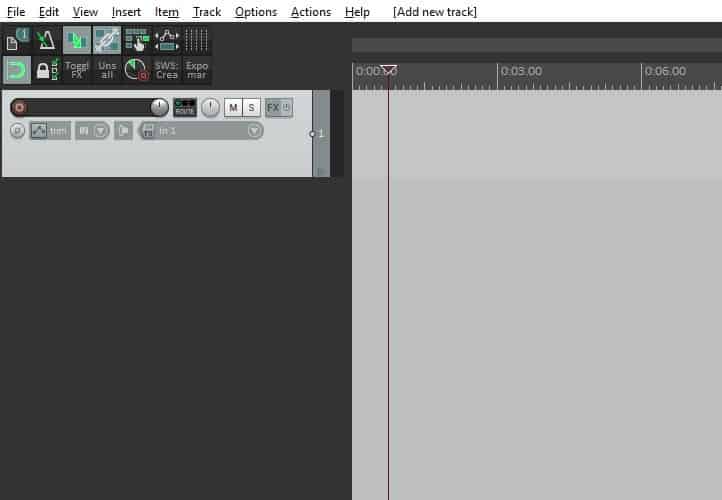
Tracks
To the left of the arrange area is a dark grey bar called the tracks area. This is where the different controls are for horizontal track, such as volume, muting, record, etc. If no audio has been dragged to the arrange area, this area will be blank.
Double-click in the tracks area to make new tracks. A track is where you will put an audio file, and also where existing files can be added to other tracks.

Timeline
At the top of the arrangement window is the timeline. The sequential numbers indicate the span of time; the default is about 30 seconds. The playhead position can be moved to anywhere along the timeline by left-clicking in the top half of the timeline, or left-clicking anywhere in the arrange area. Press spacebar and the playhead will now start playback from its new placement.
You can also select a section of time, by left-clicking and dragging along the bottom half. This is useful for making selections across multiple clips as well as selecting a specific amount of time that can be looped.
Press the escape button to deactivate your timeline selection.

Transport Controls
In the bottom left corner are the transport controls. These behave like any typical media player or streaming software.
From left to right:
- Go to Start – Moves the playhead to the start of the project.
- Go to End – Moves the playhead to the end of the project.
- Stop – Stops the playhead,
- Play – Starts the playhead,
- Pause – Pauses the playhead.
- Record – Start recording on tracks where recording is enabled.
- Loop – Puts the playhead into loop mode and loops playback across a timeline selection.
- Global Automation – This will be discussed later in the module.
Mouse Controls and Key Commands
Drag a few of the provided sound clips from the folder into the Reaper arrange area. Reaper analyzes the audio and makes a visual waveform representation.
Now let’s look at some basic editing techniques that form the basis of audio editing work.
Moving
After you’ve dragged the audio file to a track, it can be moved by left-clicking on the top half of the clip. Your cursor will change to a circle with four arrows around it.
Length
Move the cursor to the bottom left or right corner of a clip. The cursor changes to a line with left and right arrows, at which point you can left-click and drag to change the length of the clip.
Loop
When you click and drag on the bottom half of a clip you select a portion of that audio. To adjust your selection, hold shift while clicking and dragging to expand or change it. With loop mode activated, that portion of the timeline loops.
Fade
Move the cursor to the top left or right corner of a clip. When the cursor changes, left-click and drag towards to the center of the clip to create a fade.
Double-click on the fade to change the behaviour of the fade.
Tip! As a general rule for sound designers, fade every clip in and out when you are putting layers together, regardless of how long or short the clip. This ensures there are no jumps in volume.
Zooming
Hold Alt and scroll the mouse-wheel to zoom into a file . The view will zoom in and out from wherever you have placed your mouse. This is helpful when you are trying to make detailed edits and fades.
Track Height
Hold Ctrl and scroll the mouse-wheel to enlarge one track, or hover over the arrange area where there are no tracks to enlarge them all. This allows you to see the sound wave clearly for where you are making an edit.
Splitting
To chop up a piece of audio, place the playhead where you want to split the audio track, left-click on the clip you want to split (if more than one, hold down shift while you click), then right-click and select “Split items at cursor.”
Duplicating
To duplicate, the standard ‘cut, copy and paste’ works, but a quick shortcut is to hold Ctrl and left-click in the top half of the audio clip. This makes a duplicate of that clip that can be dragged around and edited.

Item Volume
There are a number of ways to change the volume; for now use the item volume knob in the top left corner of each clip. Left-click and drag up or down to change the volume. You will see the waveform change to match.
Mixer
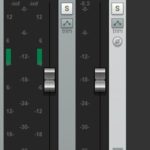
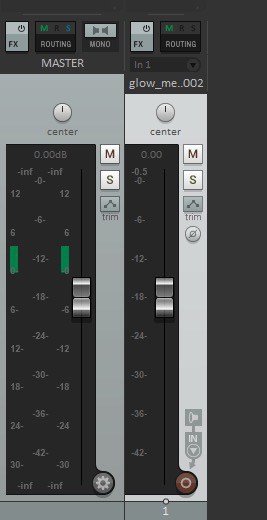
A sound signal goes through different stages before it gets to our speakers or into a file. If track elements are too loud you will encounter clipping, which is when the signal overloads at any point as it travels towards its destination. Keep an eye on your Stereo master channel to make sure the output levels don’t hit the maximum.
Press Ctrl and = together to open a second screen, the mixer. The first track is the master track, where all your individual tracks come together, and the following ones are the individual tracks from the arrange area. The mixer is where you can see if all the sounds playing together overload the master output. Press the spacebar and watch the height of the meter. To avoid clipping, stay within half to two-thirds up.
To understand how the tools work, experiment with dropping in some sound clips, and trying out the different tools. The next module goes more in depth about editing, pulling sounds from the library, and explaining different categories of sound design for film and games.
Conclusion
Discuss some sounds that students noticed from games, videos, movies, etc. What does the sound convey? Imagine what the person who created that sound was thinking, and what they used to create the sound. All sounds in media are intentional, and it is beneficial for aspiring sound designers to critically examine sounds they hear in media. Examples such as R2D2 and Wall-E are great to discuss, as they communicate meaning through sound without words.
Resources
Online Sound Libraries
- Free Sound – an open source sound library.
- Sound Ideas – produce some of the most widely-used professional sound libraries in film and games.
- A Sound Effect – a sound library site made up of independent contributors.
Audio Production
- Film Sound – great reference site for sound design.
- Reaper Videos – continue your learning with Reaper’s great video tutorials.
Books
- The Sound Effects Bible: How to Create and Record Hollywood Style Sound Effects – an overview on field recording and sound design techniques; a fun and informative read.
- Practical Art of Motion Picture Sound – covers the art and craft of film sound, from its early days to now. A mix of theory, anecdotes, advice, and techniques. It’s a great resource for those interested in doing film sound professionally.
- The Essential Guide to Game Audio: The Theory and Practice of Sound for Games – introduces the major areas of game audio and applies these principles in the Unity game engine.
You might also like

Film Review
 Grade 4 – Grade 6
Students will review short films and write a film review based on the intended audience, point of view, and purpose.
Introduction To Audacity
Grade 5 – Grade 7
Learn about Audacity, a free program that allows you to record and edit audio.
Introduction To Sound
Grade 6 – Grade 9
Students will be introduced to how sound works, how to describe it, and understand the different aspects of sound.
