Section Navigation

Introduction
In this tutorial, you will be learning how to create a visual, animated and interactive version of your story that you created in the lesson: Using Twine to Understand our Responsibilities to Mother Earth: Environmental Protection from a Two-Eyed Seeing Perspective. You will learn how to re-create and build upon your story you created in Twine by using block coding in Scratch!
By re-creating your story in Scratch, this will give you the opportunity to visualize and deepen your understanding of Two-Eyed Seeing and the responsibilities we all have to Mother Earth by using your own words/interpretation to complete the project. Sharing your story/animation may ignite understanding in others to work towards a healthier environment for the next Seven Generations.
For this lesson, it may be helpful for learners to have a familiarity with Scratch functionality, however, those who are new to Scratch can also complete the lesson by following along with the computer activity section below. For those who want to learn the basics of Scratch animation and movement before this lesson, click here! This module is intended to give you a starting point for your animation and expose you to different functionality in order for you to further explore and expand on your story after the module is completed. This module will give you the tools to create a question-and-response story as well as tips on expanding your story to create choices using lists!
Learning Goals
At the end of this module, you will have a better understanding of digital storytelling, coding and animation using Scratch. You will learn how to use the Motion, Looks, Events, Control, Sensing, Operators and Variables command to create a visual representation of your Twine story.
Vocabulary
Mother Earth - The source of all life and the living being for which all spirits are connected; She provides all living things with nourishment, medicines, and a home
Seven Generations Principle - Ancient Haudenosaunee philosophy from the Great Law of the Haudenosaunee which states “in our every deliberation, we must consider the impact of our decisions on the next seven generations”
Two-Eyed Seeing - “learning to see from one eye with the strengths of Indigenous knowledges and ways of knowing, and from the other eye with the strengths of Western knowledges and ways of knowing … and learning to use both these eyes together, for the benefit of all”
Scratch - free programming platform, online and offline, that helps users learn to think creatively, reason systematically and work collaboratively to create interactive stories, games and animations
Sprite - a computer graphic that may be moved on-screen and manipulated as a separate entity
Motion command - Allows users to create movement in sprites
Looks command - Allows users to change the appearance of sprites
Events command - Allows users to control when certain commands are started
Control command - Allows users to control how pieces of code interact with each other
Sensing command - Allows users to control how players and sprites interact with each other during the animation
Operators command - Allows users to customize their code by adding mathematical and string elements to specialize their code
Variables command - Allows users to create a placeholder for any customized value or string desired in the code
Materials
- Scratch online or Scratch 3 desktop download
- Twine story from the previous lesson
Non-Computer Activity
Write your own short story about anything you want and be sure to identify the components: the introduction, setting, plot, characters, conflict, resolution, ending. Once you have a good idea of each element in the story, try to retell the story to someone else without using any words! Find items that will help you tell the story, could be anything found outside, inside your house, anything you’ve created yourself – anything you can think of that will help! Be creative! Try to create an interactive experience for the viewer so they can guess what happens in your story.
Extra challenge: re-read and retell one of your favourite stories (shorter the better) and have someone try to guess which story it is!
Computer Activity
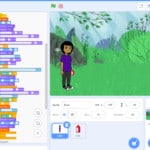
I will be showing you an example of interactive storytelling with Scratch, using question-and-response (sensing command) and reader choices (variables command)! Remember, this is to get you started on creating your own stories in Scratch and to give you an example of how to use simple interactive elements to enhance your story and reader experience – your code may not look the same, but will have the same elements. Click here for the completed story!

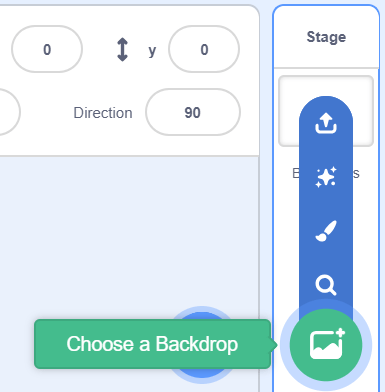
To begin, I knew my story was going to have 2 different locations that the character was going to travel to, so at the bottom right corner I added 2 backdrops using the “choose a backdrop” button:
Next, I added my character sprites from the “choose a sprite” button at the bottom right corner:
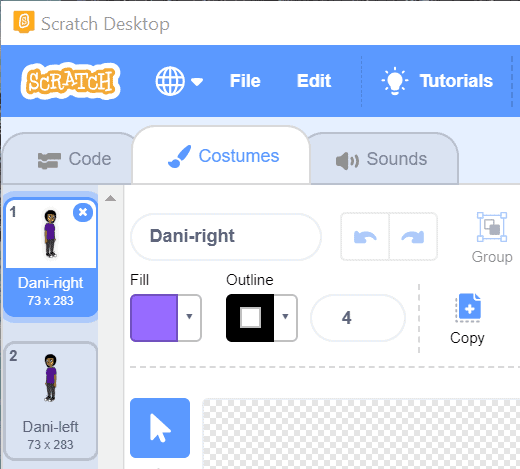
Reminder: some characters have multiple costumes; to add, delete or modify these costumes, click on the “costumes” tab on the top left corner.
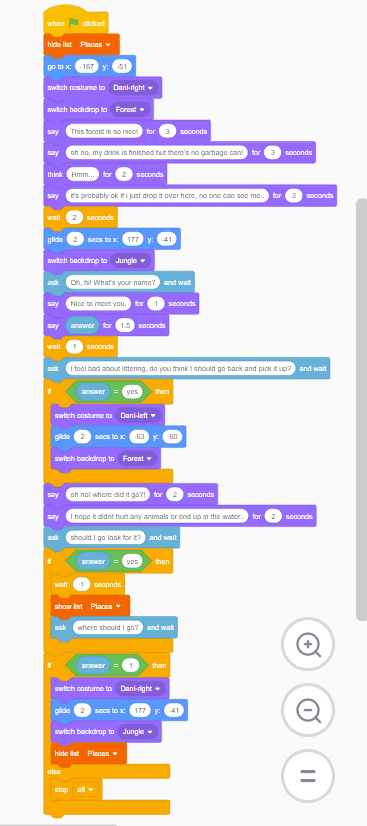
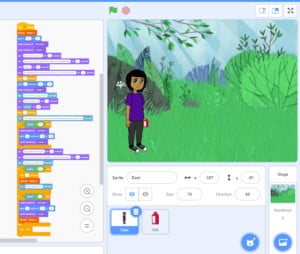
Once I settled on my sprites, I began to construct my code for the story. For this example, I decided to focus on littering as my topic. To start, I clicked on the “events” command and dragged “when green flag clicked” block into the workspace.
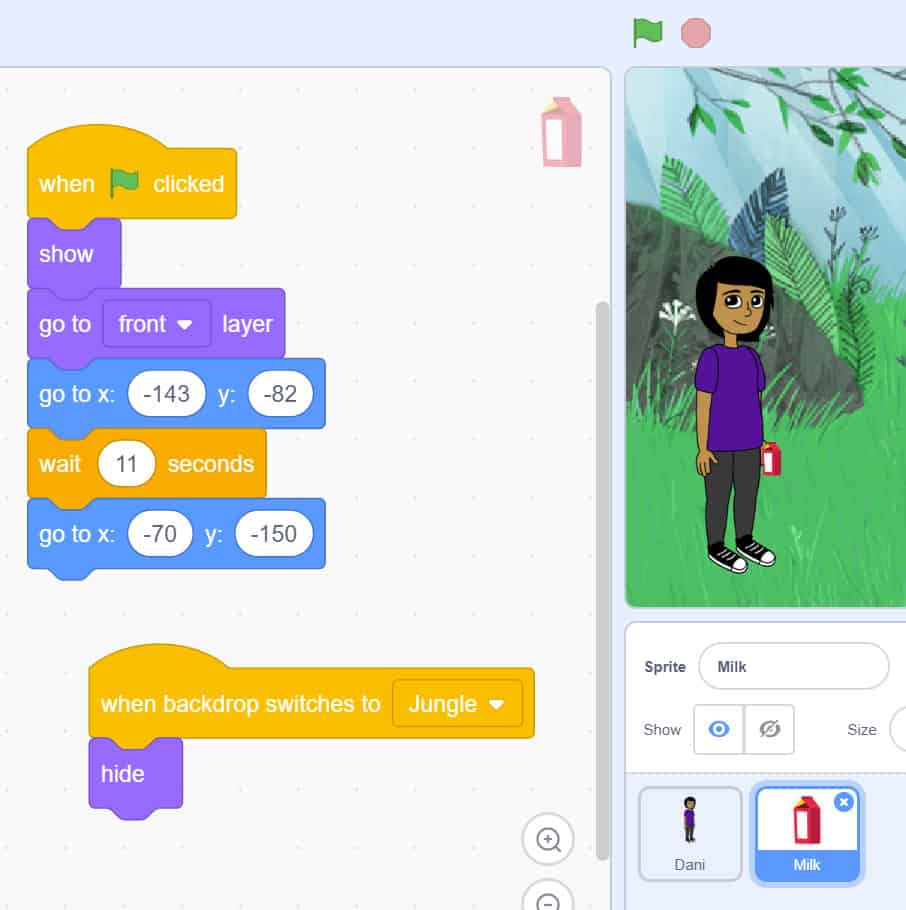
To start my story, I chose to put my character in a certain place, costume, use a certain backdrop and say certain things. To position my character, I used the “motion” command and dragged “go to x:_, y:_” block into the workspace, as I knew the exact position I wanted. In order to show certain costumes, backdrops and messages, I needed to use the “looks” command. I dragged the “switch costume to __” block, “switch backdrop to__” block, and “say __ for __ seconds” block into the workspace. I replaced the text in the bubbles with my desired messages and chose the appropriate costume and backdrop from the drop down list of each command.
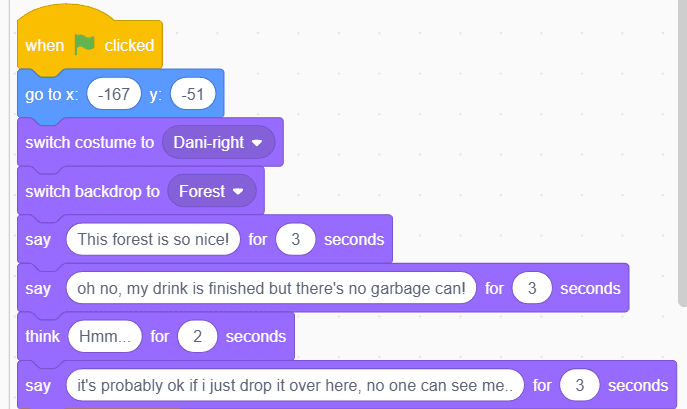
TIP: It’s a good idea to test your code as you create to ensure it is operating how you want it to and make adjustments if needed.
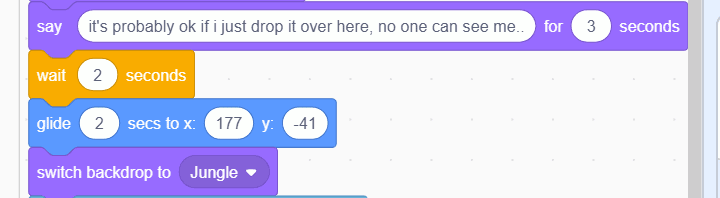
I knew I wanted my character to move into another location and interact with the reader now, so I added “glide __ secs to x:_ y:_” block into the workspace from the “motion” command because I knew exactly where I wanted the character to move. I noticed the transition from my last piece of code to this new motion was too quick, so I added “wait __ seconds” block from the “control” command. I switched the backdrop like before by adding the same code block, but selected the other name front the drop-down list.
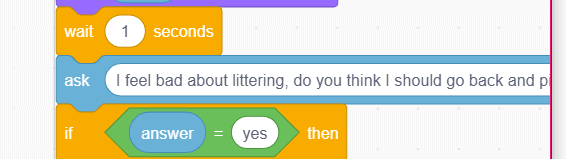
This is where I wanted interaction to be introduced into my story. To do this, I used the “sensing” command and dragged the “ask __ and wait” block into the workspace. I added the choice text and decided to add more speech to the character by selecting the “looks” command and adding the “say __ for __ seconds” command into the workspace. In order for the character to repeat the answer typed, I dragged the “join” block into the first circle and added my choice text, followed by the “answer” block (found in the “sensing” command) and dragged it into the second circle.

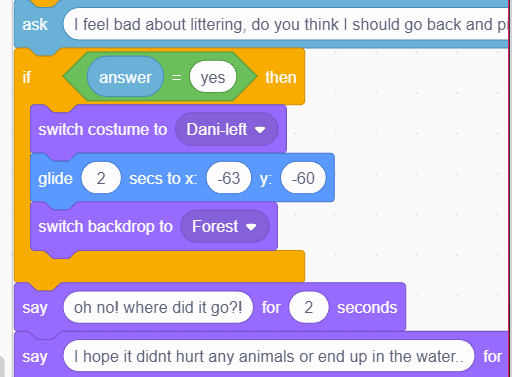
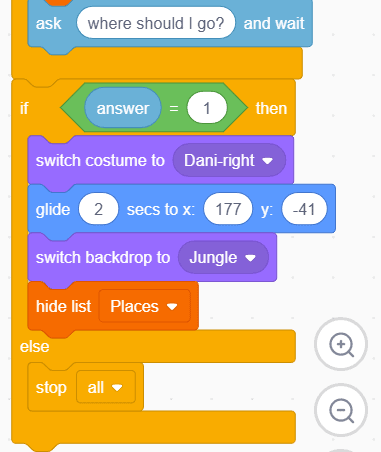
To create more interaction with the reader, I decided to ask a yes-or-no opinion question which would require me to create a piece of code depending on the answer. To do this, I had to use an if __ then loop. This allows me to control the reaction of the story, depending on which answer is given. In my story, I asked another question, found in the “sensing” command, but this time, I immediately attached the “If __then” loop from the “control” command. To control what happens, I clicked on the “operators” command and chose the “__ = __” hexagon-shaped block and dragged it into the “If__then” loop. From there, I had to fill the values of the operators code with the reader’s answer; to do so, I went to the “sensing” command and dragged an “answer” block into the green operators code and filled the second value with the word “yes”:
To control what I wanted the character to do when the desired answer is given, I filled the “if__then” loop with costume and backdrop changes and movement from the “motion” and “looks” commands, followed by more dialogue to keep the story progressing:
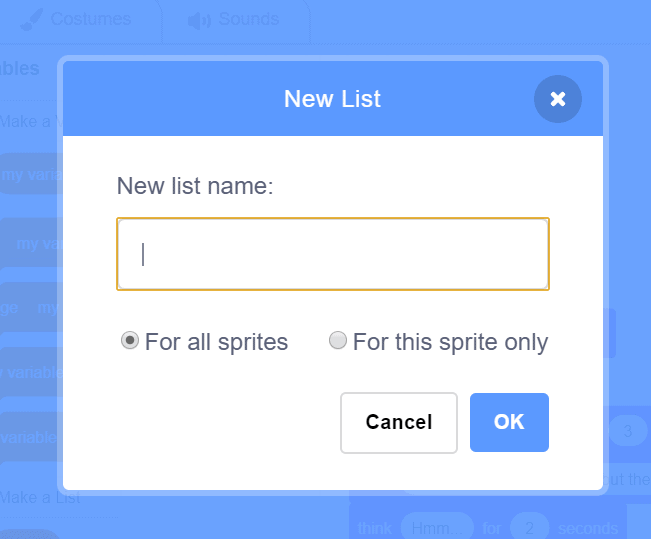
At this point in the story, I knew that I wanted to give the reader some choice as to where my sprite will travel, therefore, I needed to make a list. To do that: click on the “variables” command and click on the “make a list” button; name your list and click “for all sprites”, press ok.
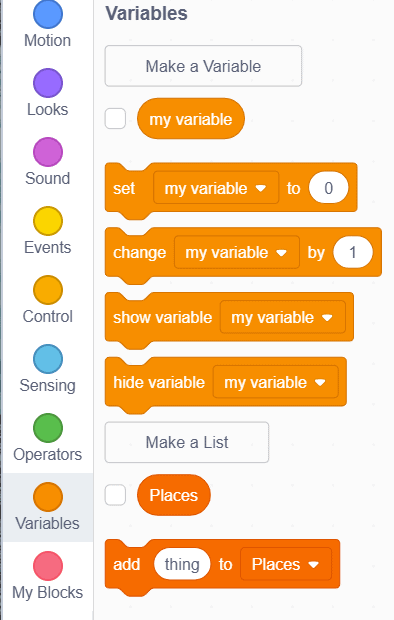
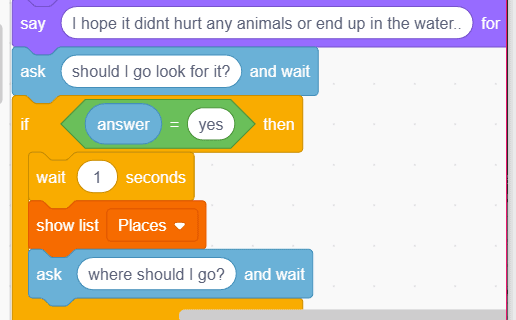
I dragged another “ask __ and wait” block from the “sensing” command and filled in my choice text. Once again, I needed to add an “if __ then” loop exactly how I did in the previous step, however, because I wanted to give the reader some choice, I needed to add the list. To do this, I clicked on the “variables” command and dragged the “show list” block into the “if __ then” loop with another question:
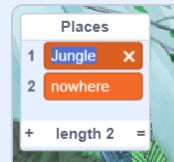
Once your list is visible on the stage, this is where you can add and modify the items in the list. To add an item, click on the “+” sign in the bottom left corner of the list box. To change the title of each item, click on the orange box beside the number and type in a new name:
Since the last piece of code was another “ask__ and wait” block and this is a question that will allow the user to choose the destination they desire, there needs to be another “if __ then” loop to control what happens when each answer is chosen. This time, I clicked on the “control” command and dragged the “if __ then, else” block because I needed to account for more than 1 choice:
For the purpose of this example, I decided to end my story here but you can keep going; add more detail, add new characters and backdrops, items, etc. Don’t forget, if you add items or other sprites that are interacting with the characters, you need to write code for those as well. To do this, ensure you click on the sprite you wish to code, then drag and drop your desired commands from the list on left:
Conclusion
Once you’ve completed your story, share your work with us! We want to see the awesome things you’re creating with Pinnguaq. Share online with us and tag @pinnguaq on Facebook, Twitter or Instagram for your work to be featured. Don’t forget to include the hashtag #LearnWithPinnguaq! Keep tuning into Pinnguaq for more lessons and fun activities!
Resources
- Seven Generations Principle video
- Seven Sacred Teachings – Interactive webpage/resource for students and educators
- More information about Two-Eyed Seeing
- Two-Eyed Seeing Ted Talk by Rebecca Thomas video
- Scratch 3 Wiki page
- Scratch website
- Scratch Studio for interactive stories made by Scratch users
Scratch Team Twitter account
Share Your Work With Us! We want to see the awesome things you’re all creating with Pinnguaq. Share online with us and tag @pinnguaq on Facebook, Twitter or Instagram for your work to be featured. Don’t forget to include the hashtag #LearnWithPinnguaq! Keep tuning into Pinnguaq for more lesson and fun activities!
You might also like

Using Twine To Explore Environmental Preservation
 Grade 9 – Grade 12
In this lesson students will learn about the impact of climate change on the environment, and create an interactive story using Twine.
Making Space for the Natural Environment
 April 5, 2020
Learn how the Lindsay Makerspace offers opportunity to emphasize the role of technology in supporting environmental stewardship.
Responsibilities to Mother Earth: Interactive Storytelling with Scratch
Grade 7 – Grade 12
Learning how to make interactive stories in Scratch.
