Section Navigation

Introduction
Students will learn how to manipulate images using GIMP (GNU Image Manipulation Program), including cropping and resizing images, adding text, and using layers.
Learning Goals
By the end of this module students will know how to use the basic tools in GIMP to edit photos and images.
Vocabulary
Crop - to remove edges of a picture to reframe or re-centre the image, or create an artistic effect.
Resize - to change the size of an image, typically the pixel dimensions, often for the purposes of making an image larger for printing, or smaller for emailing.
Layers - are like sheets stacked on top of one another. In GIMP this allows the user to isolate aspects of an image or add features, keeping each aspect distinct for editing purposes.
Guiding Questions
- Have you ever taken a picture and wanted to change some aspects of it?
- Would you like to learn how to edit images so you can put your own artistic mark on them?
Curriculum Links
This can be connected to the Art and Technology and Media curriculums. Students will gain computer skills as they learn how to digitally manipulate images.
Materials
Paper, pencils and pencil crayons
Non-Computer Activity
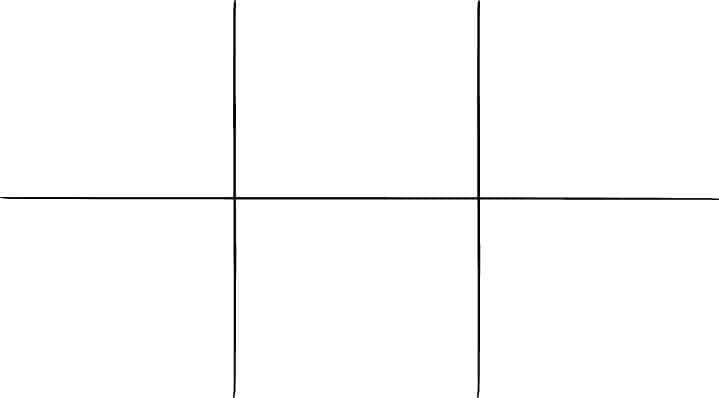
Give each student a piece of paper and a pencil. Have them fold the paper in half lengthwise and in thirds widthwise so the paper has six rectangles as below:
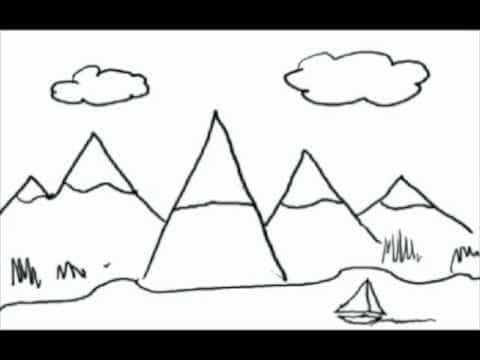
Students draw one line in each square. The lines can be straight, curly, zig-zag, or anything else they think of, as long as each space has one, continuous line. Then students switch pages with someone else and create six images from the lines that are pre-drawn on the page. For example, a V-shaped line could become a mountain.
Students then share their images and talk about their thought process. What some people might have thought about doing with the line will be different than what other people would have done. This demonstrates the variety of ways an image can be manipulated and how each person views things in their own unique way.
Computer Activity
In GIMP students can modify their own image or one they find online. They can manipulate their image by adding pencil marks, text, coloured layers and more.
Activity
Getting Started
Open GIMP, select File > Open and select the image to modify. Use the number keys 1 through 5 to zoom and adjust the view. Alternatively, the ‘View’ menu has further zoom options such as ‘fit image in window’. If the toolbox is not visible, open it by selecting Tools > Toolbox from the top menu or pressing Ctrl+B.
Cropping
To crop an image, select the ‘Crop’ tool in the toolbox (by clicking on the blade icon, or pressing Shift+C) and click and drag over your image to select the area of your photo you want to keep. Once you have selected the area you want cropped, press ‘enter’ on your keyboard to commit the changes. Notice that the ruler across the top and side of the page will adjust to match the new dimensions (in pixels) of your image. You can turn rulers off by clicking View > Hide Rulers, or using the keyboard shortcut Shift+Ctrl+R.
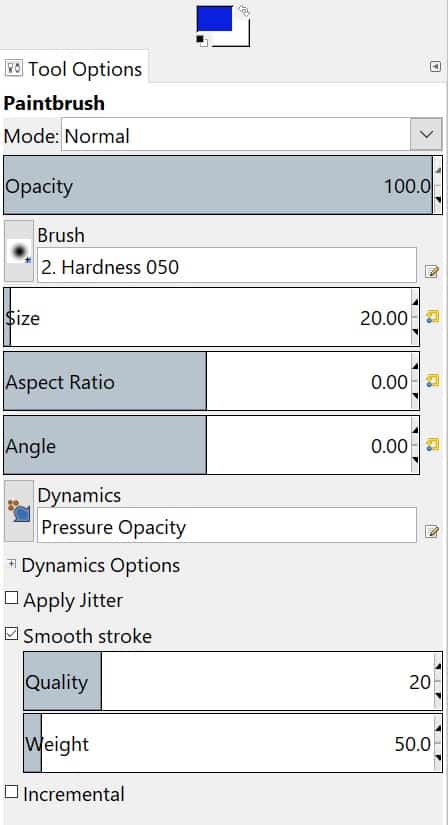
Brushes
To draw on an image use the pencil or paintbrush tool. This video shows the variations between the pencil and paintbrush tools. Allow students to experiment with both to understand what each tool can do, and see what effects can be created.
With your tool selected, further options for that tool are displayed in the toolbox, such as opacity, size, angle, etc. Adjust the values using the sliders or typing in numbers, and experiment to see what happens.
In the colour selection menu, click the top swatch to open the colour picker and choose a colour.
Resizing
Resizing an image is different from cropping. Cropping removes parts of an image, whereas resizing adjusts the dimensions of the image to be larger or smaller. To resize your image select Image > Scale Image from the top menu. This opens a dialogue box where new width and height values can be entered. The default measurement is pixels, but different units can be selected from the drop down menu. Once you have made your adjustments select ‘Scale’. NOTE: Making a low-resolution image larger does not increase the resolution, simply the dimensions. You can enlarge a low resolution image to a certain point without it looking different, but at a certain it will start to look “fuzzy”.
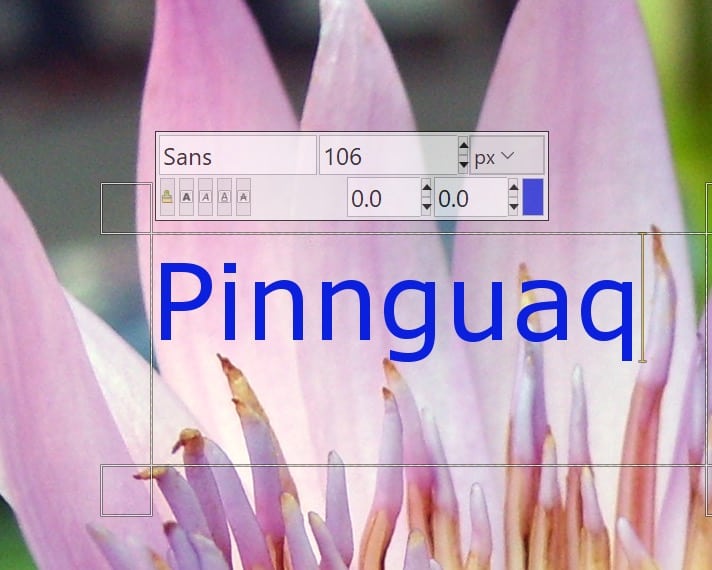
Text
Use the ‘Text’ tool to add words to your image. Depending on the version of GIMP, the ‘Text’ tool will either be the letter A or the letter T. With the text tool selected, you can adjust the colour, font, size, language, and other options in the ‘Tool Options’ menu.
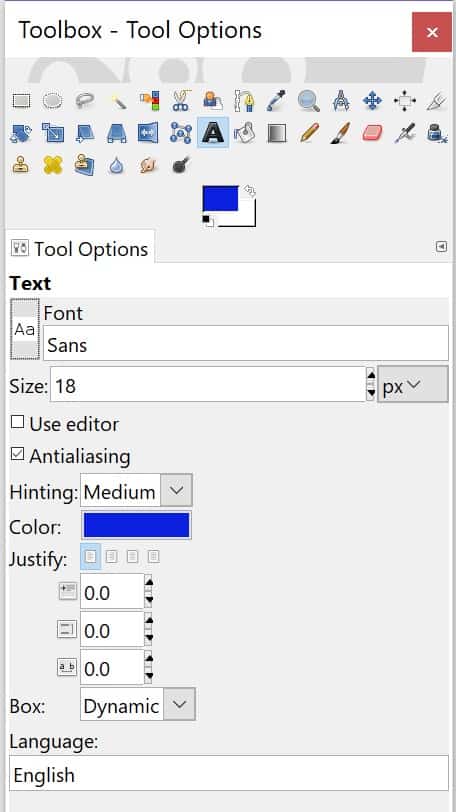
Click on your image where you want the text to appear and type your message. At this point you can highlight the text and make further adjustments including the font, font size and colour. The corners of the text box can be dragged to make the text box larger or smaller, or the entire box can be dragged to a different location.
Layers
Layers are very helpful for organizing your file, and any edits or additions you make. Keeping each addition or change as a separate layer allows you to edit that layer without affecting the layers above or beneath it. By default, any text you add will appear as its own layer.
If the ‘Layers’ menu is not visible, show it by clicking Windows > Recently Closed Docks > Layers, Channels, Paths….
Layers can be added by right-clicking under the list of current layers and selecting ‘new layer’ or by selecting Layers > New Layer. In the dialogue that appears, you can name the layer and make other adjustments. The default settings for size and transparency will typically be appropriate.
To colour a layer, add a new layer, select the ‘bucket fill’ tool, choose a colour and click on the workspace to fill the new layer with colour. At first the layer will be opaque, but the opacity can be adjusted by sliding the opacity bar until you are satisfied with how it looks.
Selection Tools
Two key selection tools are ‘Rectangle Select’ and ‘Ellipse Select’. They allow part of an image to be selected in the shape of a rectangle or a circle. The ‘Free Select’ (“Lasso”) tool allows you to create a free-form selection of your liking. After making the shape click the middle of it to select it. The ‘Select Shapes from Image’ (“Intelligent Scissors”) select tool is unique as it is used similarly to the ‘Free Select’ tool but will try to determine what you selecting and adjust the edges based on where you click. The nodes that appear can also be clicked and dragged if they are not where you would like them to be. Again click the middle of the shape to select it. The ‘Select Contiguous Regions’ (the “Magic Wand”) select tool is used to select areas of the same colour.
Saving
The default file format for GIMP files is an .XCF file (short for eXperimental Computing Facility). It maintains all layers, channels, paths, guides, etc, and is helpful for editing the file at a future date. Otherwise, to share your file with those who do not have GIMP, export as a .JPEG or .PNG. Go to File > Export As… to open a window where you can enter a filename, select a destination to save the file, and the format. Choose the quality after clicking ‘Export’. If your image as a transparent background, export as a .PNG as transparency is not supported in JPEG files.
Conclusion
Have everyone share their images and explain their process and design decisions and share any features or tools they discovered as they worked on this activity. Using the different tools and exploring the features on your own is another way to learn how to use them and discover interesting features.
Resources
- World Label has a blog post on using GIMP to edit images and includes links to tutorials.
- The Muse is a website that has advice on how to best edit your photos. Some of the advice is what to do before you take the photo.
- The Art of Visuals website has extensive information on the various settings for cameras with helpful infographics to explain them.
- Photography Mad has descriptions of photography composition rules with great examples.
- The GIMP documentation website is a helpful user manual of all the features of GIMP.
- The University of Michigan Library has some helpful information about enlarging and image using GIMP.
You might also like
Pixel Art 1: Getting Started With GraphicsGale
 Grade 9 – Grade 12
In this module students will create a pixel art sprite with physical media and then transfer that image into a freeware program called GraphicsGale to make a useable PNG image file.
Pixel Art 1: Getting Started With GIMP
Grade 9 – Grade 12
Students will understand pixel art and how to create it will provide a means of creating content for their own software, or modifying existing content of software they currently engage with.