

Overview
Students explore deepfakes and create a fake voices app using the MIT App Inventor.
Learners also explore how deepfakes can pose a threat to online safety and privacy, and how they can have an impact on not only our daily lives but also other areas like commerce, history, crime, and pop culture.
Learning Objectives
- Understand the difference between deepfakes and fake voices
- Discover how voice-generated assistive technology has impacted many aspects of daily life
- The ethical and moral consequences of creating and sharing deepfakes
- The use of assistive technology in commerce, health, banking, and security
- The rights and responsibilities of digital citizenship
Vocabulary
- Text-to-speech: A type of assistive technology that reads digital text aloud. It’s sometimes called “read aloud” technology
- Speech-to-text: Also known as automatic speech recognition (ASR), as its name suggests, this function converts audio files of speech into text
- Speech recognition: A capability that enables a program to process human speech into a written format
- Deepfakes: Images or recordings that have been convincingly altered and manipulated to represent someone as doing or saying something they did not actually do or say
Curriculum Links
Ontario (Grade 9)
- A2.1: design an experiment or a prototype to explore a problem relevant to a STEM-related occupation, such as a skilled trade, using findings from research
- A2.2: describe how scientific innovations and emerging technologies, including artificial intelligence systems, impact society and careers
- A2.3: analyse how the development and application of science is economically, culturally, and socially contextualized, by investigating real-world issues
- A2.4: apply scientific literacy skills when investigating social and environmental issues that have personal, local, and/or global impacts
Materials
- Phones or tablets (iOS or Android)
- Laptops/Chromebooks
- Wireless internet access
Computer Activity
Fake Voices App
The goal of this activity is to create a fake voices app using MIT App Inventor to show learners how to create a simple app that can recognize text and speech. Once completed, students slide a button to the left or right to change the pitch of their voice. The app also identifies and executes text-to-speech functions.
To begin, install the MIT AI2 Companion app on mobile devices and sign up. Begin by building the design interface and basic functions of the app.
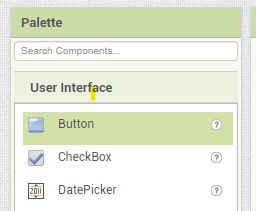
- On your computer browser, open the MIT App Inventor web application and click on the Create Apps! button located at the top of the screen. This opens a blank app generator interface.

- Go to the Project button at the top and create a new project. Name the project. We are calling it Welcome to Fake Voices. This is what the blank interface will look like.
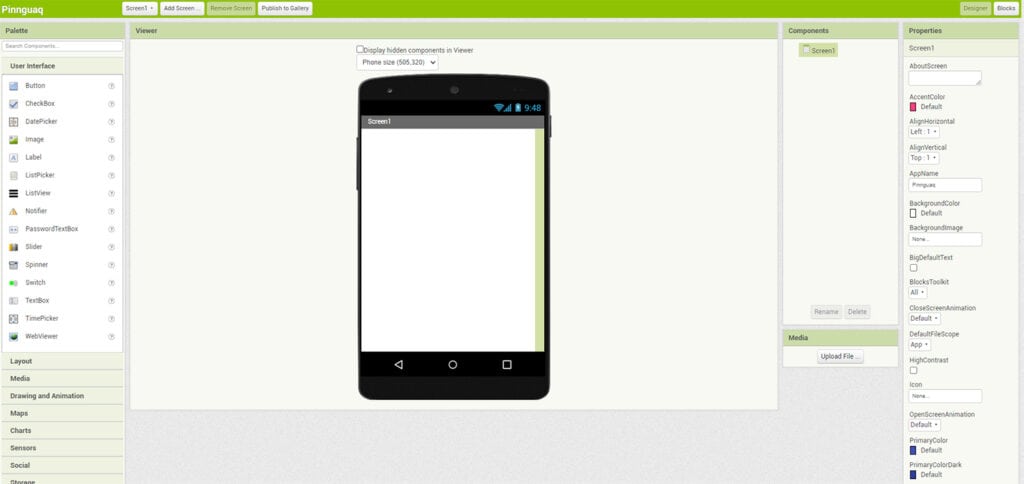
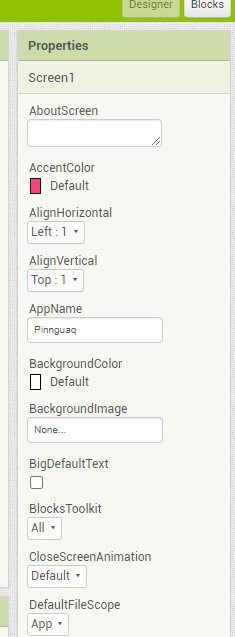
- If you like, use the Properties panel on the right side of the screen to change the default look of the app by changing the colour and font styles.
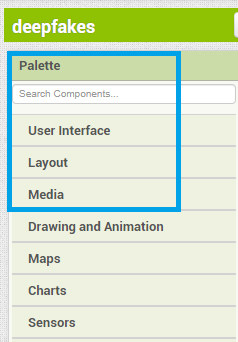
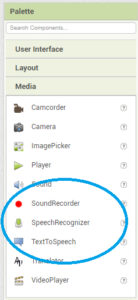
- From the Palette panel on the left side, locate the User Interface, Layout, and Media tabs for this project. We will use these three tabs to build our app.
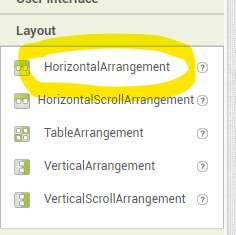
- We will start with the Layout. From the Layout tab, drag the Horizontal Arrangement button to the viewer area (it looks like a smartphone; see interface image from step 2). These horizontal buttons act as placeholders for the user interface buttons. Just like an image placeholder in PowerPoint where you can drag and drop an image, Horizontal Arrangements act as a placeholder for different design and user interface blocks for the app.
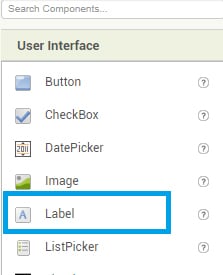
- Next, from the User Interface tab, drag the Label block and drop it under Horizontal Arrangement1. It will appear now as a placeholder named Label1.
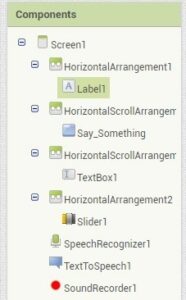
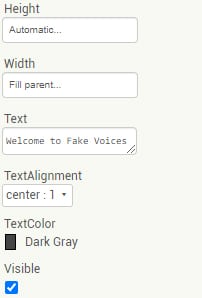
- Choose Label1 from the Components tab, then, from the Properties tab, add Welcome to Fake Voices in the Text box.
- From the Layout panel on the left, drag HorizontalScrollArrangement and drop it under the Welcome to Fake Voices label.
- Next, from the User Interface panel, drag the Button and place it on the HorizontalScrollArrangement2. Select the Button from the Components panel and add the text Say Something. The function of this button is to tell the app to start recording audio as soon as it is pressed.
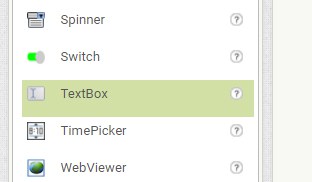
- Use another HorizontalScrollArrangement as the third placeholder. Drag TextBox from the User Interface on the third placeholder.
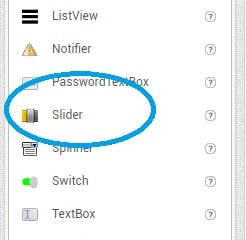
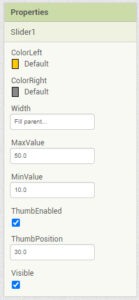
- Use a fourth HorizontalScrollArrangement placeholder, and drag Slider from the User Interface on the left on it. Choose Slider from the Components tab and from Properties, specify the MaxValues and MinValues. We are setting the MaxValue as 50 and MinValue as 10. These specify where the slider toggle will appear on the app. Also check the ThumbEnabled box. This ensures that the slider responds when it is moved left or right.
- From the Palette on the left, choose the Media tab and drag SpeechRecognizer, TextToSpeech, and SoundRecorder and drop them on the viewer area (it looks like a smartphone). These components are invisible—they do not show in the app design but add functionality. The app will now be able to record sound, recognize speech, and perform text-to-speech functions.
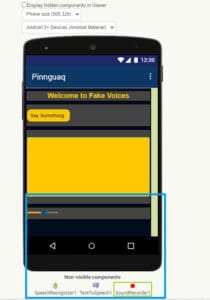
This is what the app looks like after adding the design elements. Feel free to change the colour of the app using the Properties tab.
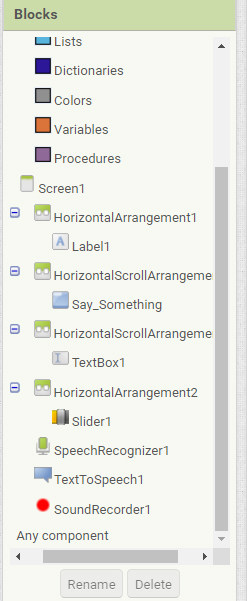
- To build the code that gives the app its functionality, go to the Blocks tab located at the top right corner of the screen. It opens another window, where you can drag and drop code blocks to make the app functional. The elements used to make this app, such as voice recording, text-to-speech, and thumb slider, are on the left-hand panel.

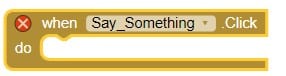
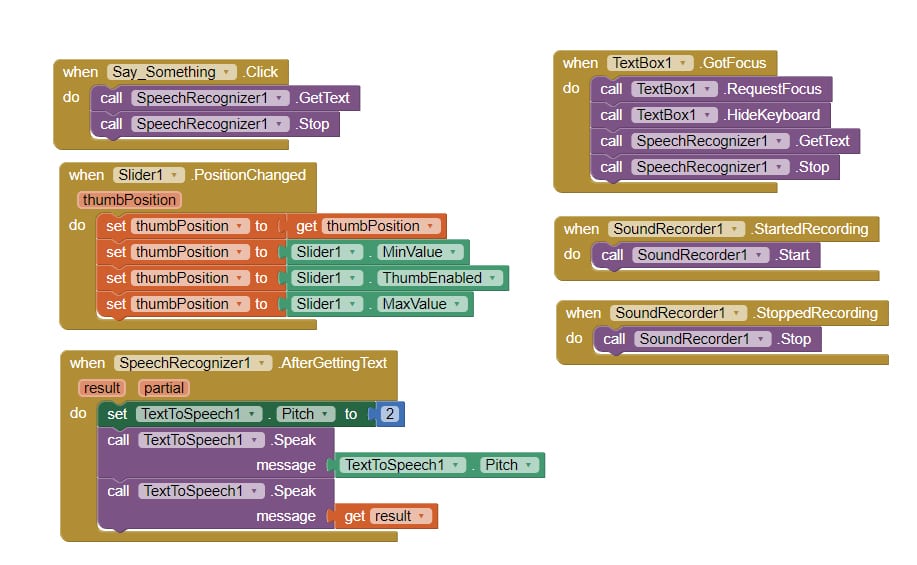
- Choose the Say Something block from the block panel on the left and drag the when say something.Click block to the centre. It will look like this:
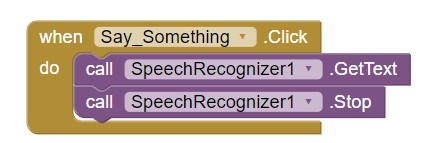
- From the SpeechRecognition tab, drag Call SpeechRecognizer1.Gettext and Call SpeechRecognizer1.Stop. Snap them in the Say_Something code block. This allows the app to recognize speech as soon as we start talking. The code will look like this:
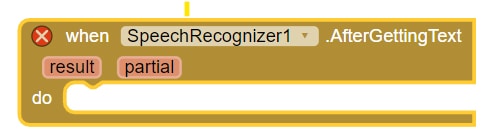
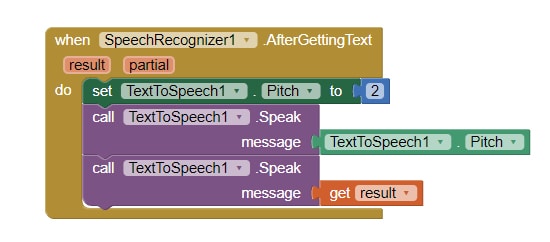
- Now that the app is able to recognize speech, let’s write the code to tell the app to convert it into text. From the SpeechRecognition tab, use When SpeechRecognizer1.AfterGettingText code block and drag it to the centre of the code area.
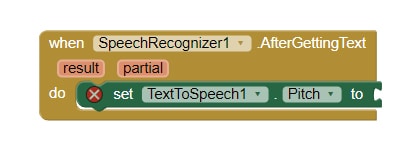
- From the TextToSpeech tab, use TextToSpeech1.Pitch to code and snap it inside the SpeechRecognizer1.AfterGettingText code block. See the pictures for reference.
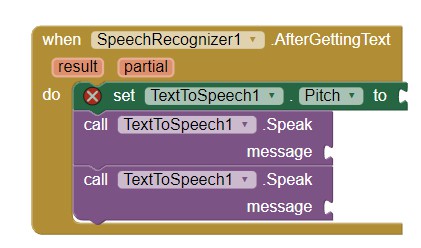
- From the TextToSpeech tab, use call TextToSpeech1.speak message code block and snap it under the TextToSpeech1.Pitch block.
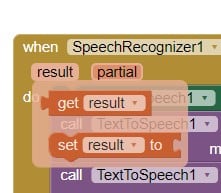
- Hover your mouse over the orange results tab and drag get results code block. Snap it to the TextToSpeech1. speak message block.
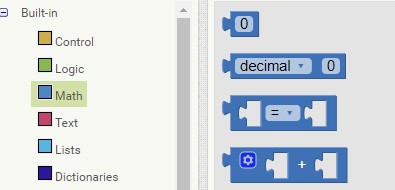
- Go to the Math tab at the top of the blocks palette and drag the number 0 block to the code area. Snap it in the TextToSpeech1. Pitch to code block. Use any number you want to replace the zero. We are using 2 for this activity.
Once completed, the entire code will look like this:
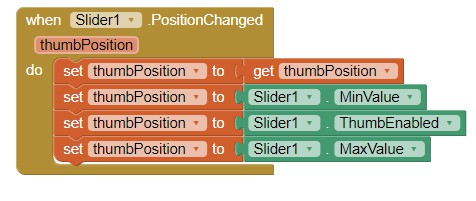
- Now build the slider function so the pitch of the sound can be changed. From the Slider tab, drag and drop When Slider1.PositionChanged block to the viewer area. Hover the mouse over thumbPosition. It will show two more code blocks. Use Set ThumbPosition to and snap it in the code block. Use Slider1.ThumbEnabled and Slider1.MinValue code blocks, found in the Slider tab and complete the code. This is what the complete code looks like:
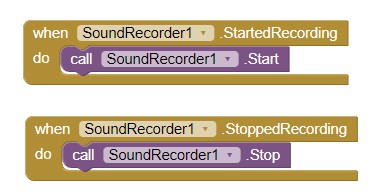
- From the sound recording tab, use When SoundRecorder1.Started Recording and When SoundRecorder1.StoppedRecording to the viewer area. Drag and drop CallSoundRecorded1. Start and CallSoundRecorded.Stop in the code. The code will snap into place. The resulting code looks like this:
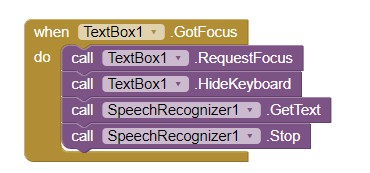
- Our last bit of code is for the text box. Choose TextBox1 from the left-hand panel. Drag and drop when.TextBox1.GotFocus to the code area. We want our text box to be able to convert text to speech. Build the following code for the text box to add that functionality. The code blocks needed can be found in the TextBox1 tab. This will allow the app to perform text-to-speech functions.
- Let’s code in the sound recorder and our code will be done. Go to the SoundRecorder1 tab and build the following code. Simply drag and drop the following code blocks and build the code.
Here is the sample code for the entire app:
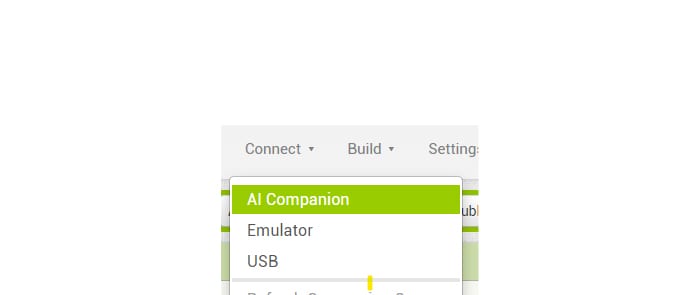
Now it’s time to test your app. Go to the Google Play Store or Apple Store and download the MIT AI2 Companion app to your phone. From the app inventor, locate and click the Connect button in the menu bar at the top of the screen. From the dropdown menu, click AI Companion. It allows the app to connect via a QR code. Scan the QR code and connect the app with the MIT AI2 companion on your phone.
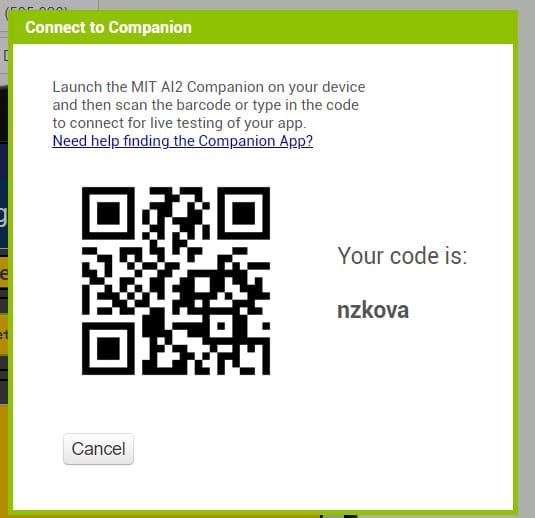
Note: Do not use the QR code in this picture. Every QR code is unique.
Students are encouraged to test the app functionality and fix the bugs in the code as they test the app.
Non-Computer Activity
Ethical Implications of Using Voice-Generated AI
To begin the lesson;
- Explain what deepfakes are and how the technology can be manipulated to have negative impacts on an individual’s life. Deepfakes are images or recordings that have been convincingly altered and manipulated to misrepresent someone as doing or saying something they did not actually do or say
- Divide the class into groups of five students and assign each group one industry that has used voice-generated AI.
- Commerce
- Pop culture
- Politics
- Health and safety
- National security
- Banking
- Ask the students to research how deepfakes can pose inherent threats to their assigned fields
- Explore ways to mitigate those threats
- Present their findings to their peers
Conclusion
Conclude the lesson by leading a discussion on how deepfakes pose threats to online safety and privacy using the following discussion prompts. Ask students:
- How do these various industries such as health care, commerce, entertainment etc., use voice-generated use voice-generated AI and how have they been transformed by it?
- Have you seen deepfakes online? What are some harmful ways deepfakes might be used on the internet?
- What are the potential advantages and drawbacks of AI-generated media, such as deepfakes, and how might they impact various sectors and individuals?
- How might deepfakes evolve in the future?
