
Overview
In this activity learners will create their very own race car using recycled and other materials. Learners will also explore the idea of storing energy in an elastic band and how we can use that energy to move their engineered race car forward. Learners will engineer their race car to move forward and then create a start and finish line to race their car against other cars!
Background Information
There are many different ways that race cars can be powered, such as electricity from batteries or even small, gasoline-burning motors. In this activity, you are going to create a toy race car that will be powered through elastic potential energy. Potential energy is the energy stored inside an object just before it sets into motion. Think about how an elastic feels when you stretch it apart to slingshot it; before you release it, it is bursting with stored energy. As described by Khan Academy, elastic potential energy is created by applying force to deform an elastic object. When an elastic band is stretched or twisted, the band becomes deformed and stores potential energy. When the elastic band is released, it turns the potential energy into kinetic energy, which is the energy of motion and it returns back to its original shape.
Materials
- Recycled bottle caps (4 required)
- Elastic bands
- Popsicle sticks
- Wooden skewers
- Recycled straws (plastic or paper)
- Small weights such as coins, rocks, washers or bolts
- Hot glue gun (Note: supervision may be required and is suggested if using a hot glue gun)
- Scissors
- Ruler
- Pencil
Step-by-Step Instructions
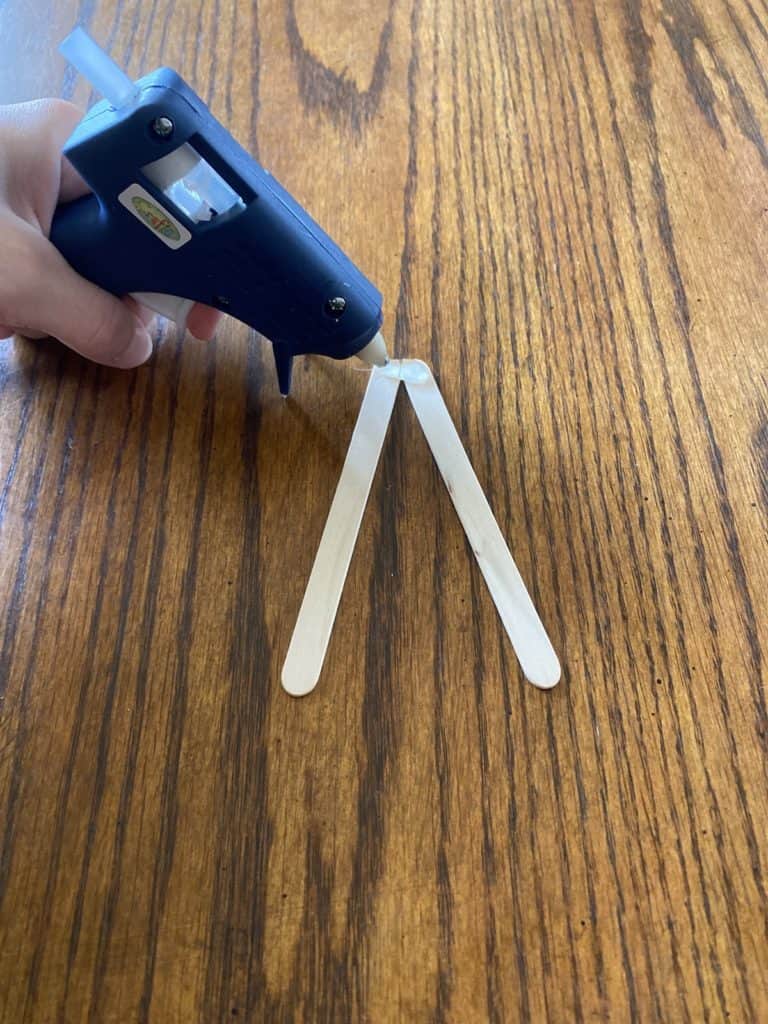
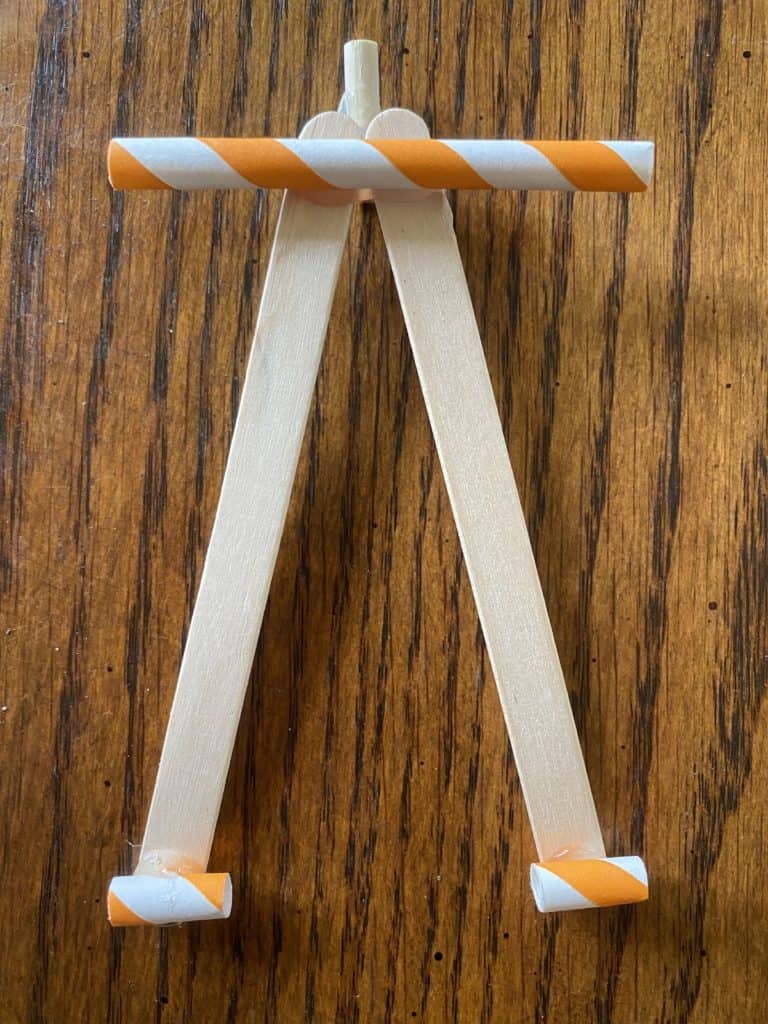
Step 1 → Lay two popsicle sticks down. Touch the tops of the popsicle sticks together at their edges to form the top of a triangle. Using a hot glue gun, glue the two popsicle sticks together. This will be your car frame.
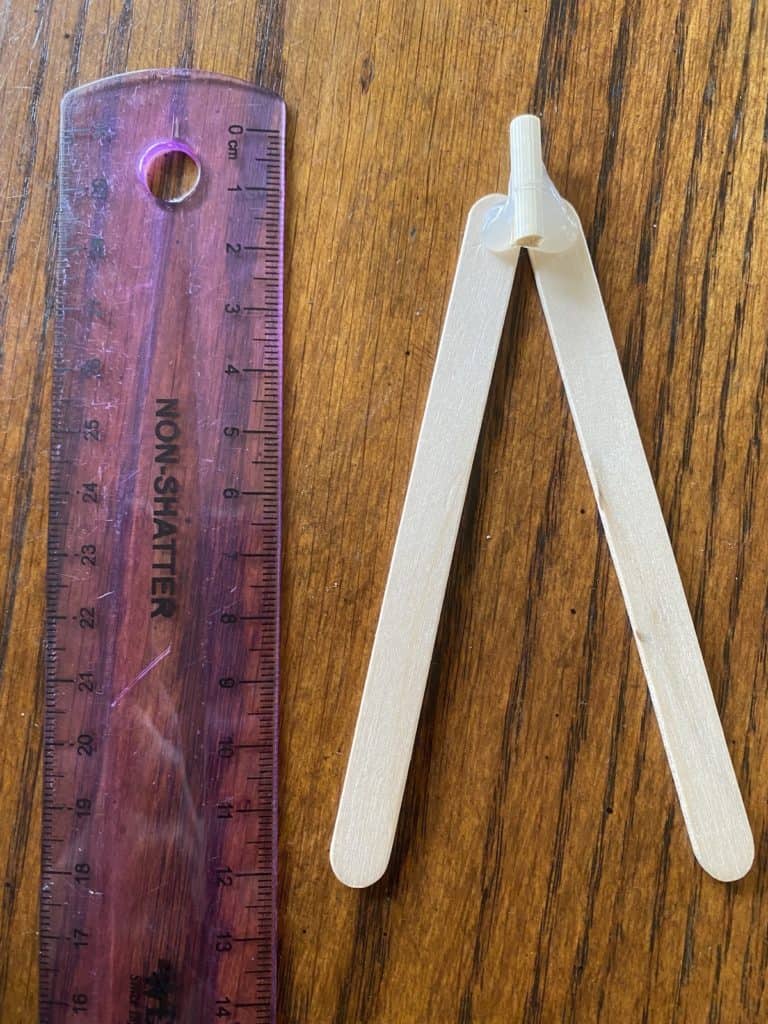
Step 2 → Using your ruler, measure 2 cm on your wooden skewer and cut with scissors. Using your hot glue gun, attach the 2 cm piece of wooden skewer to the top of your triangle vertically. This will help stretch your elastic band and propel the car forward.
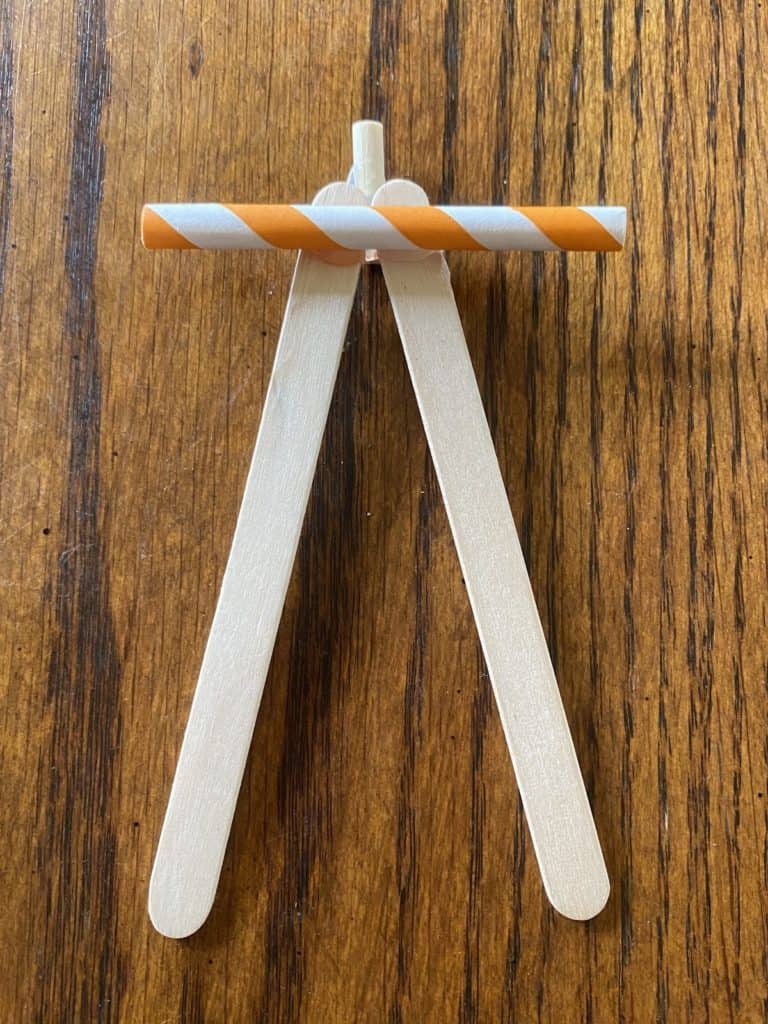
Step 3 → Using your ruler, measure 7 cm on your straw and cut with scissors. Using your hot glue gun, attach this piece of straw to the bottom side of the tip of the triangle. This will be used to hold the front two wheels on.
Step 4 → Using your ruler, measure out 1.5 cm of straw and cut with scissors. Repeat this step so that you have two pieces of straw that are 1.5 cm in length. Using your hot glue gun, attach each piece of straw (1.5 cm) horizontally to the bottom side of your popsicle stick ends. These will be used to hold that back two wheels on.
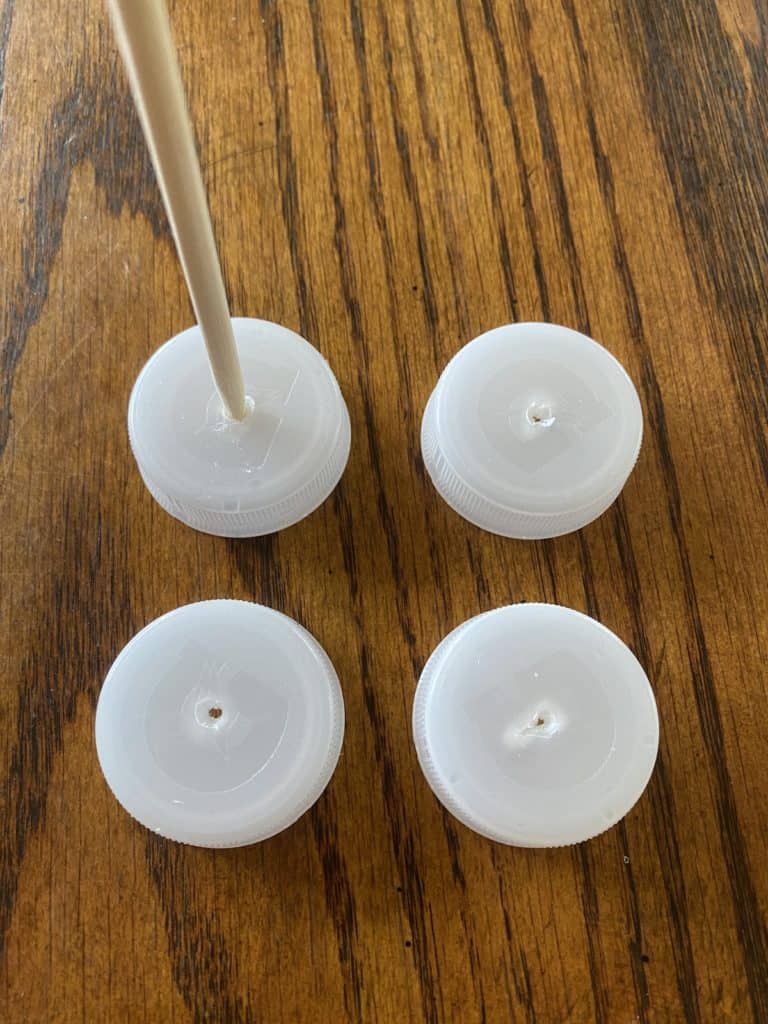
Step 5 → Using your skewer or pencil, poke a hole in the center of each bottle cap. Ask a parent, guardian, or older sibling for help. The bottle caps will be the wheels on your car.
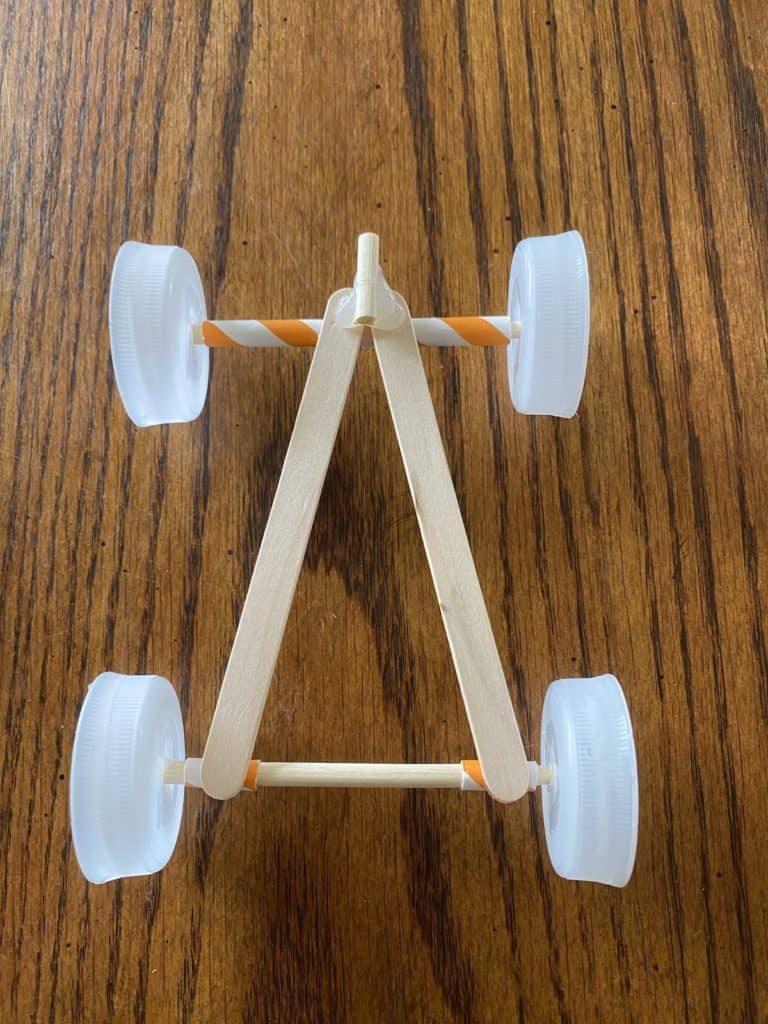
Step 6 → Place a skewer through the straw attached to the front of the car. Place a skewer through the two straws on the back of your car. Push a bottle cap on the end of each skewer and slide the bottle cap closer to the popsicle sticks. Using scissors, cut off any extra skewer. Using the hot glue gun, add glue on the end of each skewer to keep your wheels in place on the axle. The axle will do the rotating that will move your car forward therefore you want your wheels to be securely attached to the axle. The skewers and bottle caps will be the wheels and axles on your car.
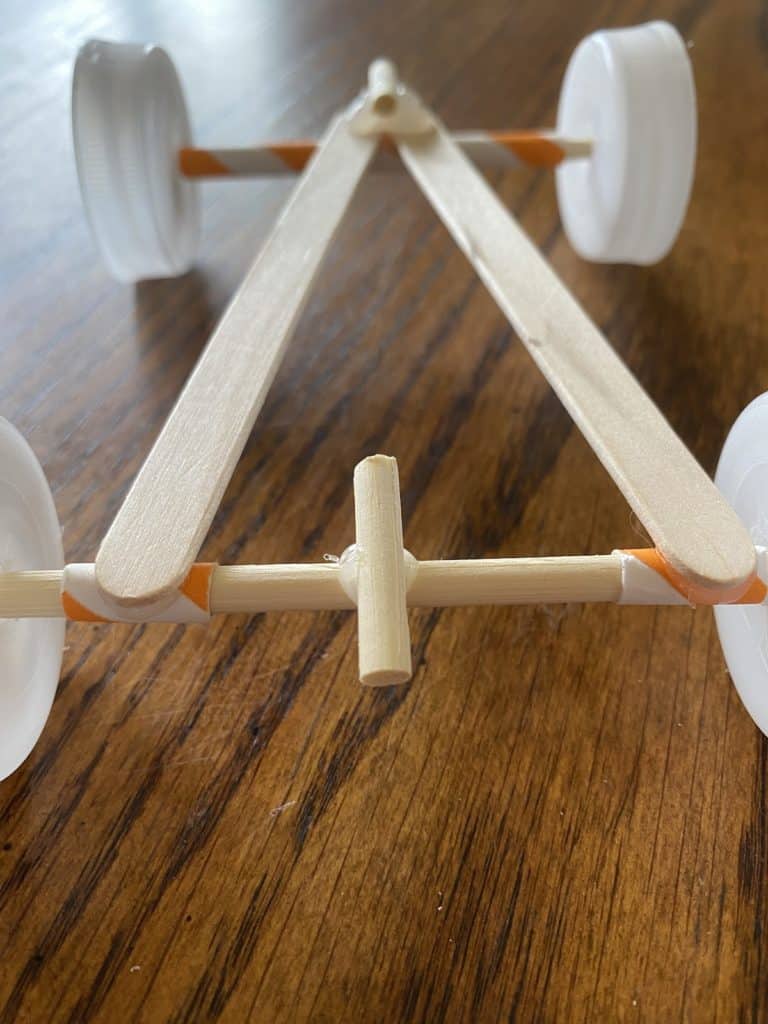
Step 7 → Using your ruler, measure and cut a 2 cm piece of wooden skewer. Using your hot glue gun, attach the 2 cm piece of wooden skewer to the bottom axle of your car vertically. This will allow you to stretch the elastic that will propel your race car forward.
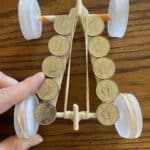
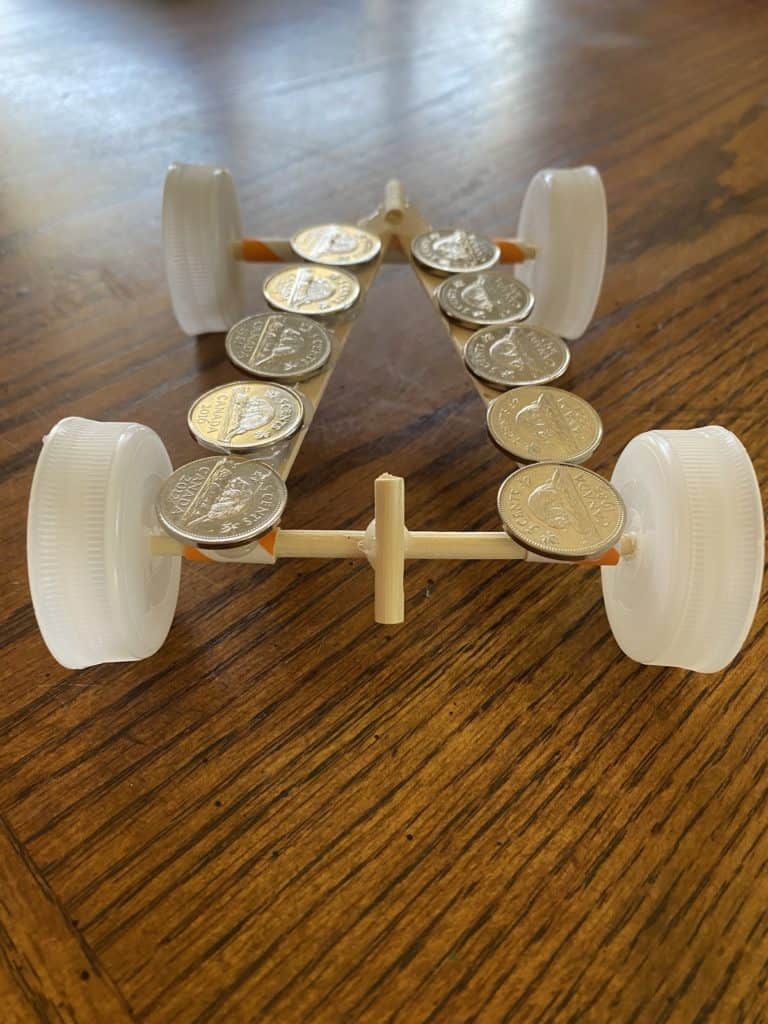
Step 8 → Add weight to your race car to keep it on the ground! You can add items to the popsicle sticks using glue or tape. Adding items such as coins or rocks will help weigh down your race car and keep the wheels on the ground. Get creative with your small weights and add items to personalize your race car! Without these added weights your race car will not make it very far as it is too light on its own.
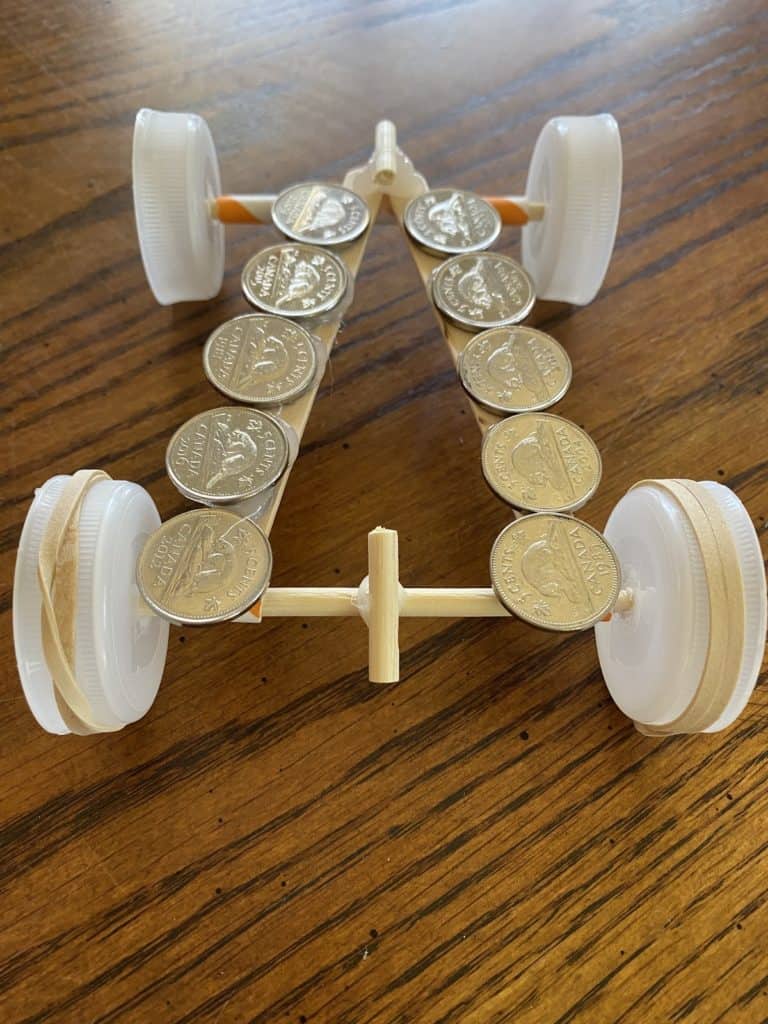
Step 9 → Take two elastic bands and wrap one each around your two back bottle caps (wheels) to give the race car a better grip on the floor. You can also experiment by adding elastics to your front wheels and see if that gives the race car a better grip on the floor.
Step 10 → Next, take an elastic band and loop it over the 2 cm piece of skewer at the top of the race car. Stretch the elastic band down and loop it over the bottom piece of skewer (2 cm) that is attached to the back axle on your race car.
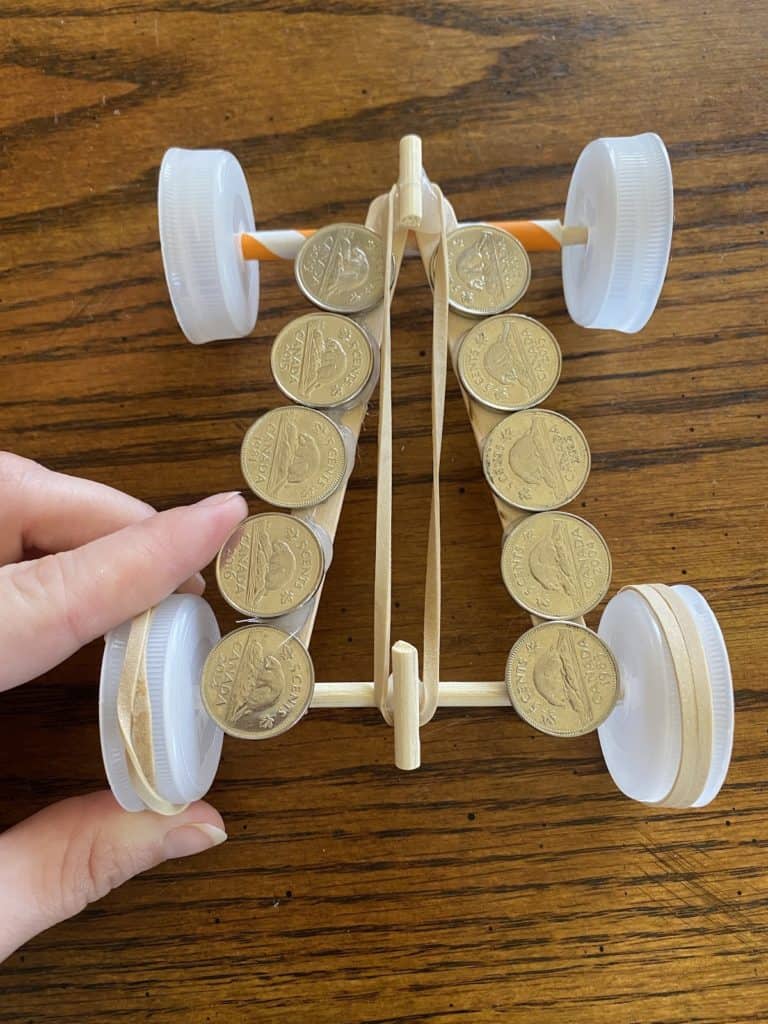
Step 11 → Twist the elastic band that stretches from the front to the back of your car by turning the wheels on the back axle of the race car towards you. This will create potential energy in the elastic. Place the race car on the ground and let it go! Watch the race car speed off in front of you.

PLAY!
Find a parent, guardian, sibling or friend to create their own race car! Create a start and finish line using whatever material you have available such as masking tape or paper and pencils, to mark off a race track. Challenge your opponents to a friendly race car game using your very own engineered race cars!
Taking It A Step Further
What happens when you use different types of elastic bands to propel your car forward? Can you use thicker bands or longer bands? What does the type of elastic band do to the speed of the race car or to the distance traveled by the race car? Explore the use of different bands to create your best version of a race car!
Follow Up
We want to see the awesome things you’re creating! Take a photo or video and share your work with us by emailing media@pinnguaq.com or tagging @pinnguaq on Facebook, Twitter, or Instagram. Don’t forget to include the hashtag #LearnWithPinnguaq!
Resources
References
- WeDOIT, “How to Make a Simple Car with Rubber Band” Accessed May 2020.
- Cemil Andıç, “LASTİKLE ÇALIŞAN BASİT ARABA YAPIMI” Accessed May 2020.
You might also like
Construct A Bee Hotel Activity
 Grade 1 – Grade 3
Construct A Bee Hotel allows learners to explore how they can help positively impact the environment that surrounds them and society as a whole, using simple materials.
Roll the Dice Storytelling Activity
Primary – Grade 3
Roll the Dice Storytelling is a side step from Story Storm Activity which will use a five box system to generate ideas for stories!
Flip and Match Activity Design
Grade 1 – Grade 3
Flip and match games are a great way to introduce vocabulary to a student or explore a new topic of study. The beauty of a game like Memory is that it is very simple to play and even simpler to make.
