Section Navigation

Introduction
Minecraft can be a great creative tool. It allows you to explore, create and play the game the way one chooses. However, one of the most rewarding ways of interacting with Minecraft is by creating custom skins for the game characters and other assets. While this previously required some tinkering with the file system, the newest builds of Minecraft now feature an easy way to swap out and upload your player skin.
Learning Goals
Many users are already familiar with Minecraft, and some will have already tried altering their player skins using one of the many online repositories available. This lesson aims to provide students with the tools to create their own skins from scratch and integrate them into the game or share them with others, and understand the structure of the texture file itself.
Vocabulary
Skin - A digital texture applied to an in-game model.
Mode - A 3D-generated wireframe that provides shape to an object in a game.
Resources - A catch-all term for the full suite of models and textures in a game.
Sprite - A nickname for the character file.
Guiding Questions
- What is a digital texture?
- How can I express myself by modifying existing game content?
Curriculum Links
This module provides an opportunity to address curriculum expectations in Art and Computer Studies for Grades 5 to 8. In particular, students will be introduced to the software GraphicsGale, possibly expanding on skills they have learned in the Pixel Art modules. This assignment will also examine spatial relationships when a 3D object is projected onto a 2D plane.
Materials
- GraphicsGale – Download GraphicsGale
- Papercraft Printouts – Download Assets Folder (ZIP)
- Glue
- Scissors
Non-Computer Activity
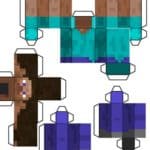
A skin is a 2D computer-generated file that is applied to the surface of a 3D wireframe to give it form and colour. Sometimes generally called a “texture map,” a skin matches to the geometry of a 3D model and is folded around it. Papercraft is the art of cutting, folding, and gluing paper templates to create figures and objects in a manner similar to a skin. Working with a slightly edited version of the official “Steve” skin from Minecraft, students can cut, fold, and glue their own paper Steve.
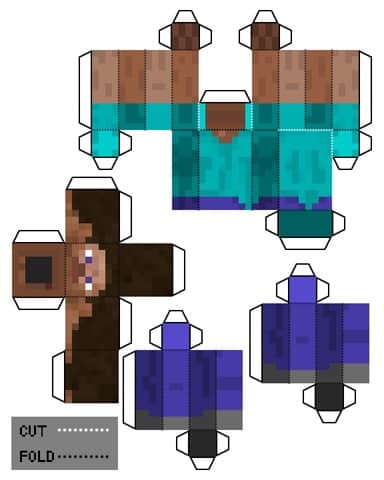
The resource file “Steve_Papercraft” is included with this module. Print out copies in advance to accommodate the number of students. Once in hand, students cut out the four shapes, then, carefully along the dotted white lines. Folding in the tabs and along the black dotted lines, the shape of the model will start to come together. Once all fold lines have been creased, apply a small amount of glue to the front face of the tabs, folding the shapes into place and applying the tab to the opposite edge where it meets. Once all four pieces are folded and glued, students can glue the head to the top of the body, and the legs to the bottom of the body.
Computer Activity
The default Minecraft characters use two files called “Steve_skin.png” and “Alex_skin.png” to generate the textures for the player character, called a sprite. Both of these files are included with this module. Working with a graphics editing program we can alter the files and create unique skins for our characters.
Before editing these files it can be helpful to understand how Minecraft arranges the various parts of the file, and how the parts are displayed. Here is a map of the basic skin template:
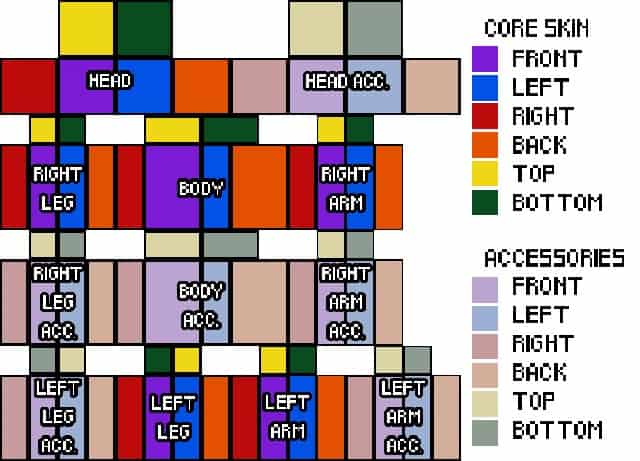
By default, only the “core” areas of a skin are visible. The “accessory” areas are transparent, but they can be used to place things like clothing, hats, glasses, and other elements directly on top of their corresponding parts. Any pixels drawn in these areas will be displayed in the same spot as the core texture, but slightly larger and floating slightly away from the base model.
Part 1: Editing the Skin
- Open GraphicsGale and go to File>Open
- Navigate to the location where the skin files have been saved and select either Steve_skin.png or Alex_skin.png and click Open
- The file is actually very small, as it’s expanded to fit the model, so maximize your window by clicking the Maximize icon on top

- Then use the Magnification drop-down menu to zoom the image in to 1500%

- If you want to make it easier to draw more precisely, you can turn on a pixel grid by clicking the Grid button

- in the toolbar. This can be turned on and off at any time without affecting your image.
- Using the Pencil Tool

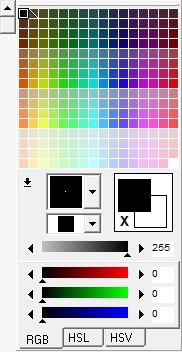
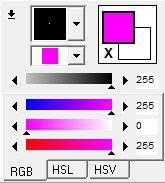
- students can draw pixels over top of the existing image by left-clicking where they want to place a pixel. Right-clicking while in the canvas will select the colour of the pixel the cursor is over. The Palette window on the right side can allow students to choose colours that aren’t currently in the file, and the tabbed sliders below can further adjust those colours.
- Students should stay within the bounds of the parts of the sprite already drawn. The areas not taken up by colour are transparent areas, sections of the file that Minecraft expects to be empty, or are used for accessories.
- If students wish to add accessories to their sprite, they have to alter the layer properties of the file, so the file knows which colour should not be displayed, and avoid any strange or unexpected floating colours in their final image. The easiest way to achieve this is to use the Flood Fill Tool

- and fill the transparent areas with something referred to as “alpha pink.”
- In the palette, under the RGB slider tab, enter R:255 G:0 B:255, then using the Flood Fill Tool, left-click all of the transparent areas of the canvas.
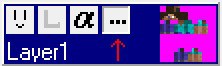
- In the Layers window on the left side of the canvas, make sure the “alpha channel” button is turned off. Working with the official skin files, this should be on by default, but we need to turn it off to make transparent colours work properly.
- In the Layers window, left-click the Properties button to open the layer properties. Make sure the “Transparent Color” box is checked (click it to check it, if it isn’t). The transparent colour should automatically change to alpha pink if it is the current foreground colour. If it isn’t, click the dropper button and choose alpha pink from the image preview that pops up.
- With the transparent colour set, any areas that are alpha pink should now be ignored when displaying the texture. This will allow you to select alpha pink to “erase” any areas outside of the core texture where you don’t want pixels. Be careful not to place any alpha pink pixels inside of the core areas, or they will display as black pixels when rendered in Minecraft.
- Once students are happy with their final image, click File>Save As, give the file a name and choose .PNG from the file types. Make sure “With alpha channel” is checked and click Save.
Part 2: Uploading the Skin
- Double-click on the Minecraft icon and start the Minecraft launcher.
- In the Rollout Menu button on the top right, select “Skins”.
- Under the “Player Model” options, click the Browse button to select your edited skin from where it was saved, and click Open. Your skin should now be applied to the preview model to the left. You can click and drag to rotate this model to see if everything in your edited skin appears as intended. This is a great time to make some edits if desired.
- Once students are happy with their new skin, click “Save & Upload” to apply the edited skin to their player, then click “Play” to start.
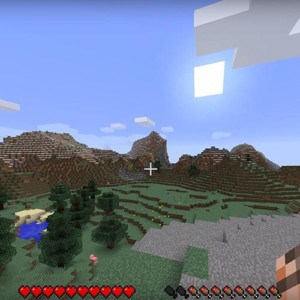
- When the game is started, pressing F5 in first-person mode allows players to view their character skin from the front, side, or back. Enjoy making and sharing new character skins!
Conclusion
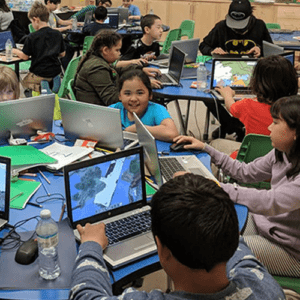
Students should be encouraged to share and show their edited skins. If possible, a group server game of Minecraft is perfect for this. Once comfortable with modifying basic skins, students can practice with the accessory layers. The next step from this is modifying resource packs, altering the in-game blocks, npcs (non-player characters), and enemies. Modifying skins is a simple way to take control of game content and make it one’s own.
Resources
Social Media Resources
- Tumblr – Explore Minecraft mods
- Instagram – Explore Minecraft creations
- Instagram – Explore Minecraft modding creations
- Instagram – The Cube School Of Technology
You might also like
Pixel Art 1: Getting Started With GraphicsGale
 Grade 9 – Grade 12
In this module students will create a pixel art sprite with physical media and then transfer that image into a freeware program called GraphicsGale to make a useable PNG image file.
Introductory Minecraft Video Walkthrough
Grade 5 – Grade 8
Would you love to play Minecraft but have no working knowledge of the game itself? Here we discuss key aspects of the game through three videos on how to survive in Minecraft!
Creating An Adventure Map In Minecraft
Grade 7 – Grade 8
Do you like building in Minecraft? If so, then this lesson will be useful to you! Learn how to create an Adventure Map and share it with your friends!
