
Overview
Welcome to another Mix and Match Challenge Bonus! In this tutorial, we’ll look at what works and what doesn’t work when you want to make a sprite hide and then be found. You can use these methods in many different ways in your game or story, beyond hide and seek games. Quest games, treasure hunt games, stories and games that involve surprises are just some ideas for when you can use these sequences of code, these algorithms.
Materials
- Mix and Match Cards
- All Together Now Scratch game
- Scratch offline editor
Useful Links
What works and what doesn’t for hiding and finding a sprite
Play the All Together Now Game
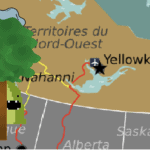
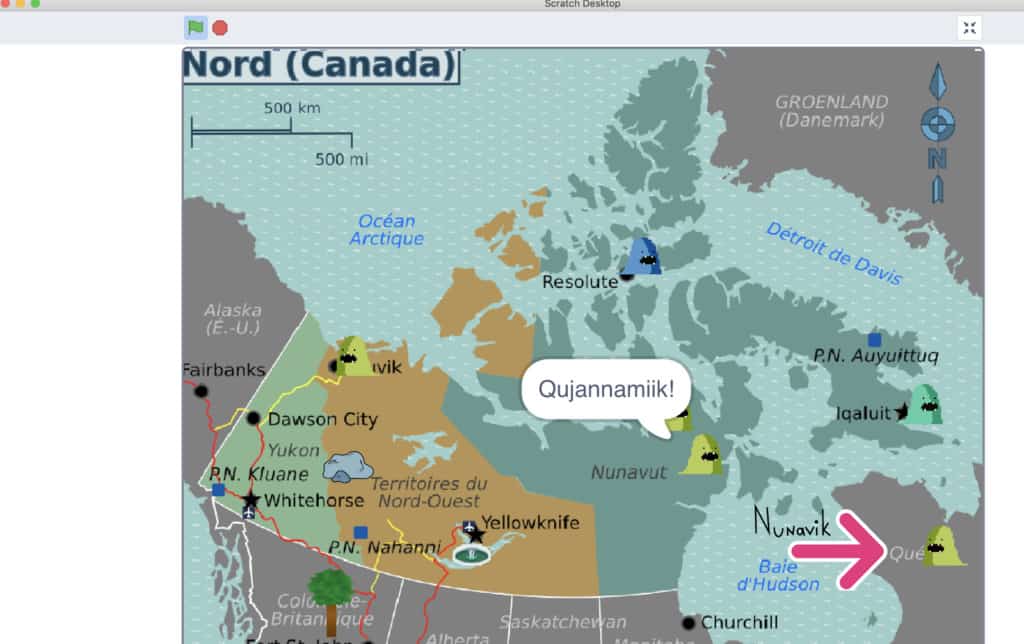
You can download this game or access it through the online Pinnguaq Scratch studio here to see the hide and seek variations in action. Remix the game! Add code to make Critter’s friends change their effects or have them travel along with Critter.
Use the arrow keys to help Critter navigate around Northern Canada and discover new friends. The friends won’t be visible until Critter finds them.
The background map for this game was obtained from Wikimedia. Attribution: Shaund / CC BY-SA
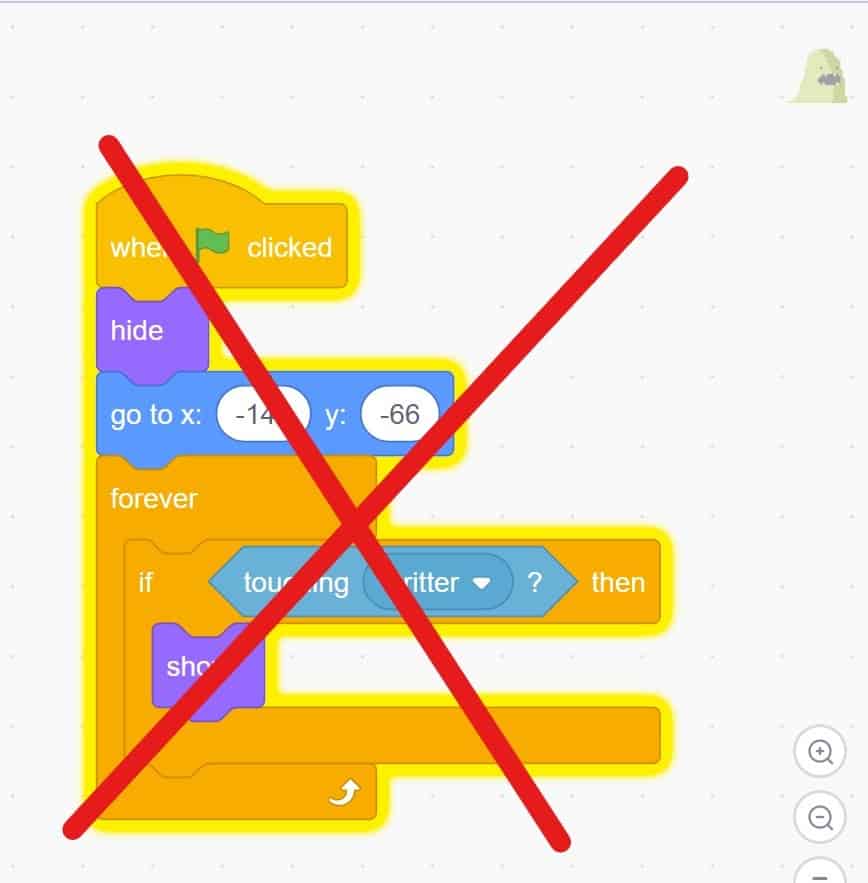
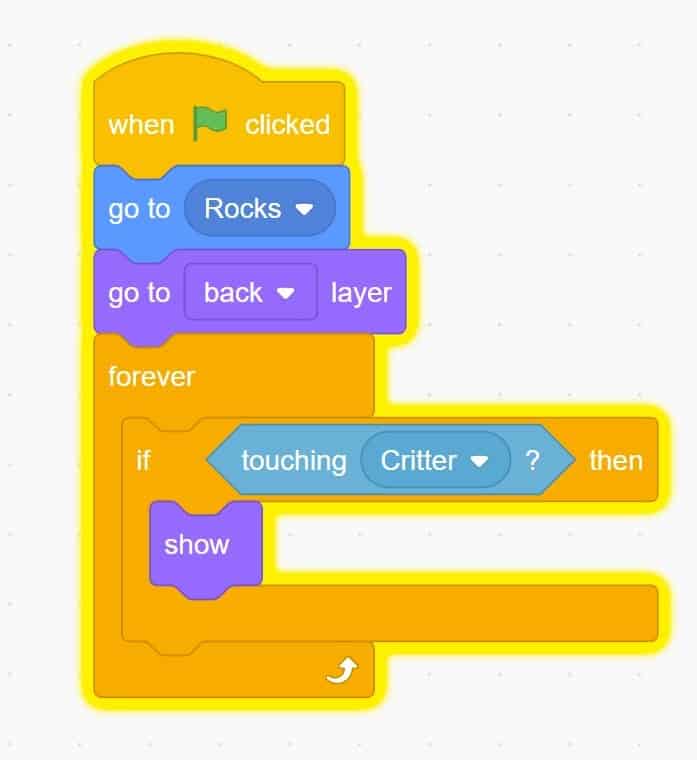
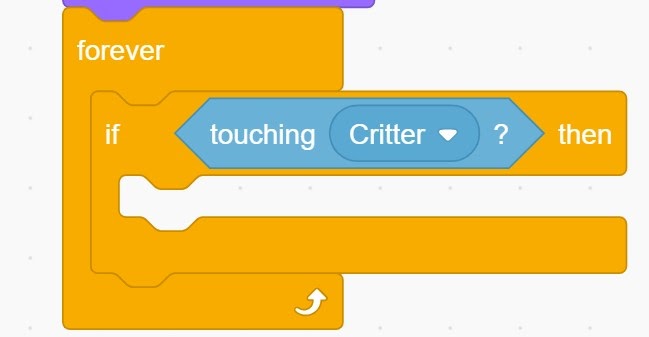
What doesn’t work- Touching an invisible sprite
- Looking at the code below, you would think that it would work, and make a sprite that is hiding appear and show once touched.
- The trouble is, you can’t touch an invisible sprite. If a sprite is hidden and not showing on the stage, it will not trigger code when touched.
- Let’s look at some alternatives so that you can find the best one for your game or story.
What does work: Variation One- Hide behind something
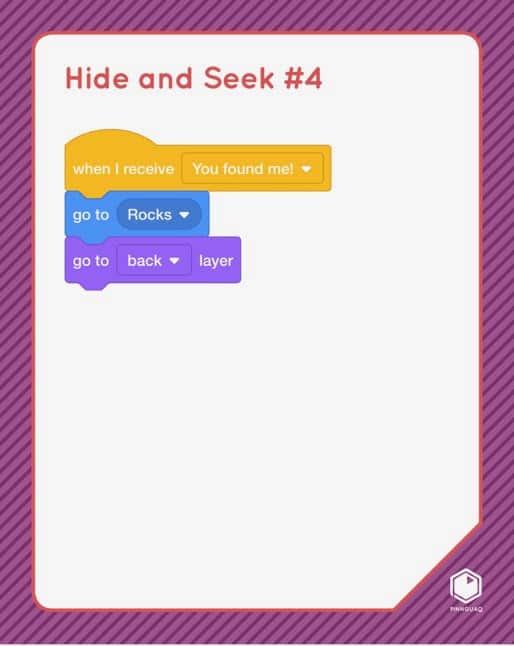
- In the code showing on the Hide and Seek Mix and Match Cards #3 and #4, one sprite is hiding behind another sprite.
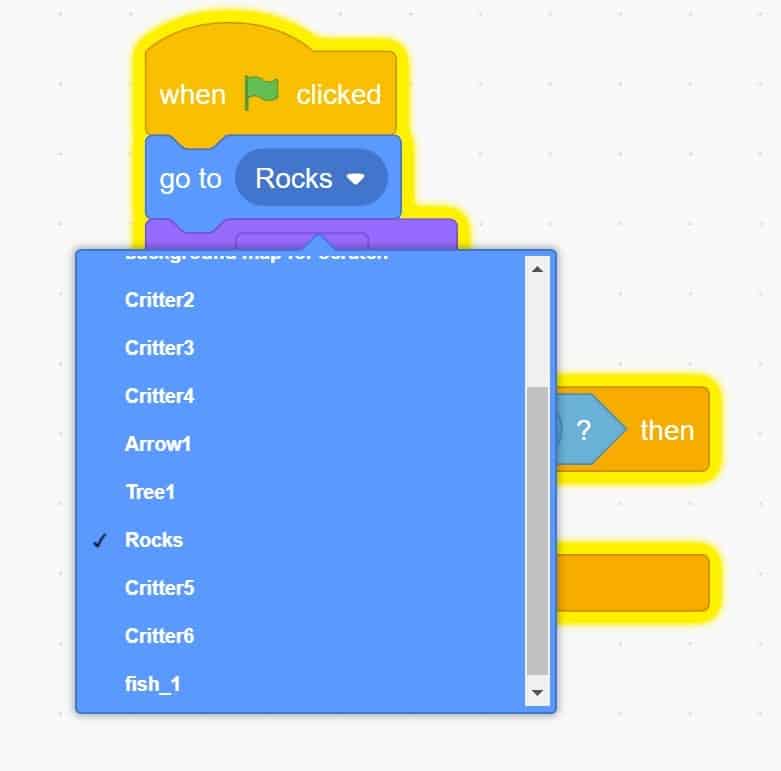
- We will make Critter #7 hide behind the rocks and then show when touched and found by Critter. We will start with the code blocks pictured below. Let’s see how these will work.
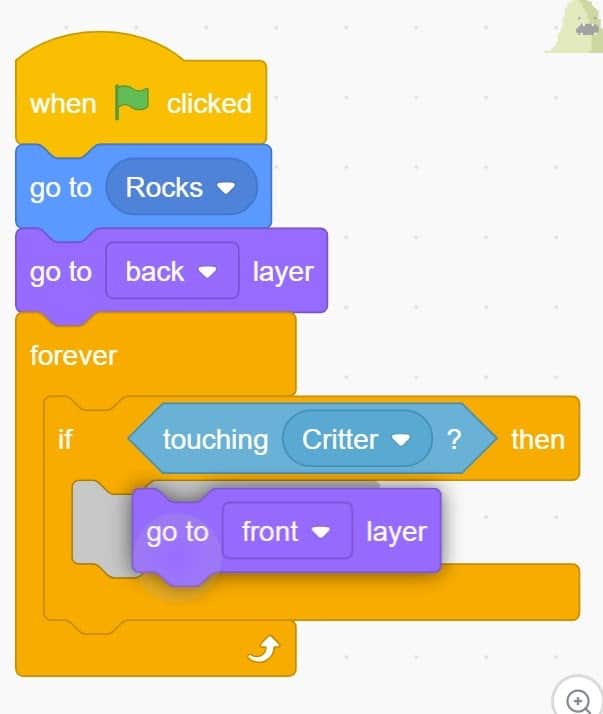
- When the green flag is clicked, Critter #7 will go to the Rocks sprite. Use the little arrow to open the drop-down menu and choose the sprite you want another sprite to hide behind.
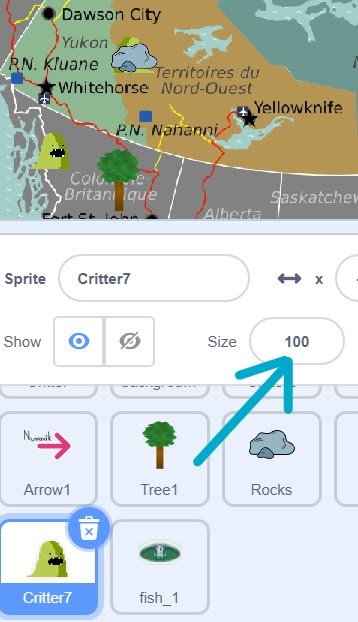
- Critter #7 is hiding behind the Rocks sprite. But…

Critter #7 is too large and can still be seen, sticking out from behind the rock.
- You can change the size of the hiding sprite (Critter #7) or the sprite that it is hiding behind (rocks) by changing the size of the sprite in the size bar below the stage, and change the value in the bubble to set the size of the sprite to be smaller.
- Or you can change the size of a sprite in the costume editor.
- The method for changing the size of a sprite is slightly different, depending on if your sprite is a vector image or a bitmap image. You don’t need to worry about figuring this out if you aren’t sure. The proper tool will be available in the editor for that sprite. If you are interested in learning more about bitmap images and vector images, take a look at Jonathan’s tutorial about working with vector graphics art in Scratch here.
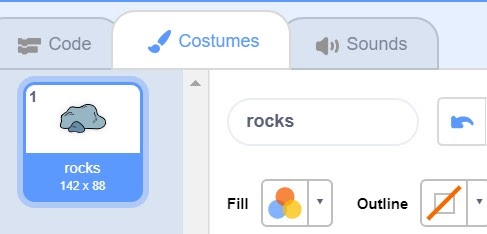
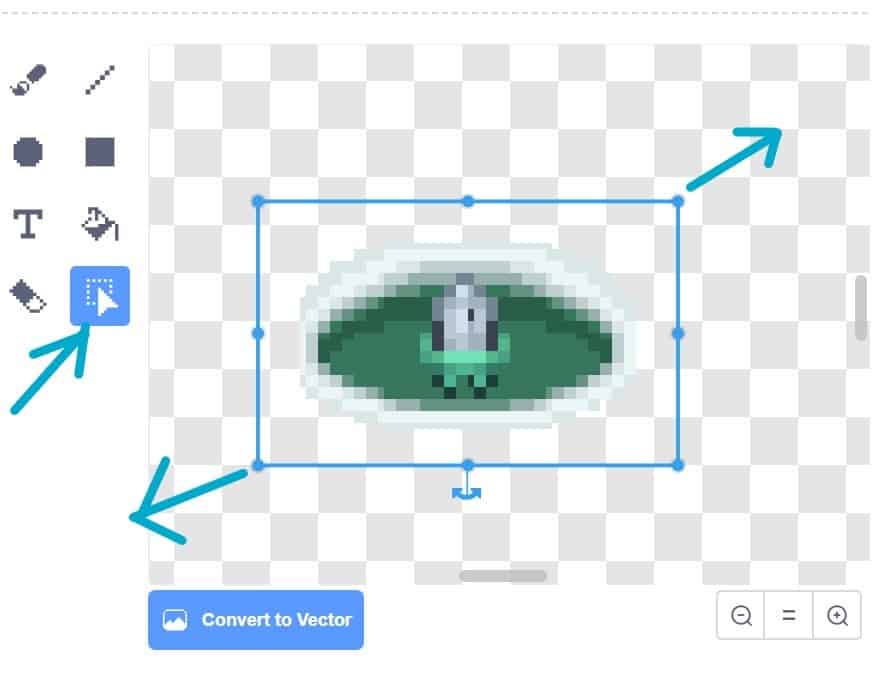
- If your sprite is a vector image, you will see the tools shown in the image below.
- Select the entire sprite by choosing the Reshape tool and drawing around the sprite. Then, pull out the corner handles to make the sprite the size you want it to be.

- Or, if your sprite is a bitmap image, choose the Select tool and draw around the sprite. Then pull the corner handles outwards until it reaches the size you want the sprite to be. Watch the sprite on the stage as you adjust the size, to make sure you have it the size you want.
- You can also adjust the size of a sprite to be smaller or larger according to what is happening in the game or story. I used this code to hide the challenge cards behind the candy hearts in the challenge reveal game for the Mix and Match Challenge #3.
- I adjusted the size of the challenge card to be smaller at the beginning of the game, when hiding behind the candy heart by “set size to 25%” when the green flag is clicked. If it is touched by Sprite 1, then the card sprite will “change size by (50)” and change position, moving to the centre of the stage, it will “go to x (0), y (0)”. And then, after a “wait (3) seconds” block (so that we can see it more clearly), the card sprite goes back to its own spot in front of the Love it candy heart and it will “change size by (-50)” to become smaller again.
- Adjusting the size to help one sprite hide behind another sprite is a handy trick for making a sprite “hide” and not be showing.
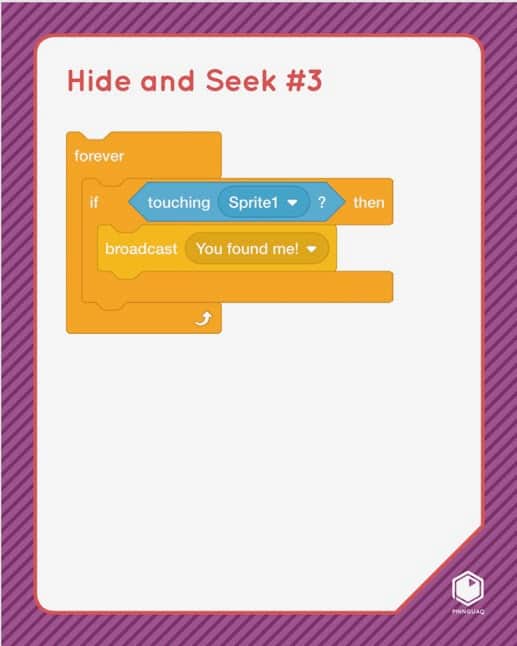
- Now that we have made Critter #7 small enough to hide behind the rocks, the next code blocks tell the computer to keep checking to see if Critter is touching Critter #7. The “if…then” orange Control block is wrapped inside the “forever” orange Control block which tells the computer to keep checking to see” if…” the sprite (Critter #7), is touching another sprite (Critter)… then,
- Critter #7 is found and should show. Which block do you think we need to make us able to see Critter #7 after it is touched by Critter? Do we need the “show” block or the “go to front layer block”?
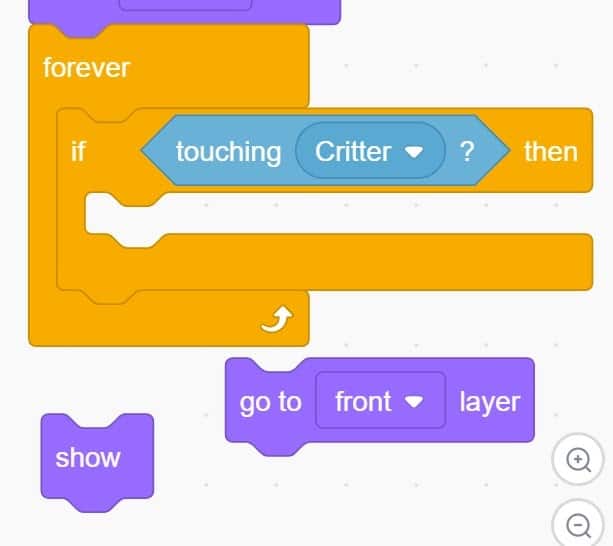
- Test if you aren’t sure!
- If you test it, you will find that you need “go to front layer” to see Critter #7 after being touched and found by Critter. “Go to front layer” will tell the sprite to move in front of the object that it is hiding behind.
What does work: Variation Two- Close Distance
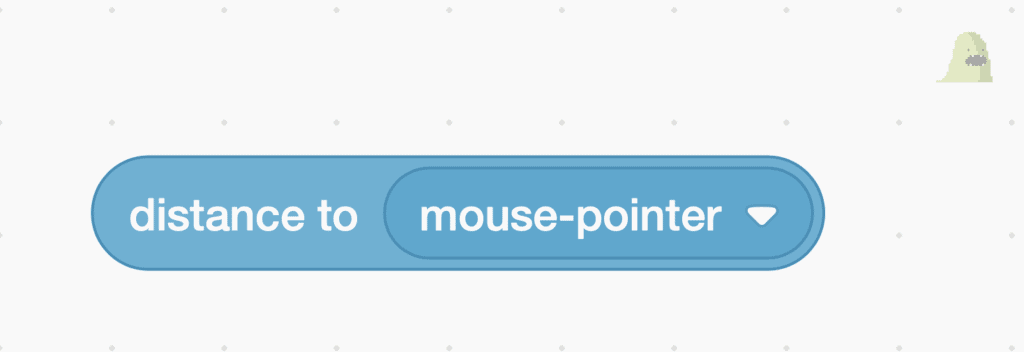
The easiest way to have a sprite hide then be found and to show is to have the computer sense and report the distance between two sprites. If we use the light blue Sensing block,
“distance to (mouse pointer)” the computer will sense how far apart the sprites are.
- We will need these code blocks:
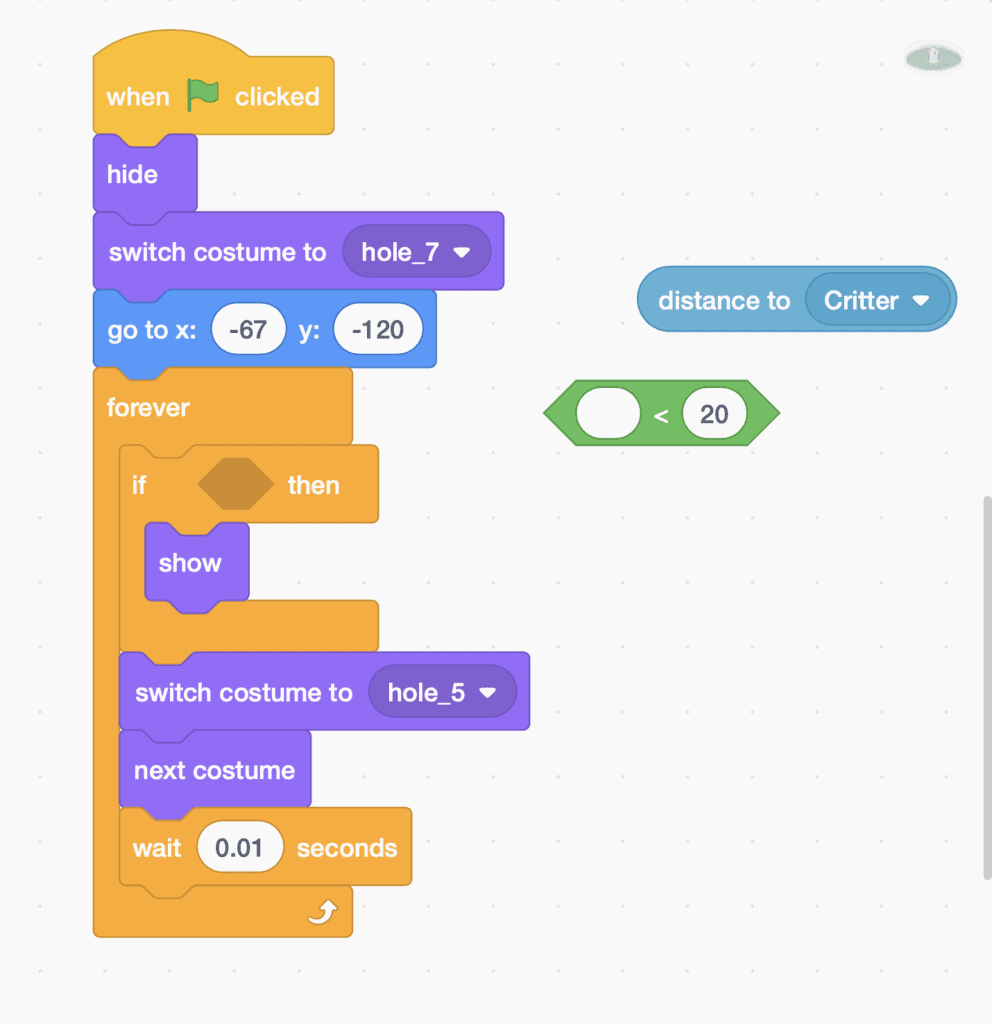
- The fish will go to its hiding position and hide when the green flag is clicked.
- Forever, the computer will continue to check and run the “if…then” code block to see if (something) is happening, the fish will show.
- The green Operators block allows us to compare two things to see if the first thing is less than (<) the second thing. Remember that green Operators blocks in Scratch allow us to use helpful math equations in our code.

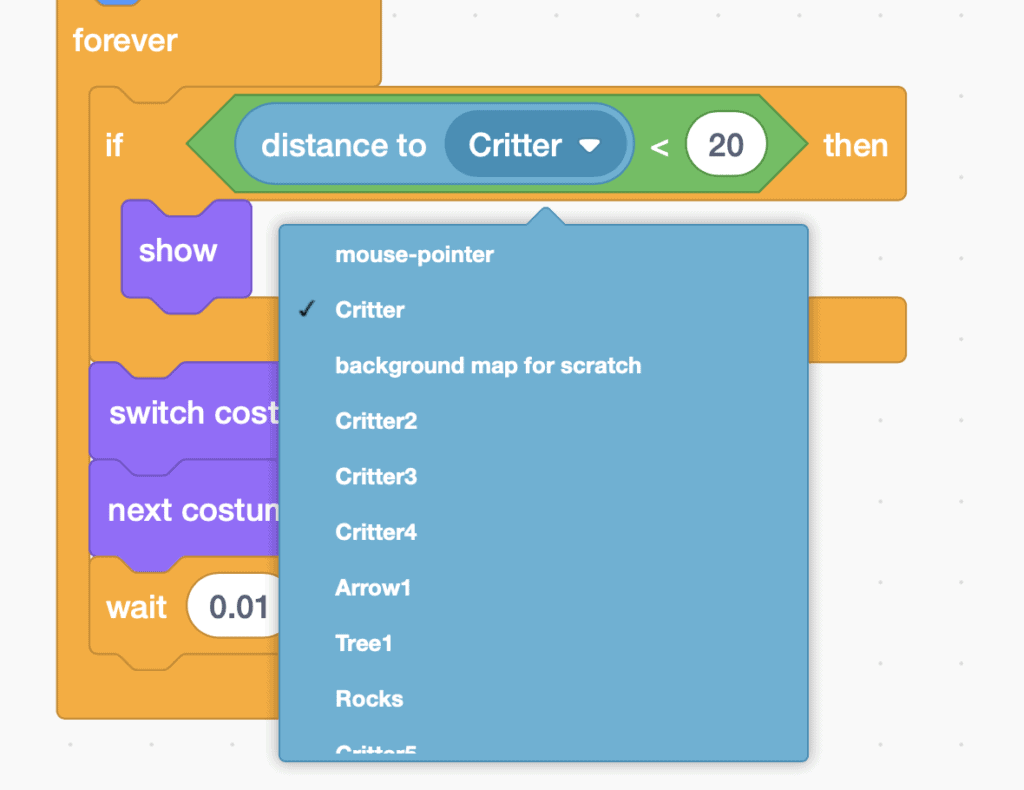
- The light blue Sensing block will sense and report to the computer the distance of the fish sprite in relation to the Critter sprite. You can open the drop-down menu by clicking on the small down arrow in the middle of the block and choose which sprite you want to compare the distance to. These two code blocks, the light blue Sensing block with the green Operators “(something) less than < (something)” working together can trigger the hiding sprite to show.
When all of the code blocks are put together into this algorithm, the fish sprite will show if the distance to the Critter sprite is less than twenty (<20) steps. You can play with the number of steps you want to have between the two sprites to trigger the code to see what number of steps or distance best fits your game or story. When I experimented with my game, I found that triggering the sprite to show if the other sprite was less than 20 or 25 steps was a good distance. You can choose a smaller number, which means the seeking sprite has to be closer to find the hiding sprite, or a larger number so that the sprites can be farther apart.
This is the easiest method to set up to make a sprite hide and show in your game or story but note that there are no clues as to where the sprite is hiding as there aren’t any sprite objects to hide behind and it is less precise than two sprites sharing the same x/y position, which I will go over in detail in the next tutorial.
Now you know two different ways to make a sprite hidden and then found in a Scratch game or story. Each method has its own benefits and drawbacks. Experiment and play to find the best method for your game or story. I can’t wait to see what you create!!!
Conclusion
We want to see the awesome things you’re creating! Take a photo or video and share your work with us by emailing media@pinnguaq.com or tagging @pinnguaq on Facebook, Twitter, or Instagram. Don’t forget to include the hashtag #LearnWithPinnguaq! You can also upload your project to the Pinnguaq Studio.
For more fun activities, visit www.pinnguaq.com/learn.
You might also like

Scratch Mix and Match Challenge #3
 Grade 7 – Grade 12
Scratch Mix and Match Cards Challenge #3. Making your own games in Scratch is a fun way to learn how to code! Accept the challenge and make a game or story with at least two of the three Mix and Match cards for this challenge!
Scratch Basics Episode 1: Introduction to the Scratch Working Environment
Grade 1 – Grade 12
In this series, the basics of Scratch will be introduced to provide learners with the foundational skills required to begin creating in Scratch.
Scratch Basics Episode 2: Deleting a Sprite, Adding a Sprite & Adding a Backdrop
Grade 1 – Grade 12
In this series, the basics of Scratch will be introduced to provide learners with the foundational skills required to begin creating in Scratch.
